Probably one of the first bits of proper pimpy anodised kit I bought BITD was this set of cooks 'E' cranks, I spent a good deal of my student loan on them  . Originally purple they were de-anodised and polished up a long time ago, and have graced many of my bikes. I wanted to use them on my latest build so decided to treat them to a refurb with fresh anodising. But I also wanted to bring back the cooks logo, I considered using decals but thought they might rub off in use. So I experimeted with using reverse decals and caustic soda. Heres the results.
I spent a bit of time polishing them up with 800 wet and dry followed by plenty of buffing with brasso
sent them off to mansfield anodisers and got them back yesterday. Cost me around 44 quid with a ringle seat collar done at the same time.

I'd describe the finish as satin rather than glossy but thats fine as it suits the rest of the parts I have.
Now the tricky bit as I take a brand spanky looking set of cranks and apply a reversed decal (from gil, who else) as centrally as my cack-handedness will allow. This took me 4 frustrating goes. I then masked all around it with duct tape to catch any drips from the caustic.

I was planning to leave the cranks like this for a day to allow the decal adhesive to cure properly to reduce the chance of the caustic seeping over and giving blurred edges.
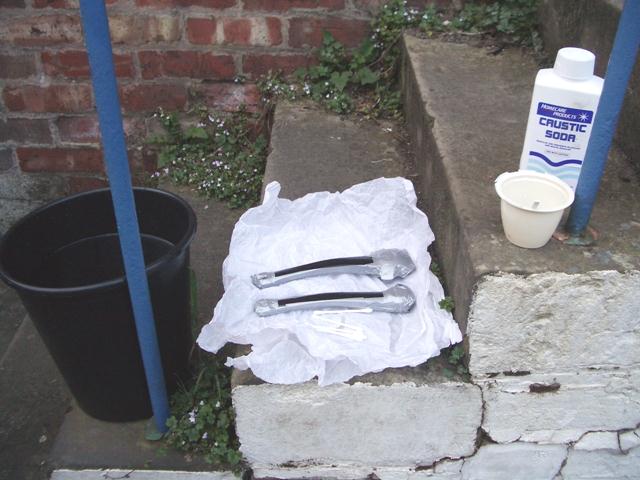
Who was I kidding, 2 hours later I am ready to go, bucket of water ready to dunk the cranks in, and caustic solution in small container.

Right no going back I’ve mixed up a fairly strong solution of caustic and using a cotton bud I applied a small amount of it to the exposed part of the crank arm. First I made a quick pass to cover the logo with caustic followed by a slower pass working it into the edges etc but obviously not enough to lift them. Left the solution on for about 20 seconds then dipped the whole crank arm into a bucket of cold water and rinsed. It took about 2 cycles before you could see the ano coming off, and about 5 before the logo looked sharp.
 on Flickr
I then soaked the crank arm in warm water to soften the adhesive and removed the duct tape and the reverse decal.

Some TA chainrings and black bolts and they're ready to mount on the bike .
.

I spent a bit of time polishing them up with 800 wet and dry followed by plenty of buffing with brasso

sent them off to mansfield anodisers and got them back yesterday. Cost me around 44 quid with a ringle seat collar done at the same time.

I'd describe the finish as satin rather than glossy but thats fine as it suits the rest of the parts I have.
Now the tricky bit as I take a brand spanky looking set of cranks and apply a reversed decal (from gil, who else) as centrally as my cack-handedness will allow. This took me 4 frustrating goes. I then masked all around it with duct tape to catch any drips from the caustic.

I was planning to leave the cranks like this for a day to allow the decal adhesive to cure properly to reduce the chance of the caustic seeping over and giving blurred edges.
Who was I kidding, 2 hours later I am ready to go, bucket of water ready to dunk the cranks in, and caustic solution in small container.

Right no going back I’ve mixed up a fairly strong solution of caustic and using a cotton bud I applied a small amount of it to the exposed part of the crank arm. First I made a quick pass to cover the logo with caustic followed by a slower pass working it into the edges etc but obviously not enough to lift them. Left the solution on for about 20 seconds then dipped the whole crank arm into a bucket of cold water and rinsed. It took about 2 cycles before you could see the ano coming off, and about 5 before the logo looked sharp.
 on Flickr
I then soaked the crank arm in warm water to soften the adhesive and removed the duct tape and the reverse decal.

Some TA chainrings and black bolts and they're ready to mount on the bike

Last edited: