2000 Marin Mount Vision Build

Re:

Cheers! I'm pretty chuffed with how it's shaping up.

I had a look at the rear brake caliper mounting situation, and while it would be possible to bodge a working set-up with the bits I have, it'd be much smarter with the proper part.

Benandemu - would you please be able to put me in touch with the chap you mentioned who may still have some of the correct disc adaptors? Thanks!
 
If it's a chap going by the moniker Presky on this site, then I've already dropped him a line, having seen he had some available a while ago.

Only other issue to sort is the possible wonkiness of the rear drop-outs. It's not too bad but not quite perfect either. Problem is I don't know how and can't think of a good way to to measure this mis-alignment before diving in and trying to "correct" it.

It's just occurred to me that it's possible it's caused by a bent axle in the rear wheel (if I'm lucky!). Ho hum, will be something to keep me entertained this weekend.
 
Re:

Right, brake caliper adapter shortly to be sorted and on the way.

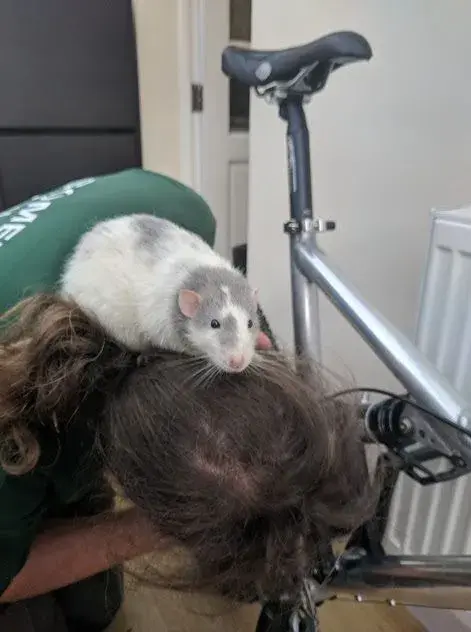
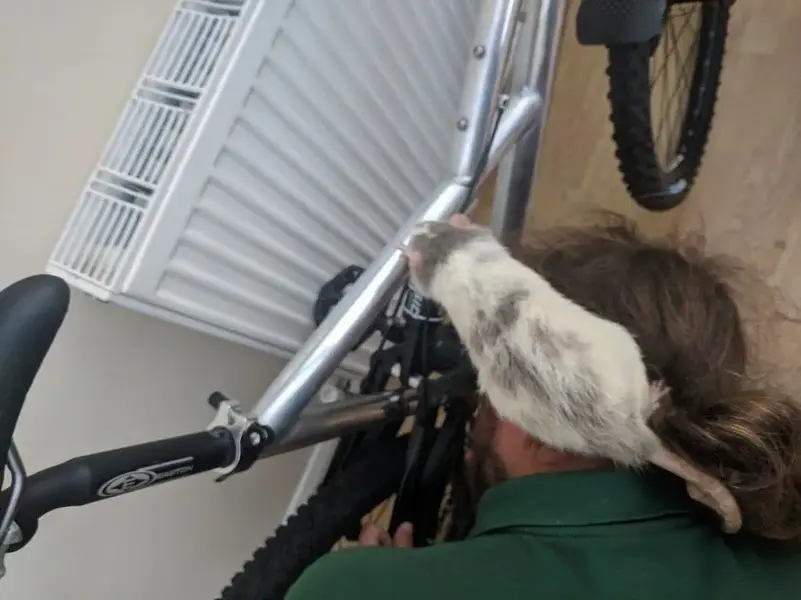
I had a little help from a very good friend indexing the gears this evening :)


Also ordered some thread locking compound for the pivot bearing bolts and shock mount bolts (never normally use the stuff, but since these ones can't be torqued up much it seems like a sensible precaution).
 

Attachments

  • LittleHelper.jpg
    LittleHelper.jpg
    34.9 KB · Views: 817
  • Ratsaregoodatindexinggears.jpg
    Ratsaregoodatindexinggears.jpg
    54.4 KB · Views: 818
Re:

Tyke & I adjusted the derailleurs as best we could, but the shifting is not quite 100% perfect yet. The crankset looks like it's sitting a few mm outboard of where it should be, so there is a bit of an angle on the chain line in the largest rear sprockets.

Only tested this with the bike upside down on the floor so far, so it may not be an issue in practice. Worst case is a new BB is required with a shorter spindle.

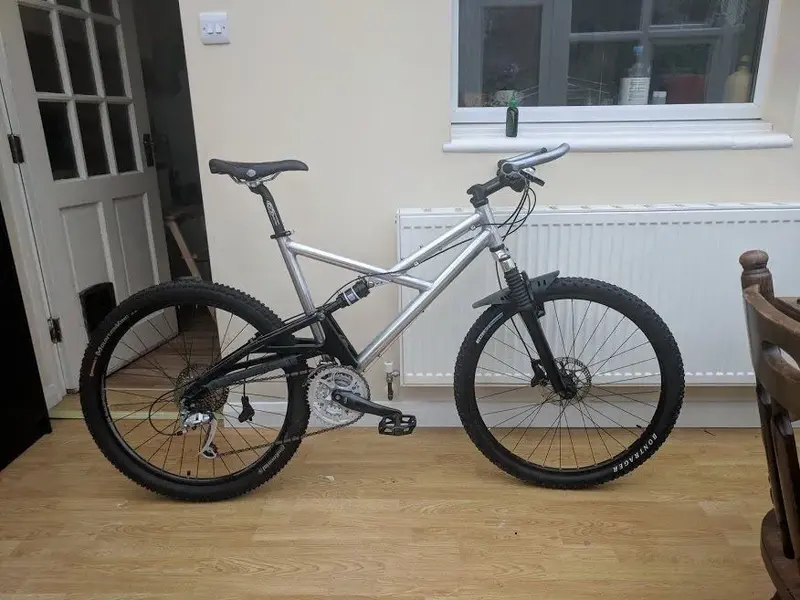
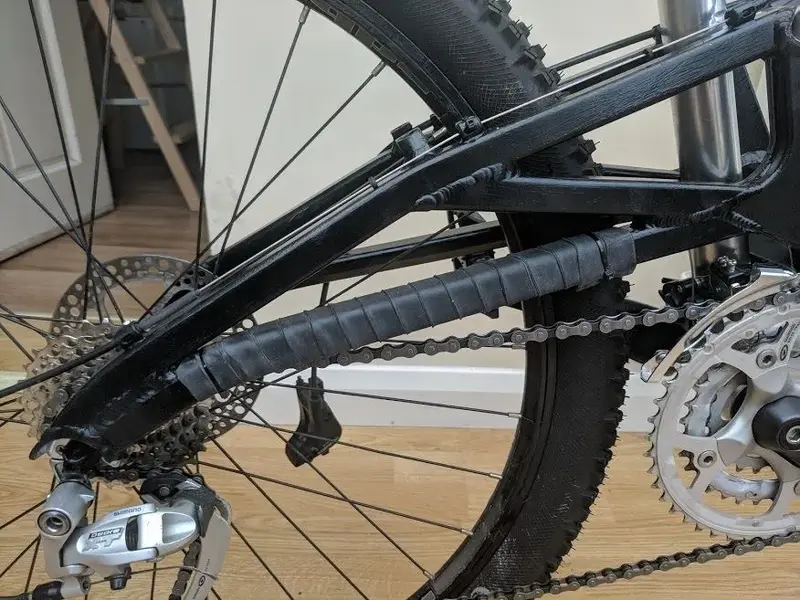
I took off the rear mudguard as it was simply too offensive, and turned the front one inside out so it's a less intrusive plain black colour. Also used an old one inner tube to make a chainstay guard, and upped the pressure in the rear shock to around 165psi to give 20%ish sag.

The brake mount adaptor will take a while to get here so progress is currently stalled. A shame, would have loved to have finished this off over a rainy weekend!
 
Here's how it's looking at the moment:


The bottom bracket looks really high to me... but then again I'm not used to full sus bikes so I guess once its sagged it would look more like how I'd expect.

Here's a close-up of the chain stay guard made from an old inner tube. Have used this method on a couple of bikes and it works really well and looks OK (especially on a black frame).
 

Attachments

  • GettingThere.jpg
    GettingThere.jpg
    88.9 KB · Views: 787
  • ChainstayGuard.jpg
    ChainstayGuard.jpg
    122.4 KB · Views: 788
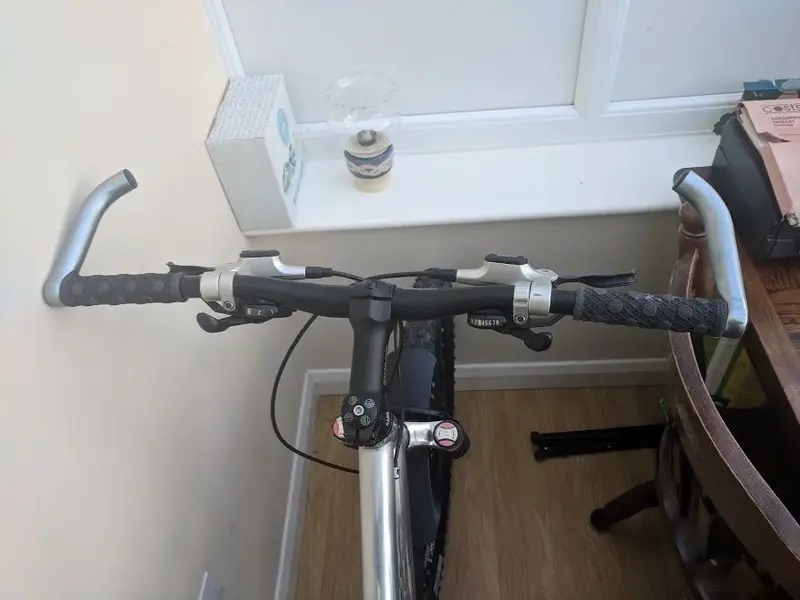
I've been fiddling around with the cockpit set-up a little. The bars are currently 630mm wide, which is really a little wider than I'd like for this build.

However, the oversize 31.8mm clamp area in the middle prevents the brakes & shifters from moving any further in towards the middle. I also like a bit of a gap between the grips and the brake clamp rather than having them jammed up against one another, so although there's room to move the grips & bar ends inwards by up to 18mm each, this would involve an ergonomics compromise I'm not keen on.


My other retro MTB (a rigid singlespeed '97 Marin Hawk Hill) has 580mm bars, which I really like, which is achieved through not having any shifters to take up bar space and having a thinner 25.4mm central clamp portion.

Guess I'll just have to take it on a few trails and see how I get on with it. I don't have a problem with wide bars per se (I run 720mm on my 2010 GT Avalanche and love them), but I do find long bar ends seem to work better with narrower bars.
 

Attachments

  • Cockpit.jpg
    Cockpit.jpg
    52.3 KB · Views: 778
Re:

The rear disc caliper mount adapter came this week courtesy of Presky (thanks mate!).

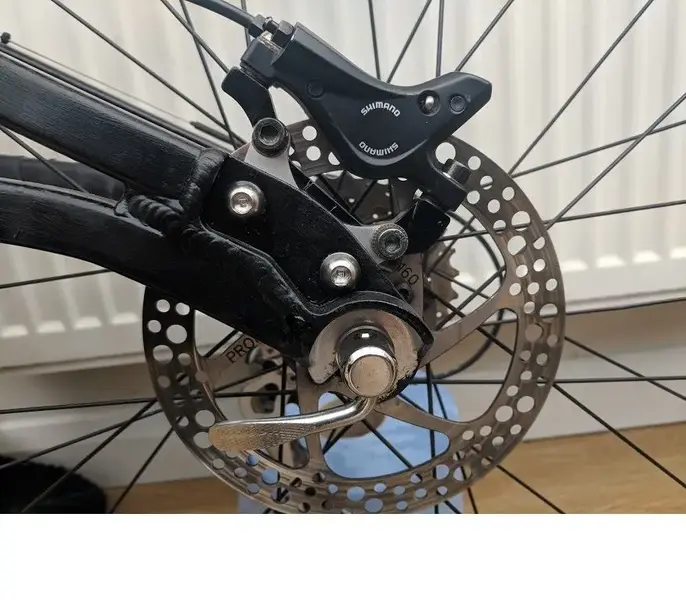
Unfortunately it wasn't quite as smooth and easy a job to fit the caliper as I'd hoped, as the clearance issues remained. I assume this was because the dropouts, caliper mounting point, or both, are out of true.

I didn't fancy cold setting the aluminium swing arm, so I got out my files instead. First I enlarged the drop-out on the non drive side a little, to bring the rear wheel into line with the frame.

Then I filed out some rebates on the IS to post mount adapter, to move it outboard a mm or so, and to tilt it ever so slightly in the required direction so that the caliper is perfectly aligned with the disc rotor.

All took quite a long time, as I wanted the alignment to be as close to spot on as possible at the end of it... but the bike now has a working rear brake :D


I stuck some blue thread locking compound in the shock mount and pivot bolts while I was at it, touched up a couple of scuffs in the paint on the swing arm, and made a hose guide for the front brake out of a couple of zip ties.

It's really close to being ready now! Might manage to get a maiden voyage in over the bank holiday weekend :)
 

Attachments

  • Bodged_Mount.jpg
    Bodged_Mount.jpg
    99.7 KB · Views: 726
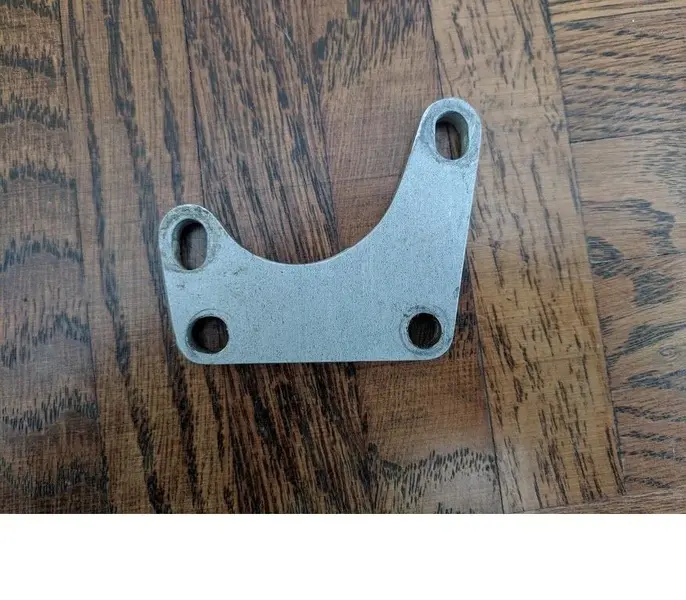
I've still got the old disc mount adapter - if anyone needs one for a similar project, drop me a PM. Think this design was for the 2001/2002 frames based on a quick google.
 

Attachments

  • Old_adapter.jpg
    Old_adapter.jpg
    138.3 KB · Views: 721
Re:

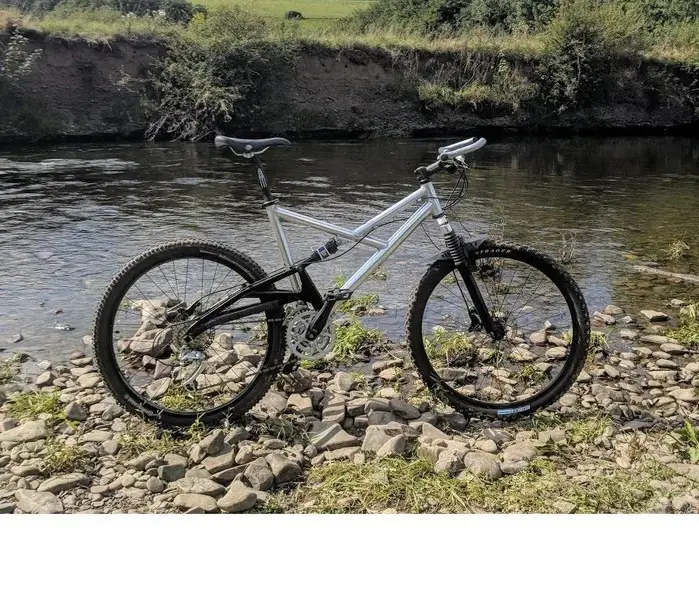
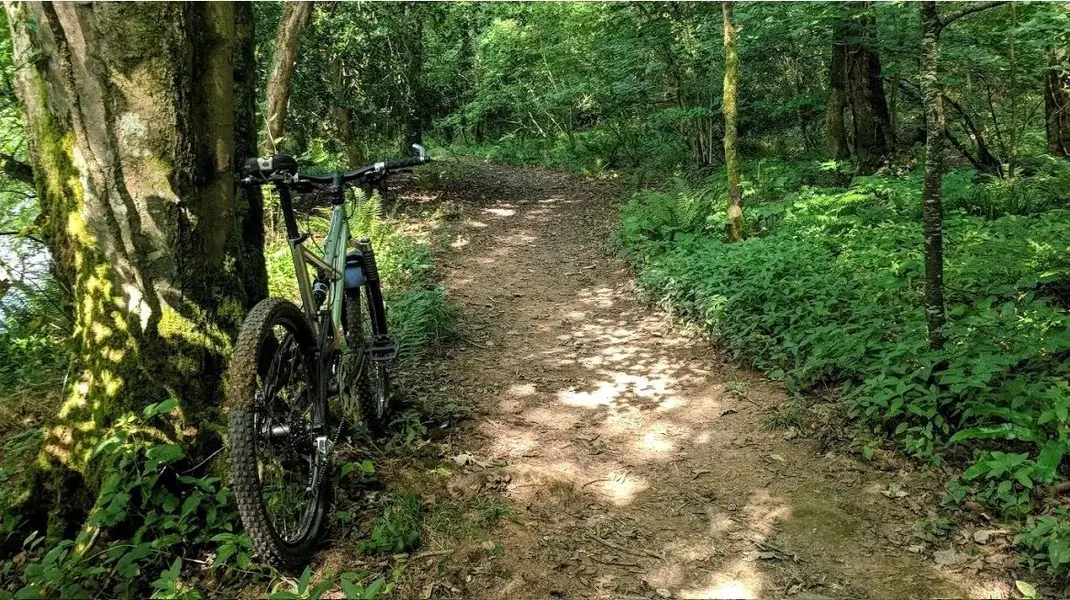
Well, it's finally finished :D


The gears are still slipping a tad, perhaps because I stuck a new chain on a used cassette. If the chain doesn't stretch to match the cassette in a week or so to fix the issue I'll pop a new cassette on the back. Also need to get a cable end cap on the two gear cables, but I think that's it. Took a bit longer than expected and (as always!) cost a bit more too, but I'm pleased with the end result.


How does it ride, then?

The first thing that struck me is that it feels very long (even though I'm using a 100mm stem instead of the 120mm that would have been originally specced). With the seat up at my usual height (an inch shy of full pedalling efficiency height) there's only an inch or so drop down from the saddle to the bars, but I was still pretty stretched out with a nice closed hip angle.

This makes it feel awesome putting the hammer down when seated pedalling over non-technical off-road trails :D It does also mean when I take it on more challenging downhill sections I reckon it will involve a fair bit of hanging off behind the back of the saddle to stop that OTB feeling... I guess that's late 90s MTBs for you though!

As well as being long, it also feels quite tall. Even when sagged, the BB still feels a smidge high to me - great for avoiding pedal strike, but the feeling of being perched that much higher up will take a bit of getting used to. Handling and cornering feels pretty neutral - it's not as snappy and responsive as my '97 rigid Marin Hawk Hill, but it goes where you point it without any fuss and feels a bit less boat-like than some of the modern MTBs I've ridden.

I moved the bar ends and grips inboard around 1.5cm each, giving a bar width of 600mm, which feels good. Although it's only a small difference in length, the bar ends just didn't feel quite right set up at 630mm. In an ideal world I'd move the brake levers and shifters in board another 5mm-10mm, but the profile of the bars won't allow this and it actually feels better than I thought it would like this anyway. Will ride it like this for a bit and trim the bars once I've settled on a final position.

The suspension feels pretty good at each end. There's not a lot of "pop" at the rear (maybe this is because the frame was designed around a linear coil shock rather than a progressive air one?). The feeling is more one of being stuck to the floor over terrain that would have you pinging around a bit on a rigid bike.

The shock now holds air in both +ve and -ve air chambers, and with 165psi feels about right. The fork has a tiny bit of top-out clunk on the rebound, and the stanchions have a bit of play in the lowers, but in spite of that they feel spot-on over chattery roots and rough stuff.


Looking forward to taking it out on my regular after work ride this week :)
 

Attachments

  • MaidenVoyage.jpg
    MaidenVoyage.jpg
    210.1 KB · Views: 700
  • LookinGood.jpg
    LookinGood.jpg
    83.1 KB · Views: 698
  • HittingTheTrails.jpg
    HittingTheTrails.jpg
    285.4 KB · Views: 698
Re:

Looking good for a rat bike ;).

I did a Marin X frame build a few years back and posted it on here. When it was done I enjoyed it a lot, it started out budget and got a bit spendy. Won't say I miss it but I did enjoy it.

Only problem with finishing a build is the build is finished. What next for you?
 
Back
Top