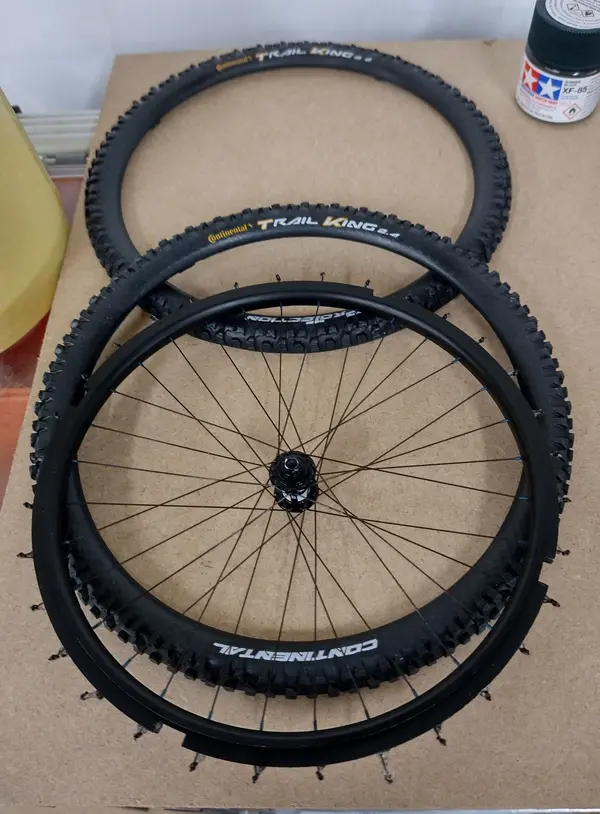
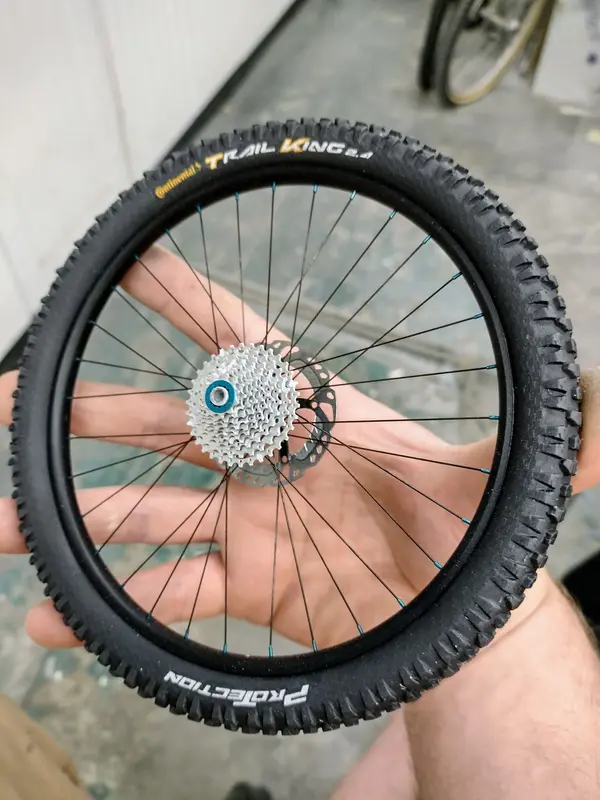
Yeti build thread. Not in the wrong section.

Wheels (3).jpg
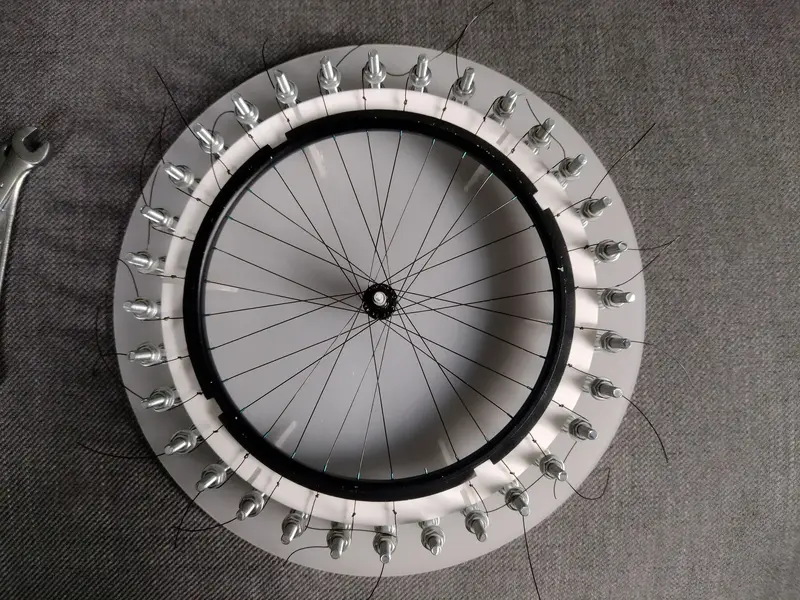
Wheelbuilding, quarter scale.
The spindle in the middle holds the hub at the correct height relative to the white ring holding the rim. Different spindles are used for the front and rear hub. Lengths of monofilament fishing line are laced as spokes having melted a small "spoke head" on the end using FIRE.🔥
The knot in the filament outside the rim is tied as close to the rim as possible, these will be used to secure each spoke with superglue once the wheel is trued. Without the knot, the monofilament just slips through superglue, which is a pain in the horse. During the tensioning and truing, if a knot goes beyond the outside of the white ring it must be retied further in so it will fit inside the tyre carcass later.
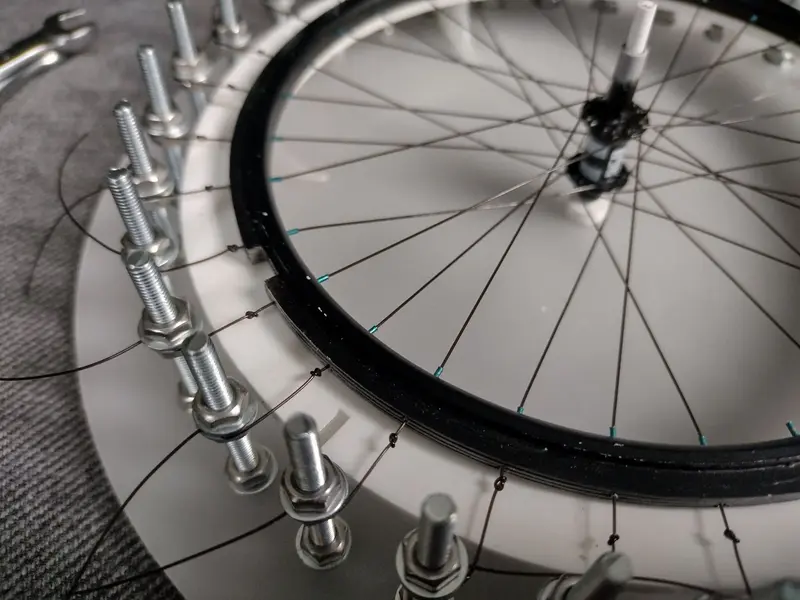
Wheels (2).jpg
By tightening and untightening each set of nuts, the rim ends up just lifted up from the ring. Only just enough to go "click" instead of "thud" when it is tapped.

I need to get out more.
 
Last edited:
I think you are letting him off too easily. Personally; i would rubbish him on social media and have him cancelled for printing those grips. Have you seen the wheels....pah!... short cuts all over the place.

;)
Yes, cancel him.

I am still in awe over the way he put the wheels together actually. I have used filaments for fishing for years and am simply amazed at what mr Panda did with it. Nothing lumpy about it.
 
Absolutely love this thread. Demonstrates the full skills of a model maker of taking an idea and creatively problem solving of how to make it and then executing with such skill and precision.

@LumPi Panda as I mentioned briefly many pages ago I'm an Industrial Designer and did model making for about 6 months after leaving college. No CNC, no laser, no 3D print, just manual machines, hand tools and lots and lots of templates. Did lots of architectural models, TV & exhibition props and product prototypes. Always been a garage monkey and when doing my design degree I earned money making models/furniture for the 3rd year students on their final projects.

Making stuff still continued in the design agencies I worked for as the first two had amazing workshops so despite me being a "creative" my broad skillset meant I was chucked in to help with model making/prototypes so I was always busy. However as it was always left until last I did end up working loads of crazy hours and it can be seriously stressful at times. As you know, there is no UNDO button!

Anyway @LumPi Panda , this thread is your mad skills and how you take shaped bonded sheets of styrene and transform them into amazing things with filler! I can smell it from here! 😍 Loving the jigs, stands, repurposing of materials etc. Just the time spent to create all the path files for the laser cutter is bonkers in itself! Thanks so much for documenting so well as it brings back many happy memories!!! Keep up the amazing work! 💪😎👍🙏
 
Last edited:
Absolutely love this thread. Demonstrates the full skills of a model maker of taking an idea and creatively problem solving of how to make it and then executing with such skill and precision.

@LumPi Panda as I mentioned briefly many pages ago I'm an Industrial Designer and did model making for about 6 months after leaving college. No CNC, no laser, no 3D print, just manual machines, hand tools and lots and lots of templates. Did lots of architectural models, TV & exhibition props and product prototypes. Always been a garage monkey and when doing my design degree I earned money making models/furniture for the 3rd year students on their final projects.

Making stuff still continued in the design agencies I worked for as the first two has amazing workshops so despite my being a creative, my broad skillset meant I was chucked in to help with model making/prototypes so I was always busy. However As it was always left until last I did end up working loads of crazy hours and it can be seriously stressful at times. As you know, there is no UNDO button!

Anyway @LumPi Panda , this thread is your mad skills and how you take shaped bonded sheets of styrene and transform them into amazing things with filler! I can smell it from here! 😍 Loving the jigs, stands, repurposing of materials etc. Just the time spent to create all the path files for the laser cutter is bonkers in itself! Thanks so much for documenting so well as it brings back many happy memories!!! Keep up the amazing work! 💪😎👍🙏
Thanks 27motorhead, truly appreciated.
As it happens, I started my University career as Industrial Design, but switched to model making half way through my third year. The industrial design was really helpful with respect to model making. This was in the late 90s, so we still learned all of the "proper" drafting techniques before going anywhere near CAD.

I feel your pain about the crazy hours. When I was self-employed as a model maker there would be days at a time spent in the workshop. Sleeping on the floor in between silicone pours when you had six hours curing time; not quite long enough to make it worth going home.
Now that I'm part of a bigger team, those days are over. My colleagues' idea of a late night is before midnight, easy.

There is no UNDO button.
But there is a REDO button.
There's a whole box full of rejects from this model. As it progressed the level got a bit higher, so many parts were returned to the drawing board to improve the detail.

I'm glad, and touched, that so many people are enjoying this build.
I admit that I am really proud of it. It is one of the only models for fun that I have bothered to finish. I usually get to about 95% complete and then lose interest. I don't tend to build models to have models, rather for the problem solving element of it. For me it is very much about the journey, not the destination.
And if that doesn't sound like pretentious tosh, then I need to try harder.
 
Right, about those tyre sidewalls.
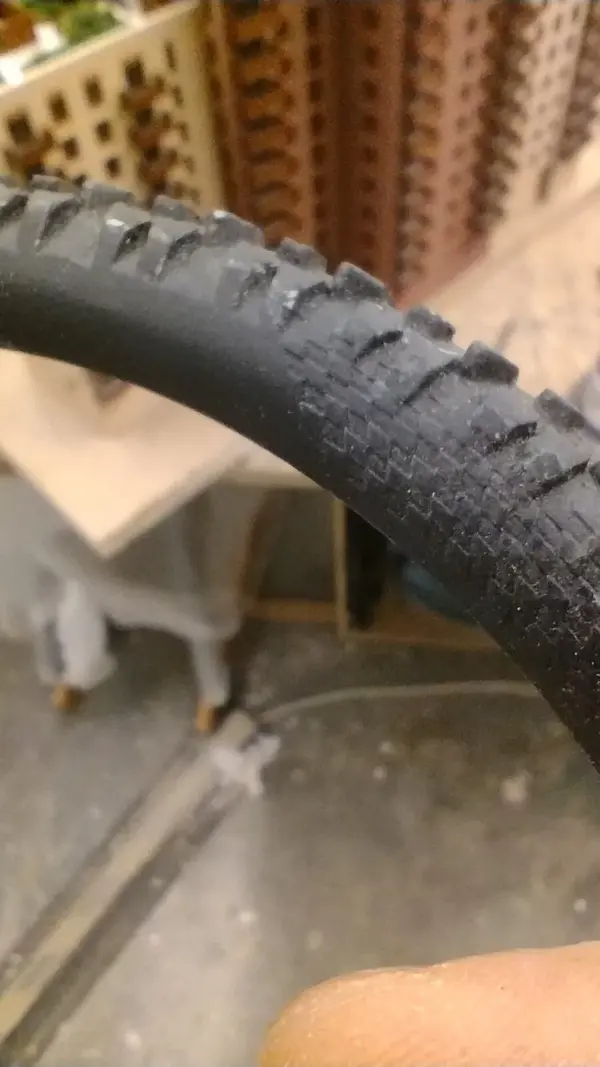
They needed a bit more texture, the real ones have a checkerboard pattern embossed into them. A bit of experimentation with a scrap cast and a laser engraver resulted in this:
5.jpg
Looks much nicer, needed to adjust the size of the pattern a little, but not bad for a first attempt.

6.jpg
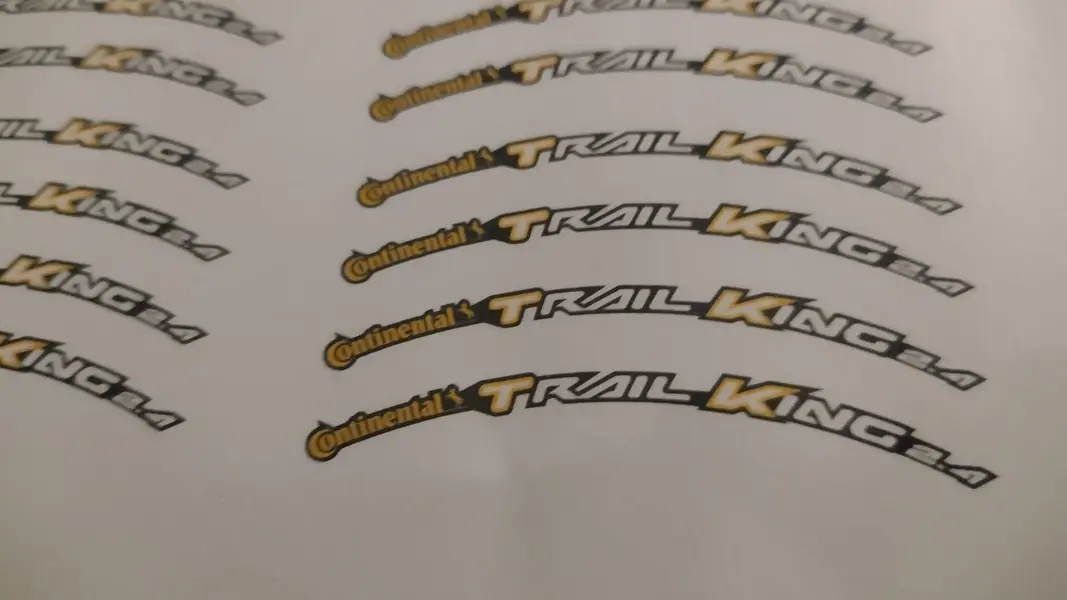
All of the graphics needed to be drawn out in CAD then coloured in Coreldraw graphics package. These were then printed onto waterslide transfer paper.

IMG_20240422_213539084.jpg
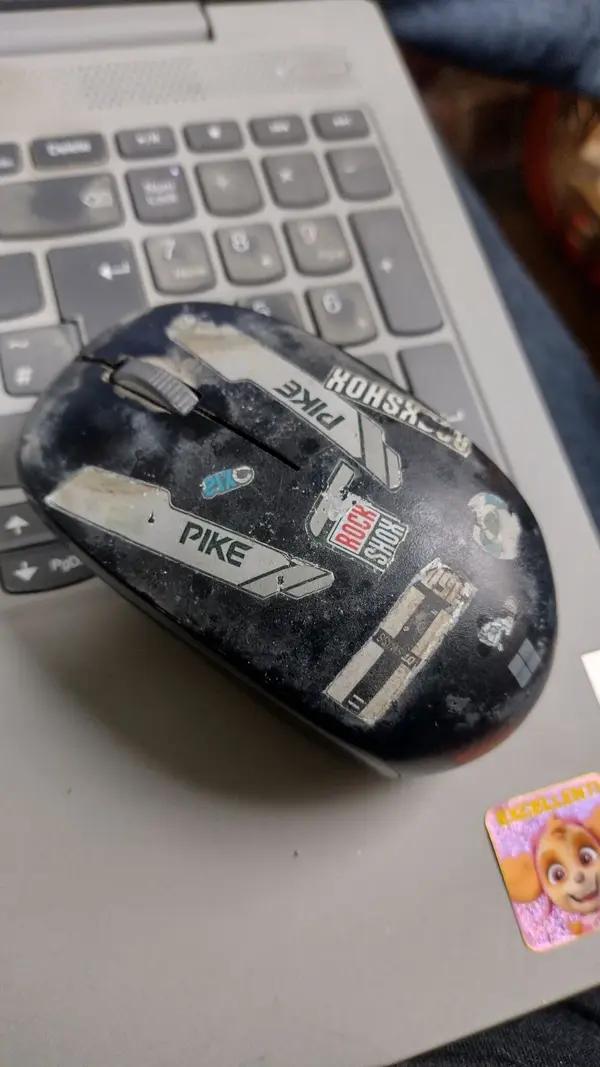
I worked out a way of laser cutting them out of the printed sheet to minimise the amount of border around the logos. There's an envelope full of these somewhere if anyone wants any tiny stickers.

22.jpg
 

Latest posts

Back
Top