WARNING, GRAPHIC CONTENT!
Disclaimer: I do not promote doing this to your frame and there is some very serious damage that can be done to the frame and to yourself if you're not careful. Kids, do not attempt to do this without adult supervision. You'll only have yourself to blame. I warned you. I refuse to take any responsibility for your broken frames, floorboards and arms & legs. This is not a healthy pastime - please find yourself another hobby.
Also, you'll be at risk of getting grief from true retrobikers.
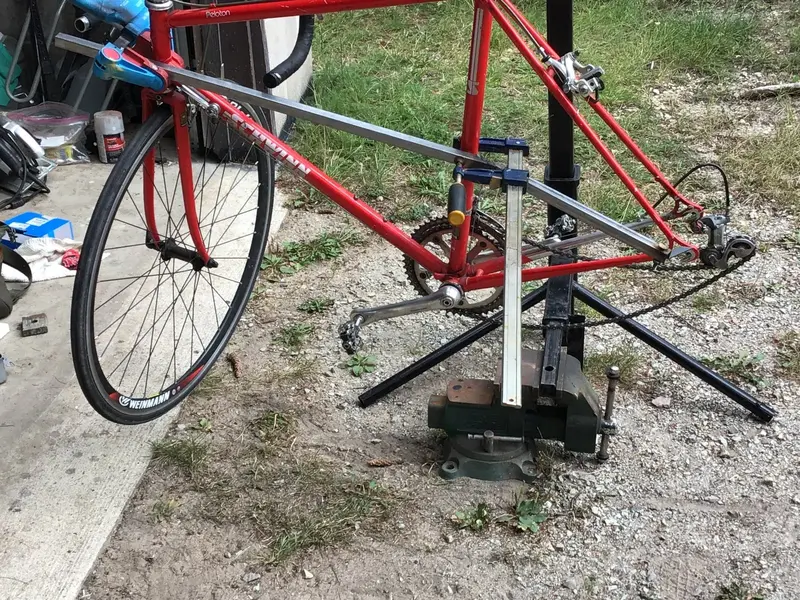
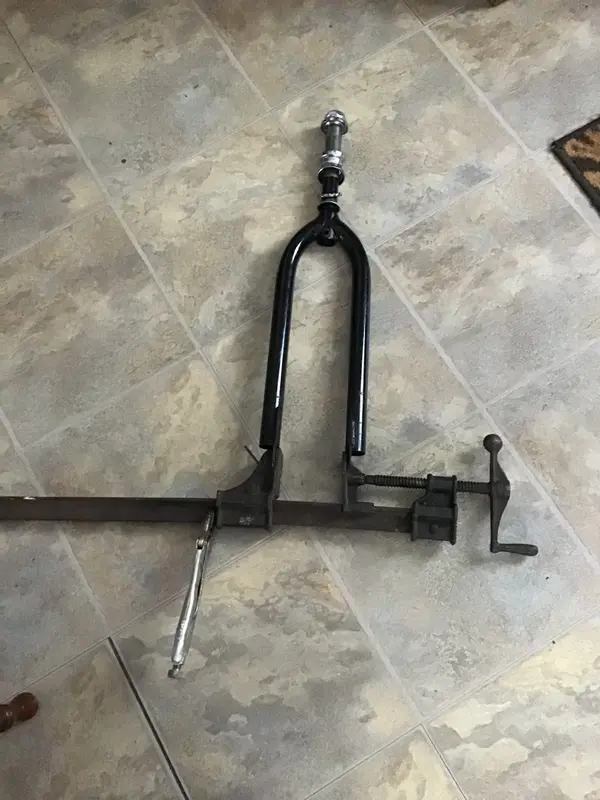
I've re-created the cold-setting process as promised.
I'm not expert - I've only done this 3 times and so far did not have the gates of hell open & swallow up me & my workshop.
I haven't clamped the bridges for the photo, but when doing the actual cold set, it is recommended that you clamp them so they don't break off.
Depending on stay shape, you can drill a wooden block to the right diameter, then cut it down the middle to make clamping blocks. Alternatively, wrap baking paper on the tubes and put some 5min epoxy on them + wooden blocks on top to shape the clamping blocks to your stays. Wait for it to set, remove the paper & you're ready to clamp.
If you're lucky, you might be able to get away with just a pair of cam clamps though.
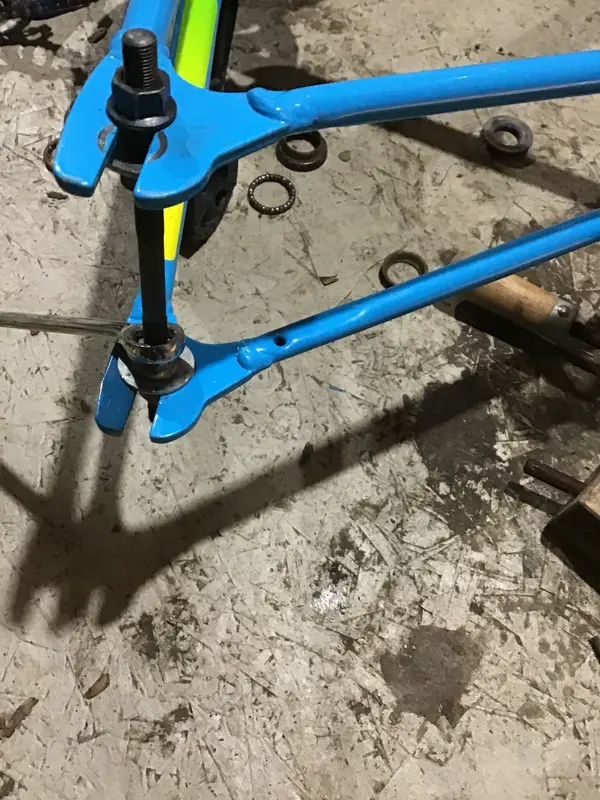
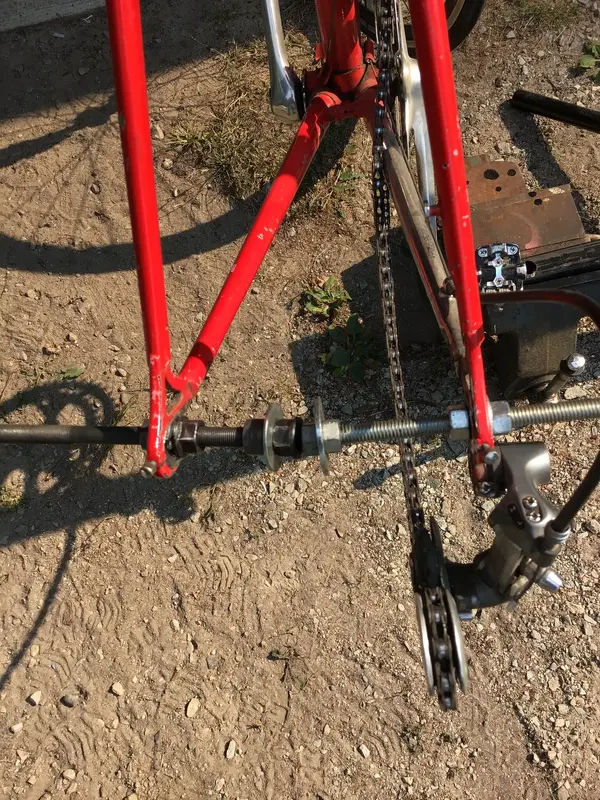
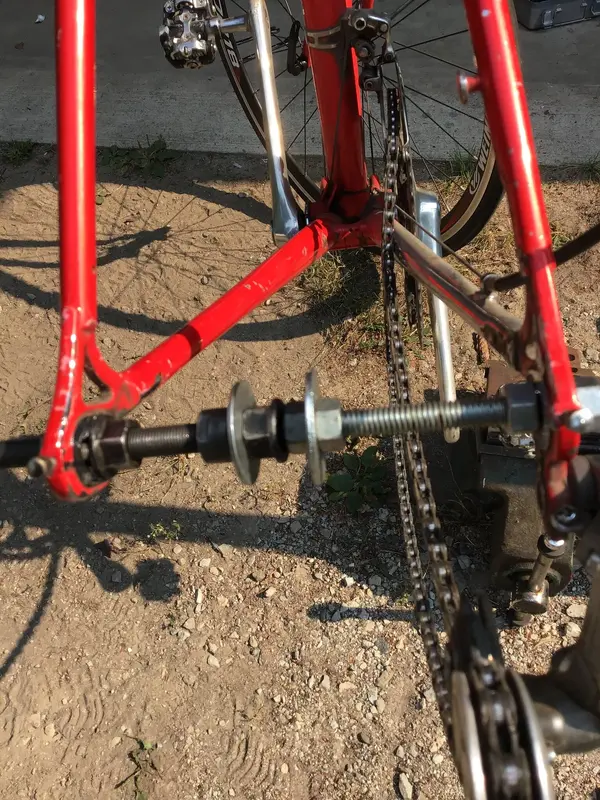
Option 1: M8 threaded rod. I'm missing a nut on the inside of the DS dropout (couldn't be bothered threading it onto a 12in rod just for the photo

).
Spread to 130+15 by turning the [missing] nut, then unwind & check if the frame has budged. Increase the spread in 5mm increments & keep checking until you reach the target (might have to go as wide as 160 or more).
Almost stress-free, but you're likely to end up with DS stay moving out more than NDS due to the chainring crimping.
This is exactly what has happened with Frannie - most of the spread went to DS and had to be corrected.
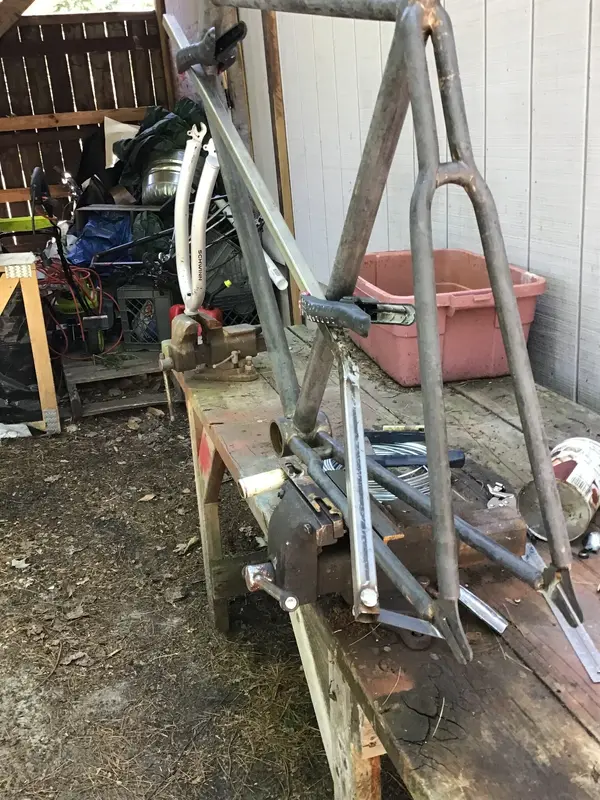
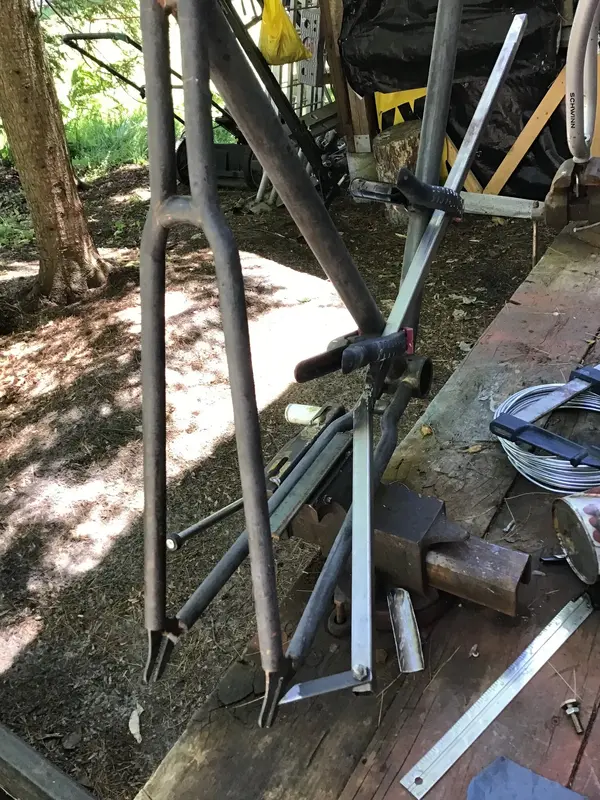
Option 2: Floorboard method. Put an end of the floorboard onto a workbench, and stick the other end into the frame. push down on the board with your knee around the seat tube to generate leverage on the stays, pushing them in or out. The frame in the photo is hanging on the floorboard and only resting on the floor on the headtube).
If you want to bend the stay back in, you need to position the board differently - check Sheldon's website for the photo.
Each frame is different, so you'll need to get a feel for the frame but once you're on it, I found it surprisingly easy to get the right amount of bend.
Very stressful when doing for the first time.
You have Sheldon's blessing (as well as more detailed instructions on his website) to do it this way. Also, the same method is described in "Lugged bicycle frame construction" book, albeit if memory serves me right, this is done before brazing on the bridges (makes sense).
So the way I understand it, doing a retrofit cold-set only differs from the process of frame building in that you bend the stays from the bridges onwards, while a "proper" frame will be bent from the lugs and reinforced by longer bridges.
Once spread, you need to re-align the dropouts. I've got a cyclus aligning tool, which was purchased for about £34 on sale, delivered from Germany. Well worth the pennies.
