You are using an out of date browser. It may not display this or other websites correctly.
You should upgrade or use an alternative browser.
You should upgrade or use an alternative browser.
boy"O"boy's 1989 Serotta Off-road Pro-flex prototype
- Thread starter boy"O"boy
- Start date
27motorhead
Old School Grand Master
- Feedback
- View
Great progress and good to hear there was nothing scary apart from the seat tube crack and hole that you already knew about.
Who's going to do the repair work on the frame? Will they just drill the ends of the crack and then weld & file back?
Does look quite cool stripped back and bare/raw, but bare frames get pretty tatty pretty quick and this doesn't feel like it deserves to be left in an unfinished state. @fguki has done a great job on those Elastomers!
As always look forward to seeing this progress!
TreaderSteve
Senior Retro Guru
I thought I'd followed this excellent thread - I hadn't! Really want to see how the 'hole' repair is taken care of and then really want to see it finished. Popcorn at the ready.
fguki
Senior Retro Guru
Great stuff! And thank you for the kind words. Always glad to help out - especially when it comes to elastomers that arent common! (Besides all the standard models and sets I stock - for Manitoiu, Rockshox, Votec, Paioli & Co.). Looks great!
Dont worry about the hole or the crack. Its steel! Its a pretty easy fix for a good tig-welder.
People like Dan Chambers have perfectly repaired cracks and holes or drilled out cable guides in very fragile and high class KLEIN frames for me. People of his skill level will have this repaired pretty easily. Although I think (!) he only does aluminium.
Very curious to see your progress on this one!
Cheers!
27motorhead
Old School Grand Master
- Feedback
- View
I think Dan Chambers does, steel and Titanium too. I know he does Ti as I have spoken to him about a repair on another cracked seat tube!Great stuff! And thank you for the kind words. Always glad to help out - especially when it comes to elastomers that arent common! (Besides all the standard models and sets I stock - for Manitoiu, Rockshox, Votec, Paioli & Co.). Looks great!
Dont worry about the hole or the crack. Its steel! Its a pretty easy fix for a good tig-welder.
People like Dan Chambers have perfectly repaired cracks and holes or drilled out cable guides in very fragile and high class KLEIN frames for me. People of his skill level will have this repaired pretty easily. Although I think (!) he only does aluminium.
Very curious to see your progress on this one!
Cheers!
I was expecting the corrosion to be a lot worse, but it looks like it's pretty solid underneath bar a couple of bits. Always thought these first generation Pro-flex's looked really cool. Ben is doing a cracking job as ever both in terms of execution and documentation.
That looks fab as it is - appreciate it's going to see some paint, but in clearcoat it would really play to the "prototype" vibe. As a former 550 rider, I love this thread!
Glad you like the thread @markoc - get where you're coming from with the 'prototype vibe'
Although it's interesting to see it warts and all...I'm still aiming for that MBUK Jan 1990 advert vision. Unpainted feels not finished if you know what I mean.
As above @27motorhead ∆Great progress and good to hear there was nothing scary apart from the seat tube crack and hole that you already knew about.
Who's going to do the repair work on the frame? Will they just drill the ends of the crack and then weld & file back?
Does look quite cool stripped back and bare/raw, but bare frames get pretty tatty pretty quick and this doesn't feel like it deserves to be left in an unfinished state. @fguki has done a great job on those Elastomers!
As always look forward to seeing this progress!


I'm going to have a go myself on the frame repair....just need to find some time at the moment! I have a back-up plan for repair if I feel I'm out of my depth.
@TreaderSteve thanks for endorsement!I thought I'd followed this excellent thread - I hadn't! Really want to see how the 'hole' repair is taken care of and then really want to see it finished. Popcorn at the ready.
As above, I'll definitely be documenting the repair. Maybe with heat involved - I could do a batch of popcorn at the same time!
Thanks @fgukiGreat stuff! And thank you for the kind words. Always glad to help out - especially when it comes to elastomers that arent common! (Besides all the standard models and sets I stock - for Manitoiu, Rockshox, Votec, Paioli & Co.). Looks great!
Dont worry about the hole or the crack. Its steel! Its a pretty easy fix for a good tig-welder.
People like Dan Chambers have perfectly repaired cracks and holes or drilled out cable guides in very fragile and high class KLEIN frames for me. People of his skill level will have this repaired pretty easily. Although I think (!) he only does aluminium.
Very curious to see your progress on this one!
Cheers!
The replacement elastomers are key for this project. Your efforts in getting these 'just right' are superb. Greatly appreciated.
As you say too.... it's Steel! ......Should be much easier to repair. If this was aluminium or titanium....it would be going away for repair with a professional like Dan.
Progress is slow but hopefully some repair updates and into paint soon
Thanks James. I've also another Serotta Off-road Pro-flex thread running at the same time too.Really interesting build thread. Following with interest.
This prototype warrants it's own thread rather than adding to the other.
I've added these scans from Mountain Biker International (midsummer 1990) to my other thread.....but it's pretty relevant to this thread too, so I'm also adding it here -
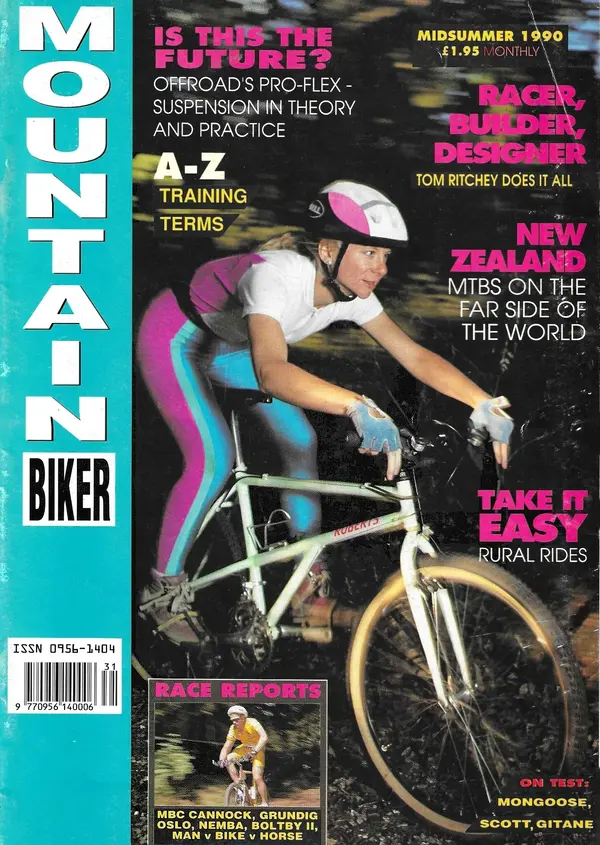
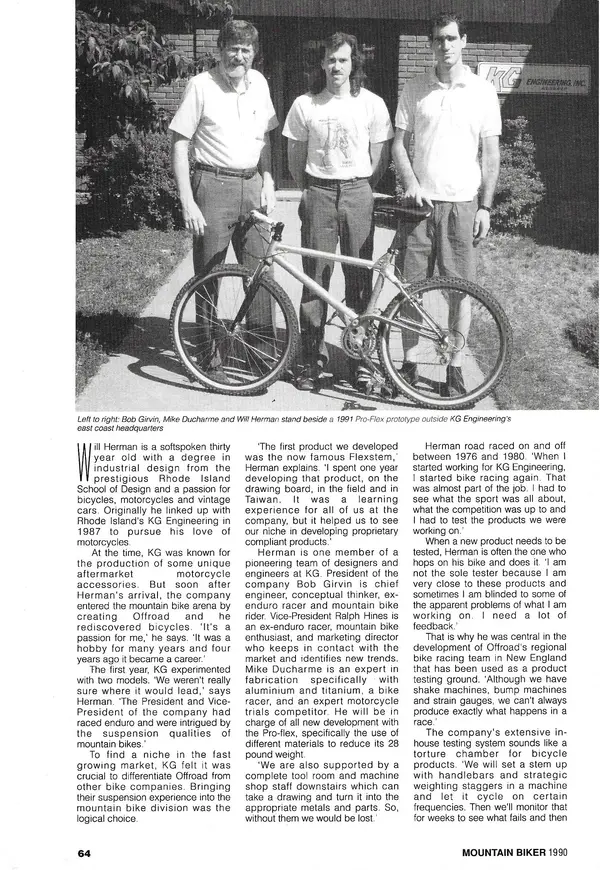
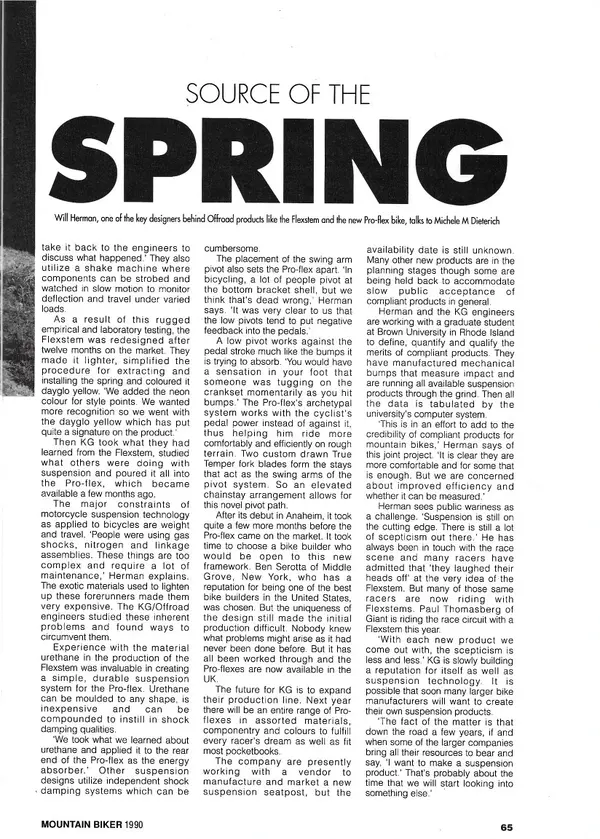
Cheers all.
More updates soon
boy"O"boy
So 2025.
Picking up where I left off last year. I'd have loved to have finished this and put my end of year tally at a record (for me) 4 builds, but it proved to be a bit beyond me. I did close the year out by completing the 'other' Serotta off-road Pro-flex though. Very pleased with the outcome of that one and the quality of the @gil_m decals really finishes it off nicely.
Just this one to go now. Repairing the rust hole and seat clamp crack.

Starting off. The ends of the crack are drilled then the edges of the crack were cleaned back with a Dremel. Some of the metal was brittle so I probably cleaned it back further than I needed to. Now I've got a bigger 'hole' to contend with.
Thinking I could probably repair this myself, I get some brass rod and a blow torch and give it a go. I quickly realized that even if I get it red hot, it's still not enough heat to allow the brass melt to fill the void. The heat just dispersed too quickly.
Best ask someone who has the skills and the proper kit.
A welder at work tells me it can be brazed but won't look pretty. I'd need to clean it up. He did make a really nice aluminum 'bung' to limit the amount of braze on the inside of the seat tube and effect the seatpost diameter.
Two bags of Haribo as payment and I'm ready to start cleaning up.


Not the prettiest, but determined to make this look good.
boy"O"boy
Picking up where I left off last year. I'd have loved to have finished this and put my end of year tally at a record (for me) 4 builds, but it proved to be a bit beyond me. I did close the year out by completing the 'other' Serotta off-road Pro-flex though. Very pleased with the outcome of that one and the quality of the @gil_m decals really finishes it off nicely.
Just this one to go now. Repairing the rust hole and seat clamp crack.
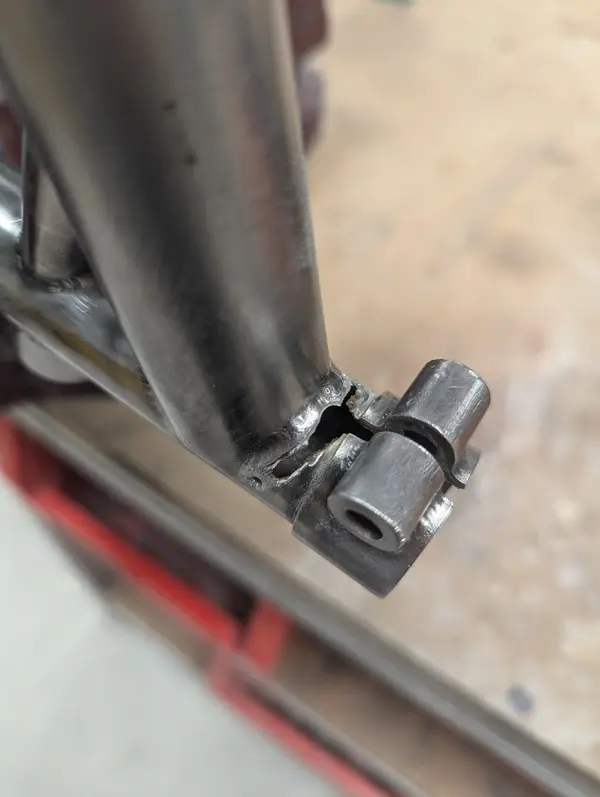
Starting off. The ends of the crack are drilled then the edges of the crack were cleaned back with a Dremel. Some of the metal was brittle so I probably cleaned it back further than I needed to. Now I've got a bigger 'hole' to contend with.
Thinking I could probably repair this myself, I get some brass rod and a blow torch and give it a go. I quickly realized that even if I get it red hot, it's still not enough heat to allow the brass melt to fill the void. The heat just dispersed too quickly.
Best ask someone who has the skills and the proper kit.
A welder at work tells me it can be brazed but won't look pretty. I'd need to clean it up. He did make a really nice aluminum 'bung' to limit the amount of braze on the inside of the seat tube and effect the seatpost diameter.
Two bags of Haribo as payment and I'm ready to start cleaning up.

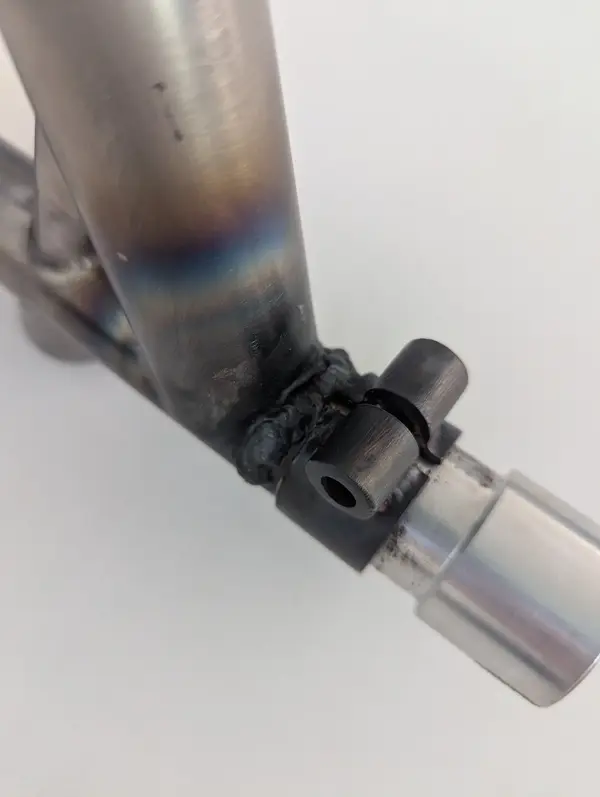
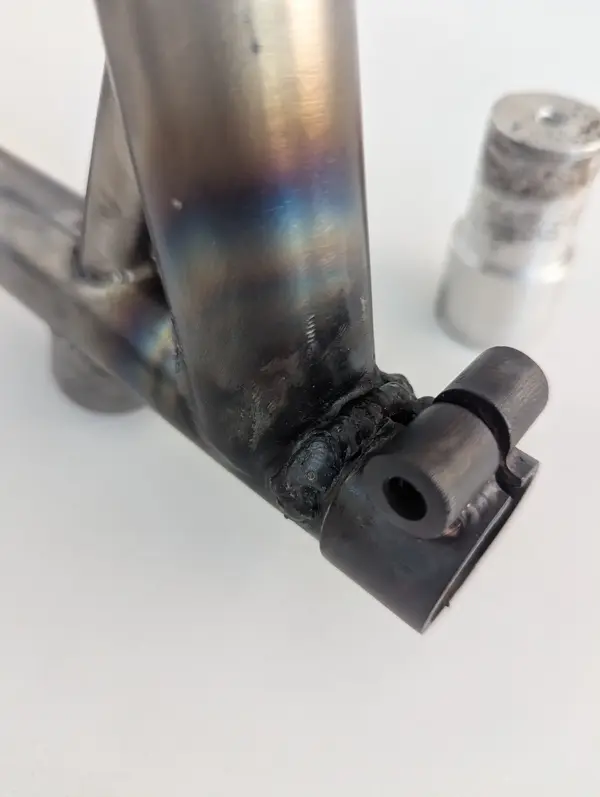
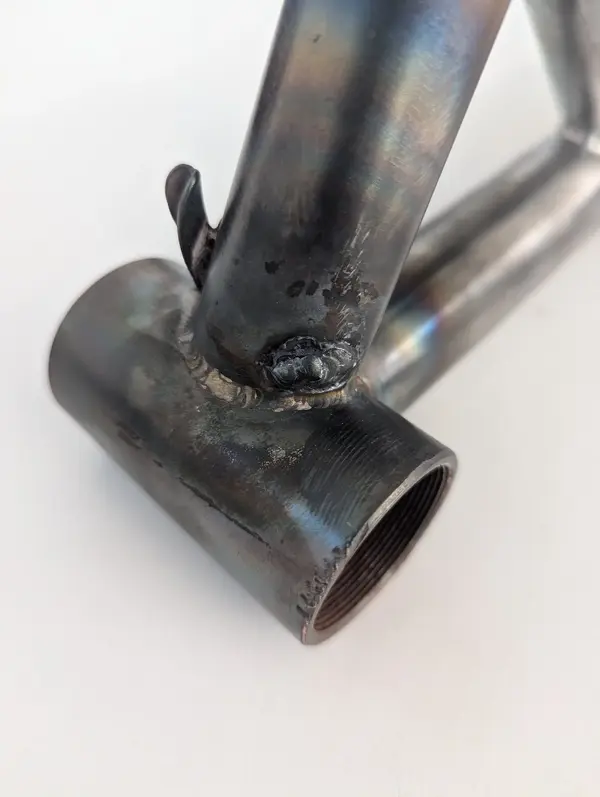
Not the prettiest, but determined to make this look good.
boy"O"boy
So. Some free time. Time to clean up the repairs.


Next to add the circular slot end.


and clean the filled hole.

There's still a tiny pin hole ....but the bit that looks like a crack is a slight difference in height that I didn't want to file anymore through fear of causing the repair to cave in.
Looks like another bag of Haribo and a revisit to add a little bit more.
More updates soon.
Cheers
boy"O"boy
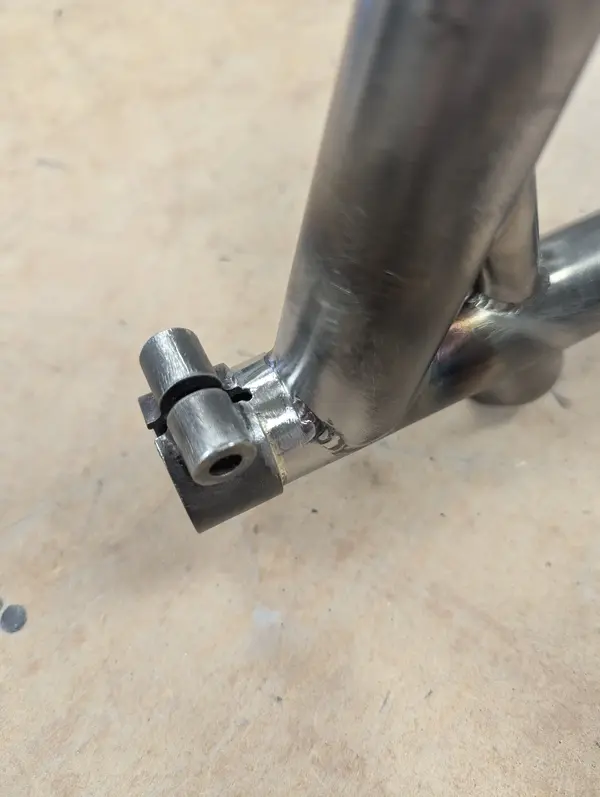
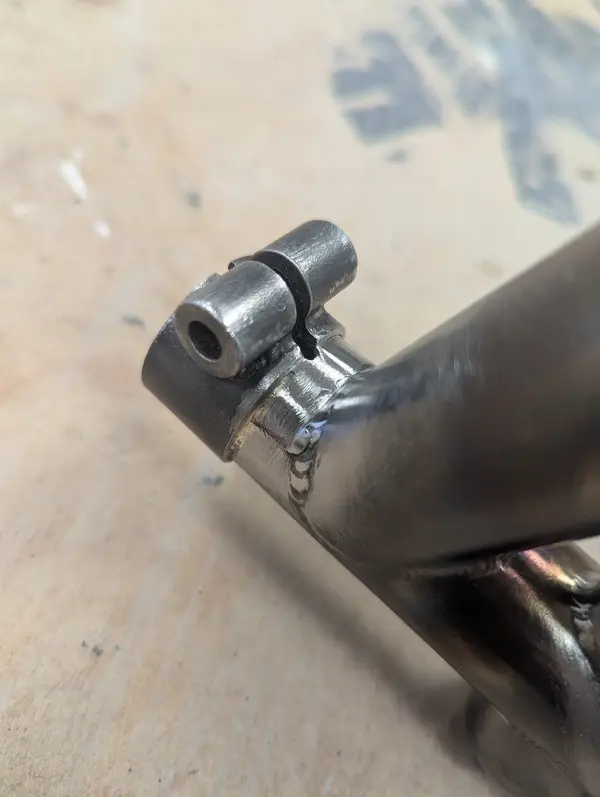
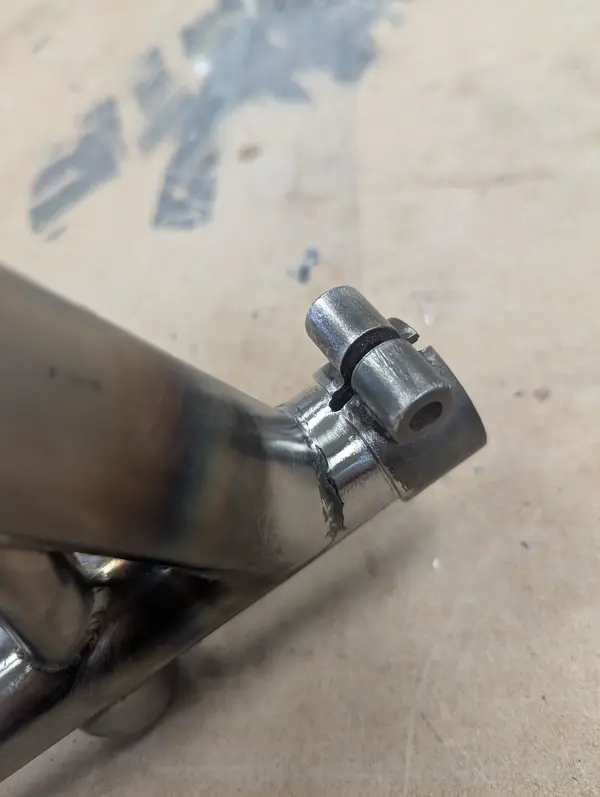
Next to add the circular slot end.
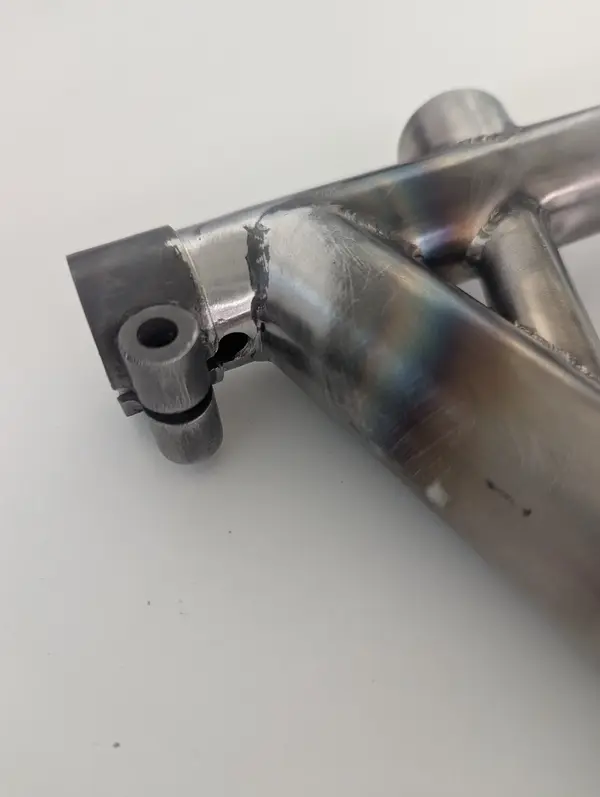
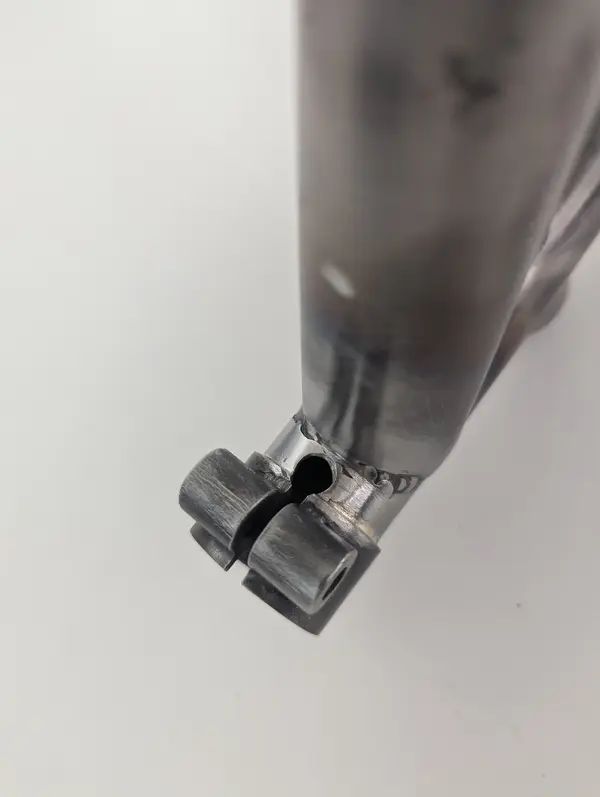

and clean the filled hole.
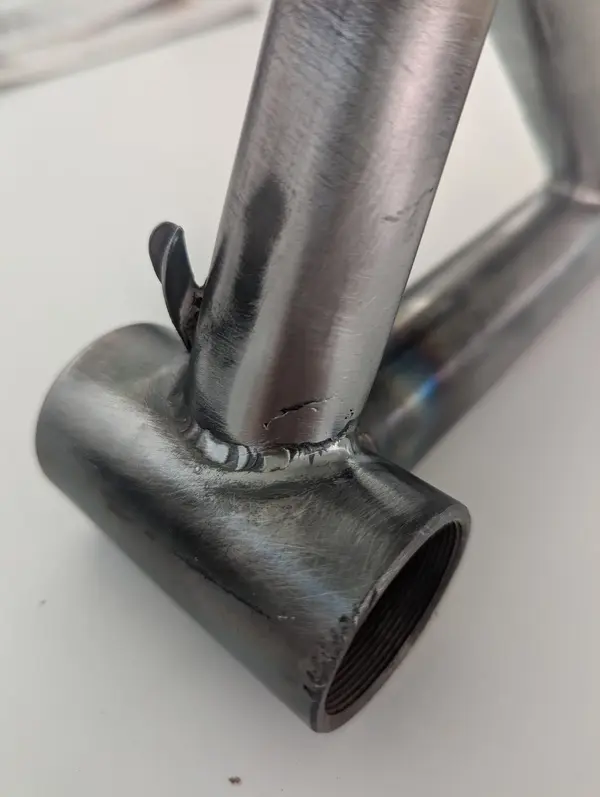
There's still a tiny pin hole
Looks like another bag of Haribo and a revisit to add a little bit more.
More updates soon.
Cheers
boy"O"boy
Last edited:
27motorhead
Old School Grand Master
- Feedback
- View
MIGtastic! Nice job on the filing.
Another quick squirt of MIG bead followed by a quick(ish) file and the seat tube will look good as new again.
Another quick squirt of MIG bead followed by a quick(ish) file and the seat tube will look good as new again.
Similar threads
- Replies
- 26
- Views
- 855
- Replies
- 40
- Views
- 6K
- Replies
- 104
- Views
- 16K
- Replies
- 39
- Views
- 8K
- Replies
- 10
- Views
- 3K