boy"O"boy's 1989 Serotta Off-road Pro-flex prototype

Oh.my.uummm 😬!

I only rode it once ! 😆 (not true..)

Well, there was no way i was going to find the time/patience for this job! Fair play 💪 !

Condition wise thats exactly how I got it tbf, but i never thought she was that deep in the bad stuff!

Keep the faith Sir Ben ! You can do it!
 
On the stuck seat post - I've never tried the caustic soda approach (or Gallium for that matter) as I have always wanted to either retain the paint style or the bike itself was aluminium . I have taken the long route and cut through the tube with a hacksaw vertically... this took ages (literally six months) as I would put it to the back of the shed when I lost patience with it. I've had plenty of seized bottom brackets too... although all but one came out with enough leverage. - I did have one that I drilled out with diamond drill bits and a Dremel. I went through 4 drill bits :LOL:

This looks like an awesome project to restore and whilst it may be frustrating, that first ride when it is fully restored will be awesome!. Good luck!
 
WOW!

Is it not too late to return to @Cristian-T ??? 😜 That's a bucket and some more of worms you have literally unearthed!

There's patina and there's full-on corrosion. You have both going on.
@27motorhead
Couldn't have phrased it better! The more I strip back, the more work it seems to create!
Took it into the workshop at work to use the 'big vice' ..... update coming!
Tuning in late to this one. I have every faith you'll knock it out of the park again Ben :)

Don't know if they're any use but I have the renmants of another early flexstem kicking about somewhere.. There could be an elastomer there but I cannot remember. You can have all the bits as karma if you need them?
Thanks Joe. Any early flex-stem parts are always useful. I'll PM you.
The flex-stem that came with this is particularly bad...I think it'll be a parts doner for a better one I have. It could be horrificly corroded under that faded neon.
Cheers.
Oh.my.uummm 😬!

I only rode it once ! 😆 (not true..)

Well, there was no way i was going to find the time/patience for this job! Fair play 💪 !

Condition wise thats exactly how I got it tbf, but i never thought she was that deep in the bad stuff!

Keep the faith Sir Ben ! You can do it!
@Cristian-T
Definitely one of the worst condition bikes I've taken on....but the Challenge is there! - the faith is strong!
I doubt they'll be much retained from the original parts other than the frame and fork.
I might just drop all of the bits into a diesel bath for a few weeks just to see if anything comes up good before writing a parts wanted/needed list.

I'll keep the updates coming!
Cheers
boy"O"boy
 
@PhillB From your experience of stuck seat posts and bottom brackets - it currently feels like I might be going in the same direction as some of your experiences!

Here's a small update. No big steps...lots of frustration. More problems revealing themselves.
1000018156.jpg
Forks removed....after a vice tussle with a very seized lock nut that ended up non- salvageable.
Lower cup and upper race eventually knocked out after an overnight plus gas soak.
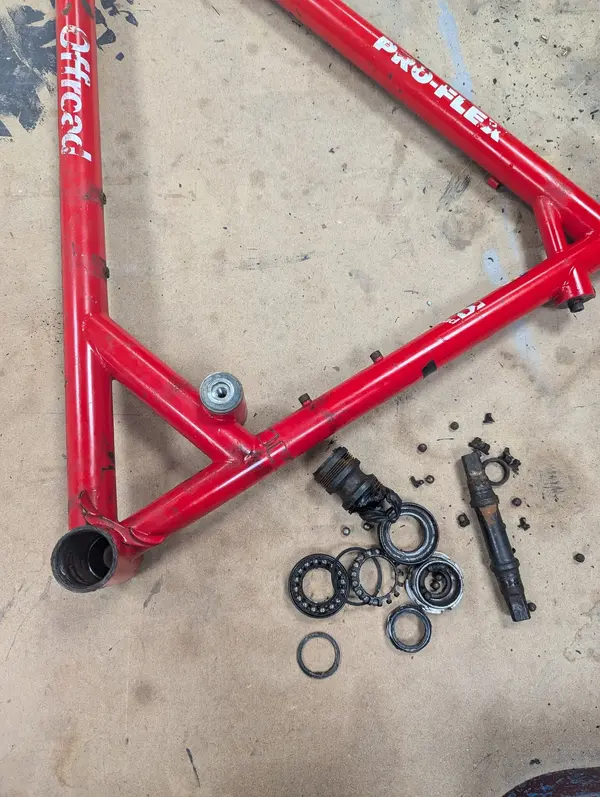
Bottom bracket Non- drive side eventually turns after clamping in vice and using the frame as a lever. Axle kept - may clean up but more useful as a sizing guide for a replacement.

Drive side well and truly stuck. Checked. Double checked. Triple checked that turning it in the vice the right way to undo...bugger. More soaking needed. Blow torch next step. If that doesn't work... Machining out could be the next option.
 
Last edited:
Let's have a go on that stuck seat post instead.
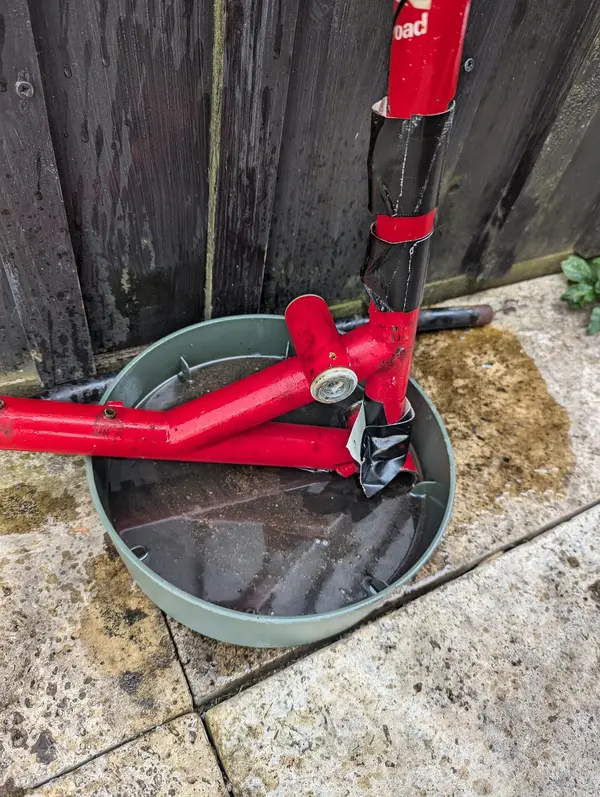
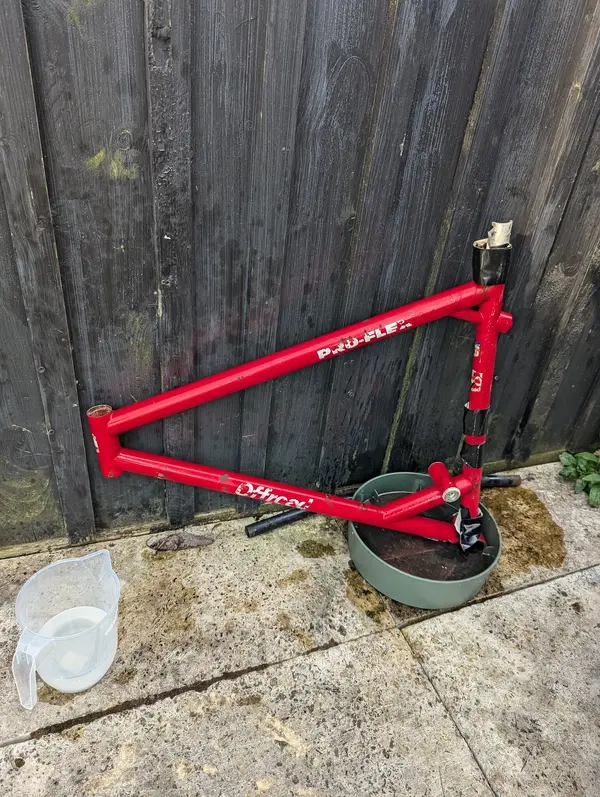
No opening at seat tube/ bottom bracket junction. Fill up the bottle mounts and seal with gaffer tape. Tape the upper too to stop caustic soda solution leaking out of clamp.
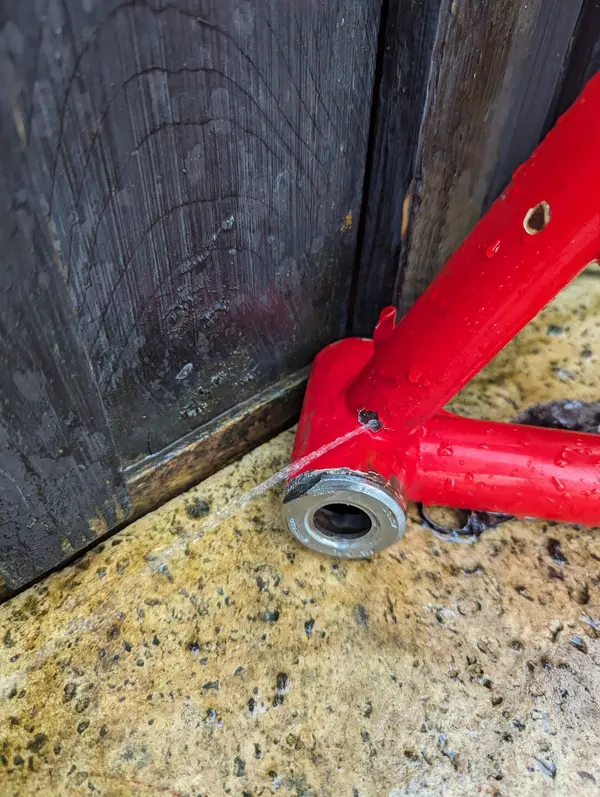
Pour solution in from top.....starts well and fills up to top of post....fizzing and bubbling. Then notice it's coming out at the back of the seat tube above the bottom bracket from rust holes under the paint! 😡🤦🏻

1000018186.jpg

1000018187.jpg
Put a container underneath and keep pouring.
Maybe it'll have an effect on the bottom bracket cup? Leave it to soak.
1000018189.jpg
Rinse out the caustic soda from the seat tube with clean water. Note the jet of water flowing out from the rust hole!
Let's see if it's had any effect tomorrow. If not, I'll try again and fill up the rust hole with clay/wax/ something to stop the flow of the solution.

Updates again soon. Undoubtedly more frustration to follow too!

Cheers
boy"O"boy
 
On the plus side - you could use this for internal cable routing?

I jest of course...some bikes just keep revealing more nasty little secrets, but it does make restoring them that much more satisfying :D
 
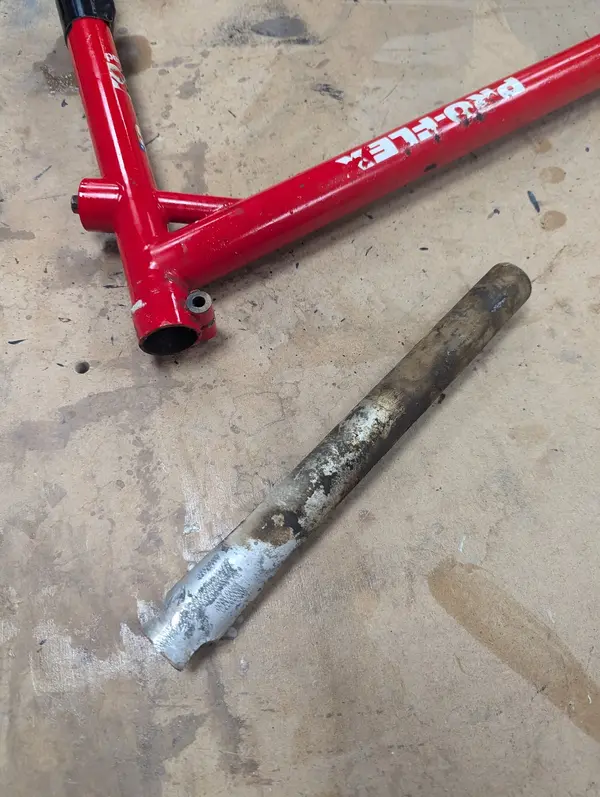
Perseverance. Plenty of force. Gripping what was left of the exposed post in the big vice....the Caustic Soda did enough to release the post with a massive crack as it broke free.

Finally it's out!

1000018196.jpg 1000018195.jpg

Same can't be said for the drive side bearing cup. Going to soak it in diesel for a couple of weeks to see if that can penetrate the corrosion.
Then I'm starting to run out of options. The hardened steel is too tough to drill. A hacksaw just slides off so can't get a cut started.
Angle grinder?
Blow torch?
Just leave it in? - it is the drive side.. the rest could assembled and tightened from the non drive side? - seems a bit of a cop out though.
Send it to a specialist?

One the back burner whilst it soaks for a couple of weeks. All thoughts and ideas welcome.

Cheers
boy"O"boy
 
Assume you will need heat to fix rust holes so maybe heat for BB?

I slide a long seatpost over my BB spanner for extra leverage- works best when the bike has wheels on- undefeated! (touch wood!)
 
Back
Top