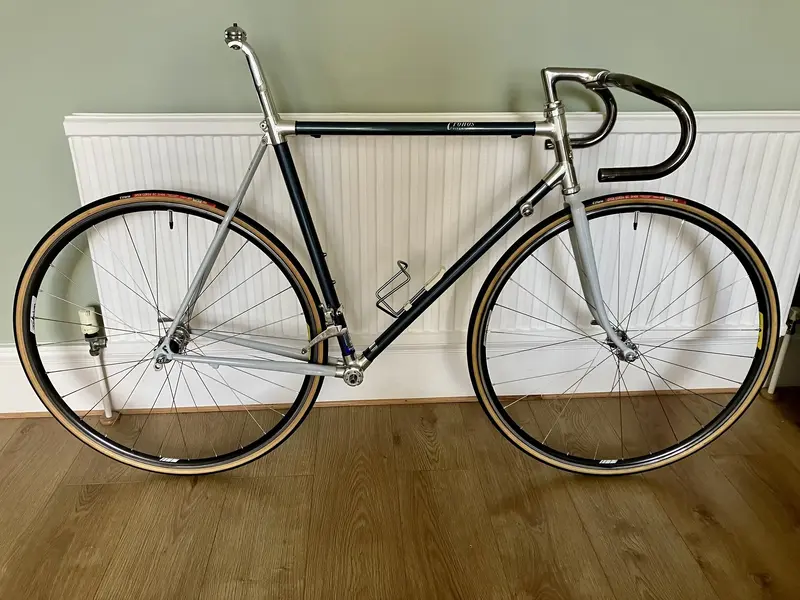
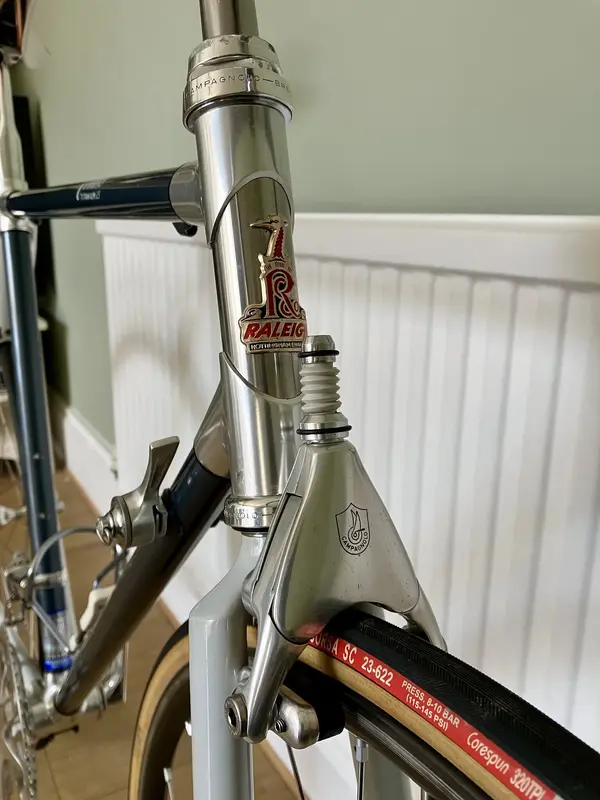
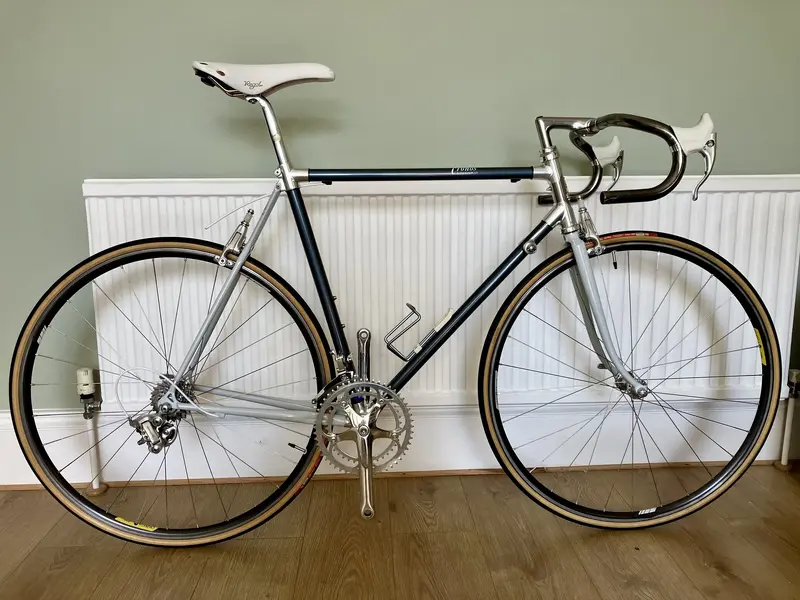
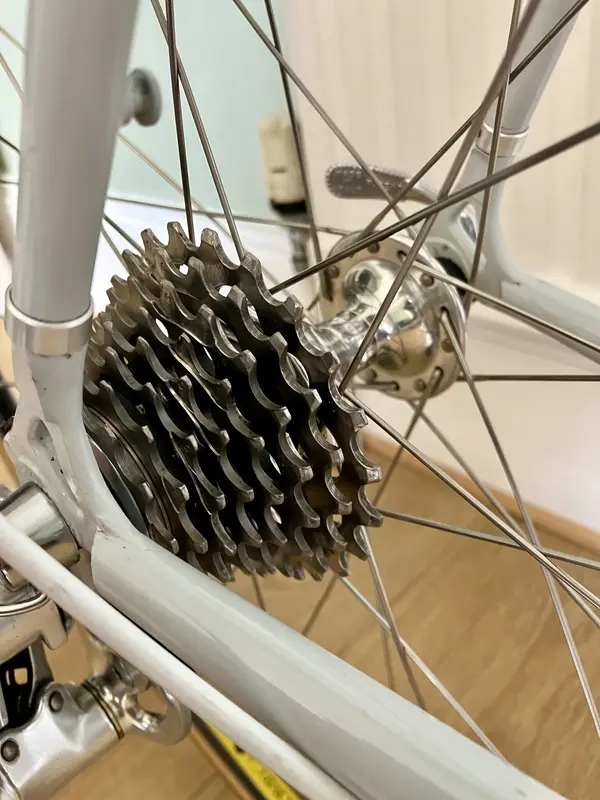
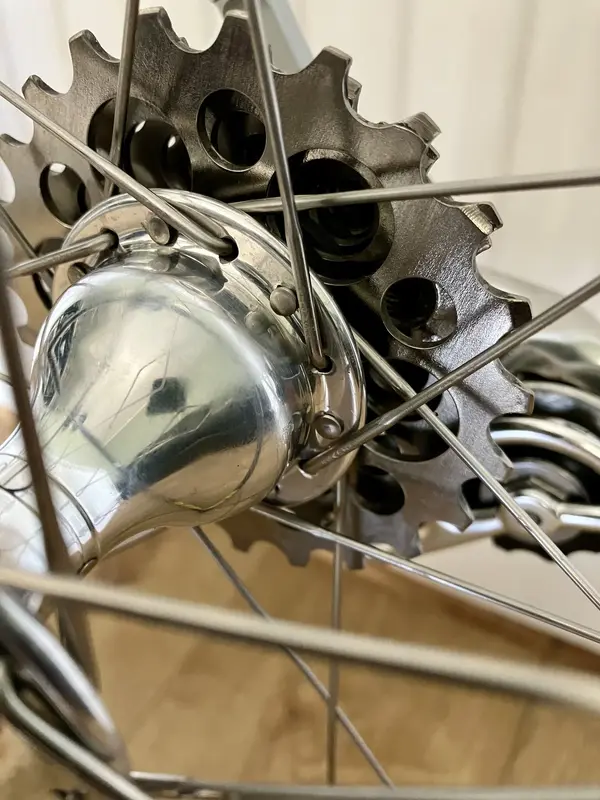
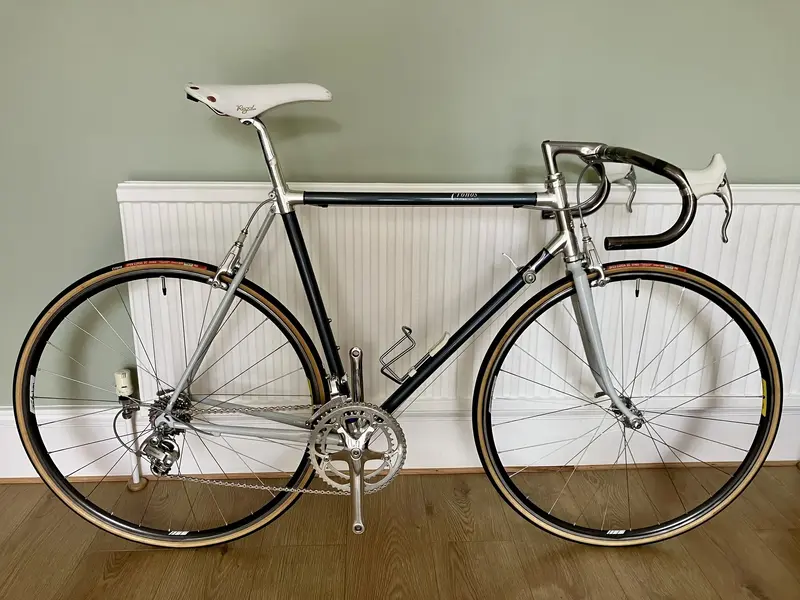
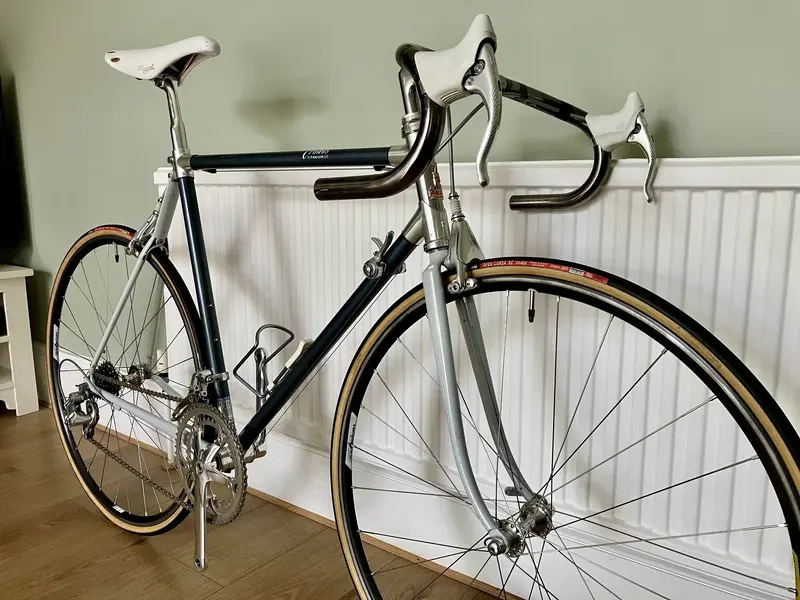
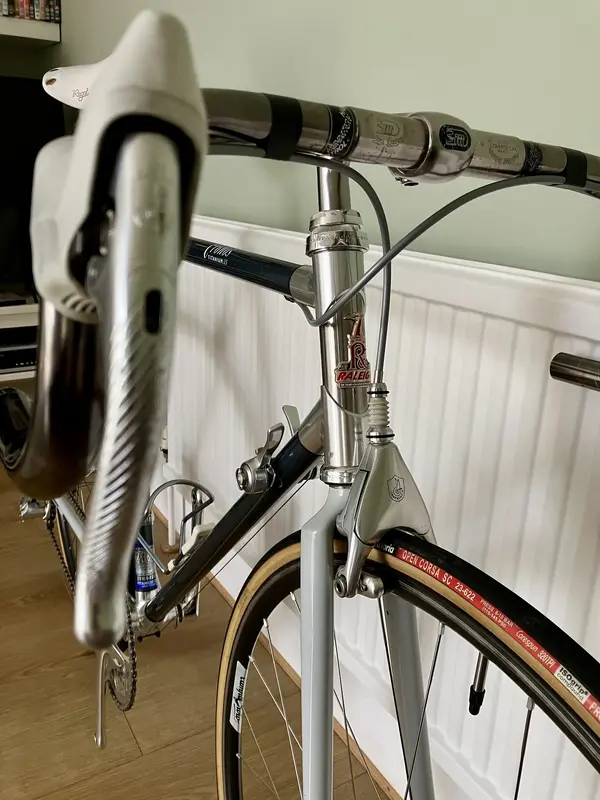
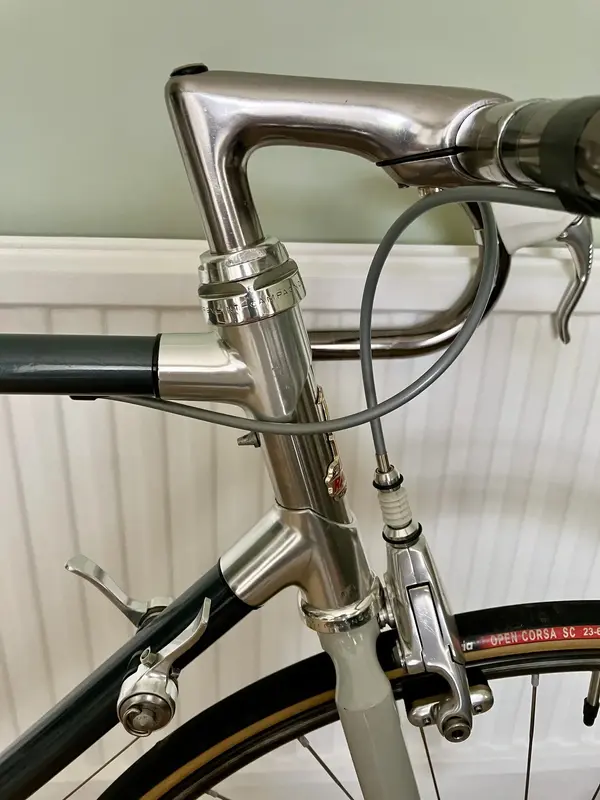
1990 Raleigh Dyna Tech Cronos Titanium (56)

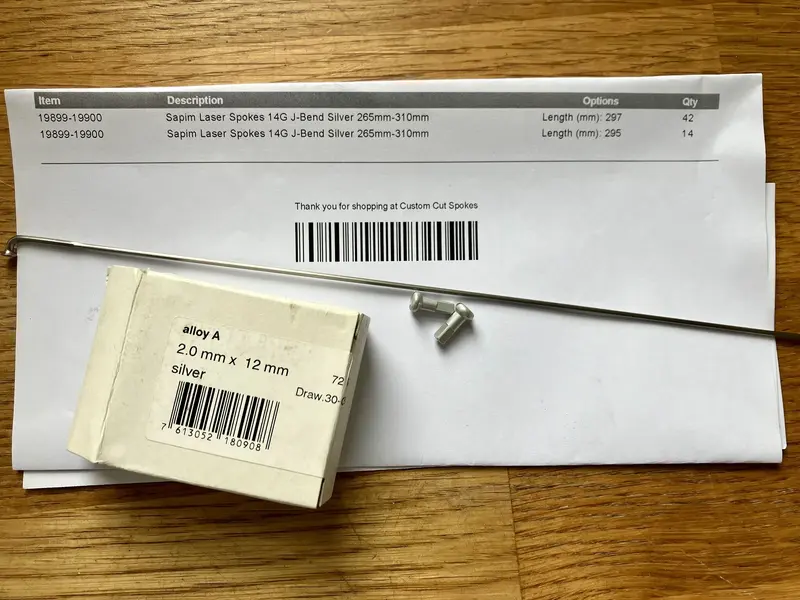
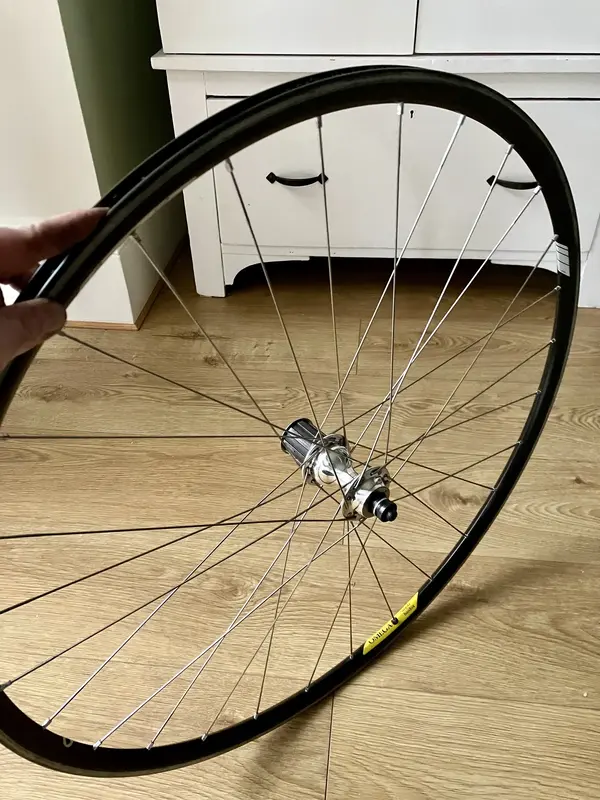
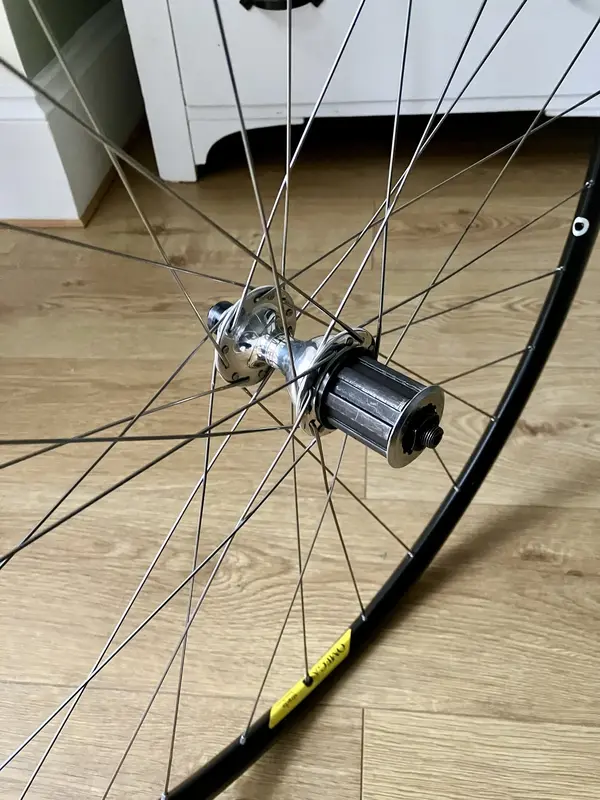
With the main components of the wheel sorted, I was eager to get the spokes organised. Using my cousin’s tool to find the ERD, and then with DT’s spoke calculator we soon established the optimum spoke lengths for a traditional cross 3 pattern.
I had planned on using either DT Revoltion or Sapim Laser spokes as they’re essentially the same as each other, and the best balance of weight and strength. As the Sapim are more widely available and significantly cheaper, it was an easy choice. They came in at 83p a spoke, and I’ll be using standard 12mm DT alloy nipples to help keep the weight down. I know what people say about alloy nipples, but providing you’re using quality nipples, and liberal amounts of copper grease when building them you’ll never see a problem. I’ve run them for years without issue. Plus, this bike isn’t going to see the rigours of our winter roads!

IMG_5890.jpeg

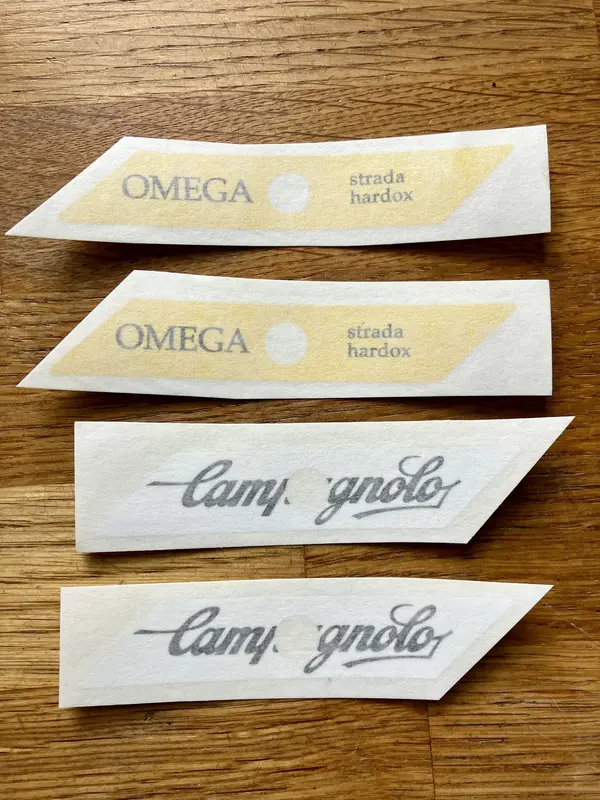
I also picked up some new rim decals for the other wheelset (the 32h ones) as the existing ones are just too scruffy. This 28’s are great though, and will clean up nicely.

IMG_5891.jpeg

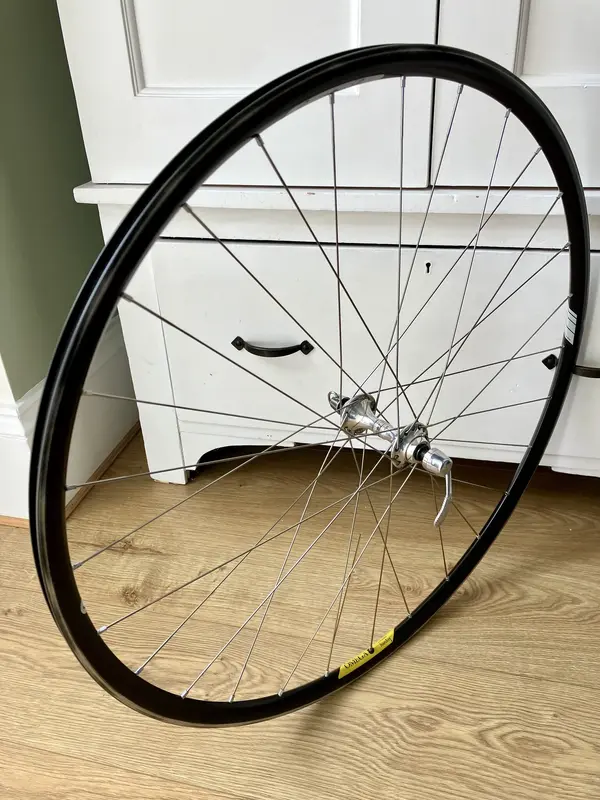
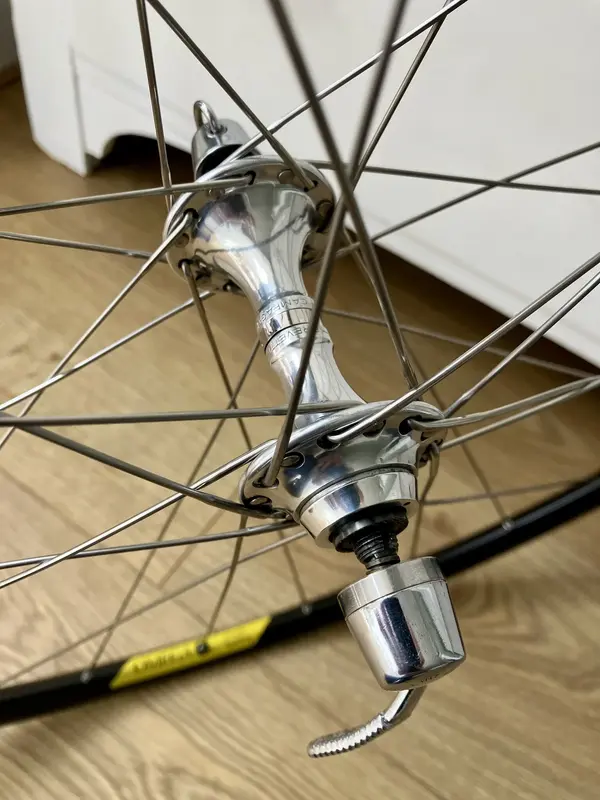
The spokes arrived yesterday, and I found an hour this morning to lace up the front wheel. I’ve lost track of how many wheels I’ve built now, but I think this is the 9th pair, and exactly the same spec as what I used on my 1991 Merlin Titanium, which I incidentally tested downhill at just under 50mph last week. The thing was solid 😁

IMG_5892.jpeg

IMG_5893.jpeg
 
Last edited:
I’ll get the wheels tensioned up properly in the coming days, but for now they’re straight enough and sat in the corner waiting for rim strips.

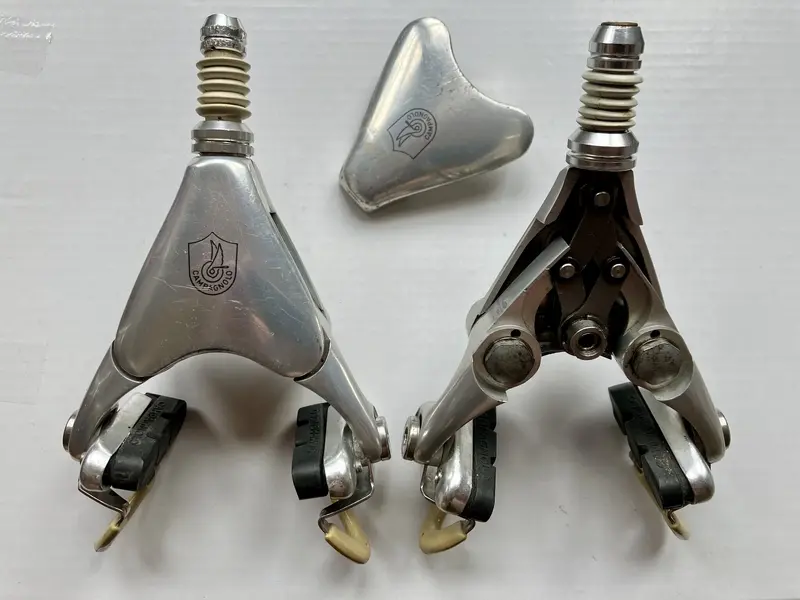
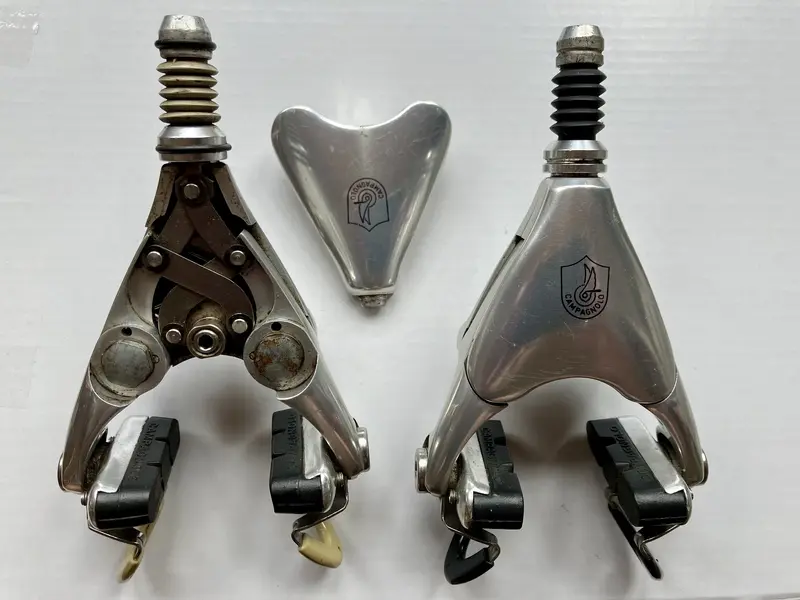
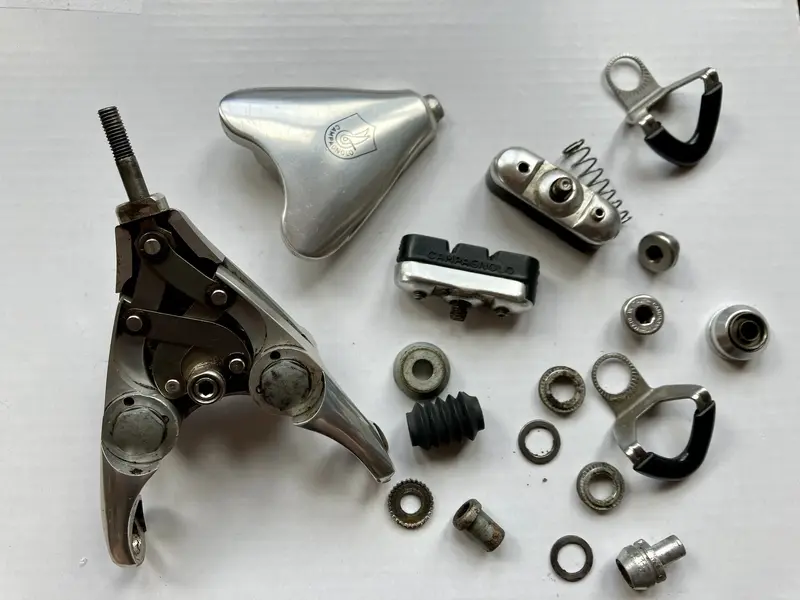
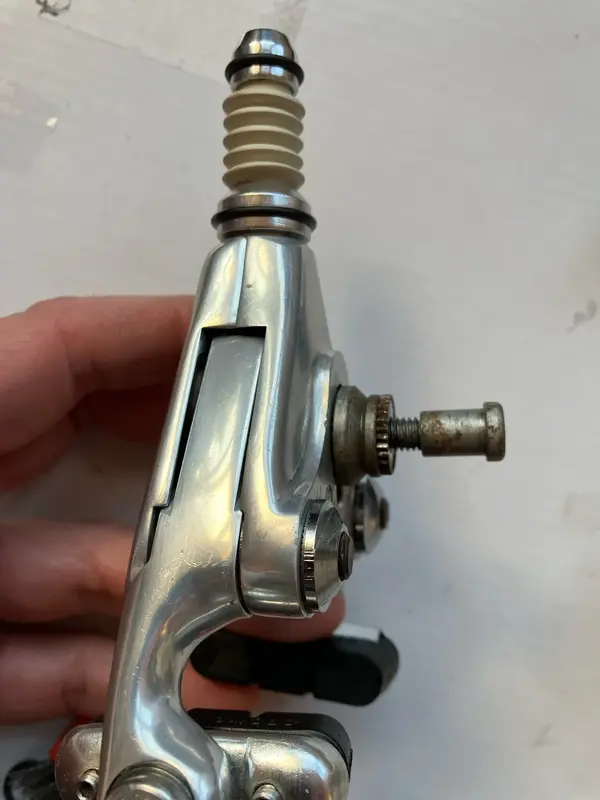
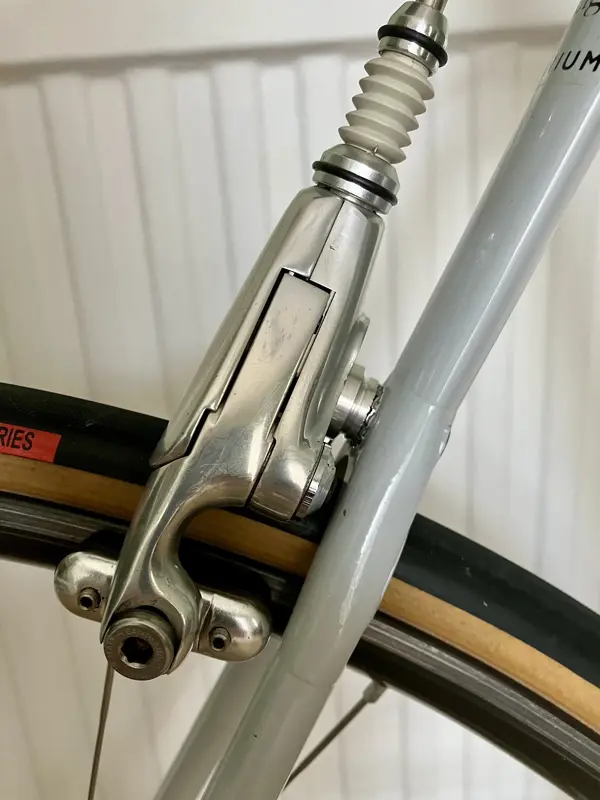
My attention has turned to the brake calipers. I’ve several pairs of delta brakes I can use, and had initially sorted them out by year/type so they were matched to the right groupset and frame. Upon closer inspection, the ones I’d allocated for this build were far more tired looking than I’d remembered. They are the 3 pivot 4th generation calipers, so best matched carefully to the correct lever as they’re not as efficient as the last generation. One of the face plates is damaged beyond use, and the arms are scuffed badly on the front brake. I looked into replacement parts for these, but the money people want for spares is ridiculous. So much so, that it’s easier to purchase another set and butcher one up for parts.

So, I picked up an externally identical pair of rear calipers that have the 5th generation internals. From my experience, these are the best version, using 4 strategically curved arms, and 5 pivots, these apply more efficient pressure per lever input than the others, although they’re best paired with Powergrade or Ergopower levers for optimal performance.

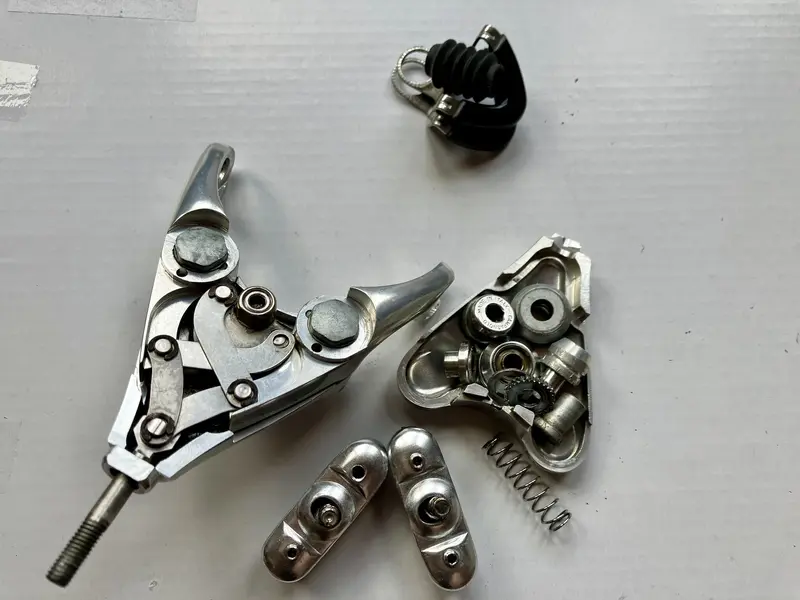
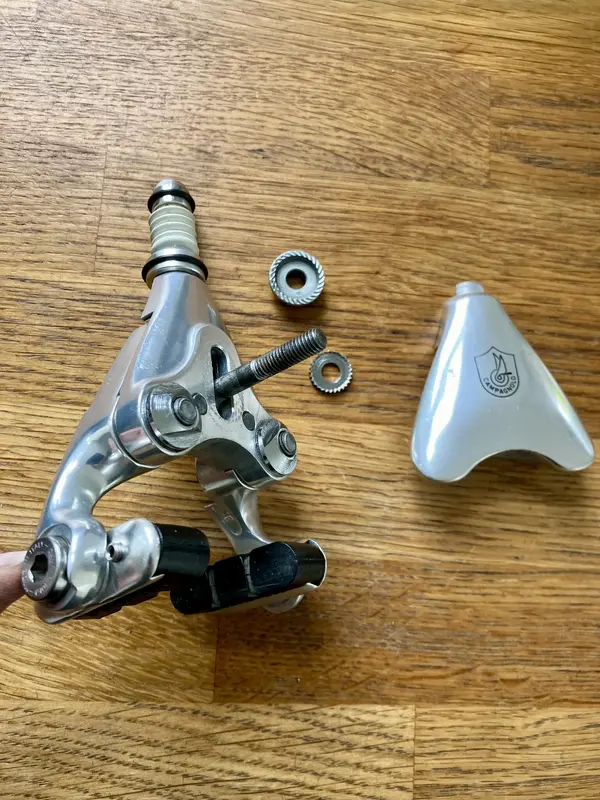
The 5th generation calipers here have a few issues, but they’re cosmetically better, and will stop me more effectively. I do need to strip them though, and swap out some bits, namely the front mounting bolt, a brake shoe adjuster, and a c clip. Sounds easy in a sentence, but far more complicated than you think as the arms and internal mechanism need to be removed entirely I. Prefer to allow access to the mounting bolt. I will clean up and select the best components for the final calipers, and then have a spare set of rear calipers that could be used for future spares, or repaired to use as a set of brakes if I find the bits cheap enough.

I originally intended to butcher up a pair of Croce D’aune calipers I have, but almost every component is different. I never really bothered with the CDA group as it was a bit of a let down; not quite as good as C Record, and seemingly no better than Chorus.

These are the original calipers I had stored for use…


IMG_5915.jpeg

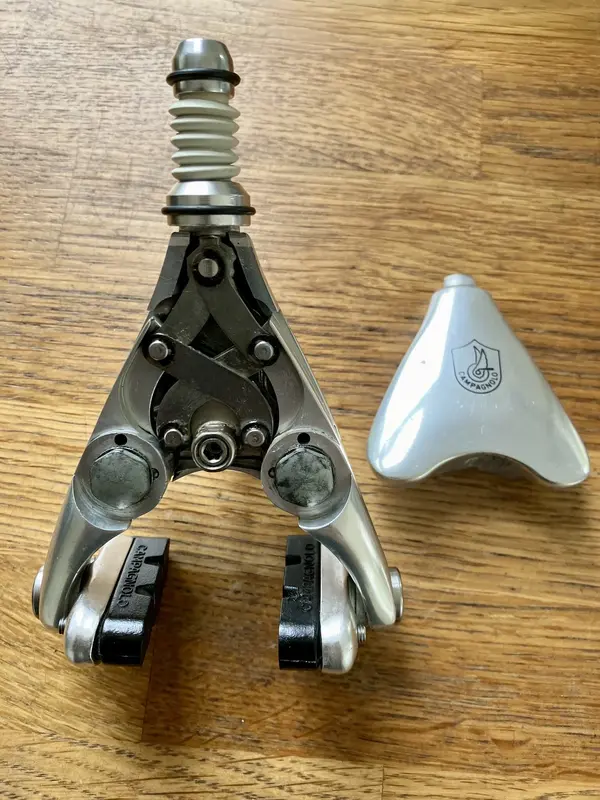
And these are the 5th gen rear calipers I bought as spares.

IMG_5916.jpeg

I’ll use this red brake as the basis for my new front brake. Starting to strip it down and clean each part, assessing and repairing along the way…


IMG_5917.jpeg

With all the dirt and grease removed I can start to see what needs what…

IMG_5918.jpeg

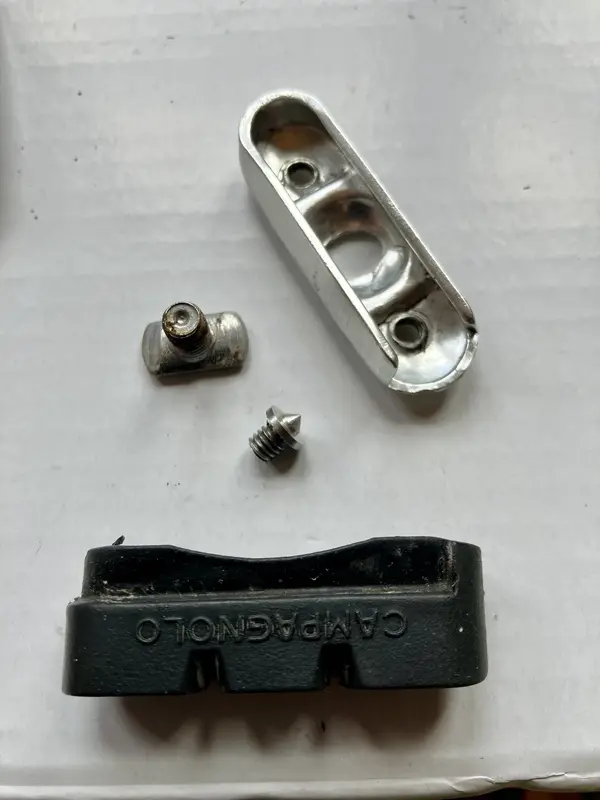
From the outside of the brake shoe you’d imagine there were two little grub screws as adjusters, but they’re not that straight forward ans you can see, so the missing one will need to be a genuine part replacement.

IMG_5919.jpeg

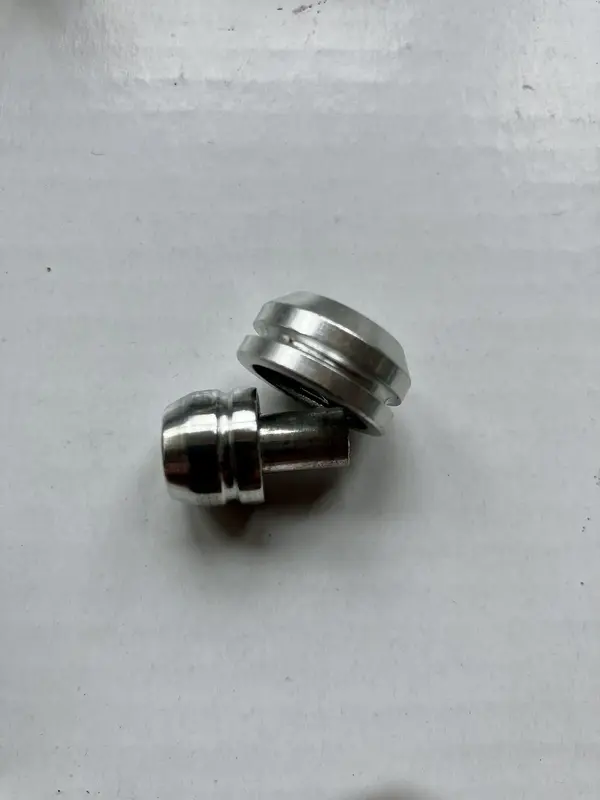
I stuck the cable adjusters in the end of my drill and ran them through several grades of sandpaper before polishing them up…

IMG_5920.jpeg

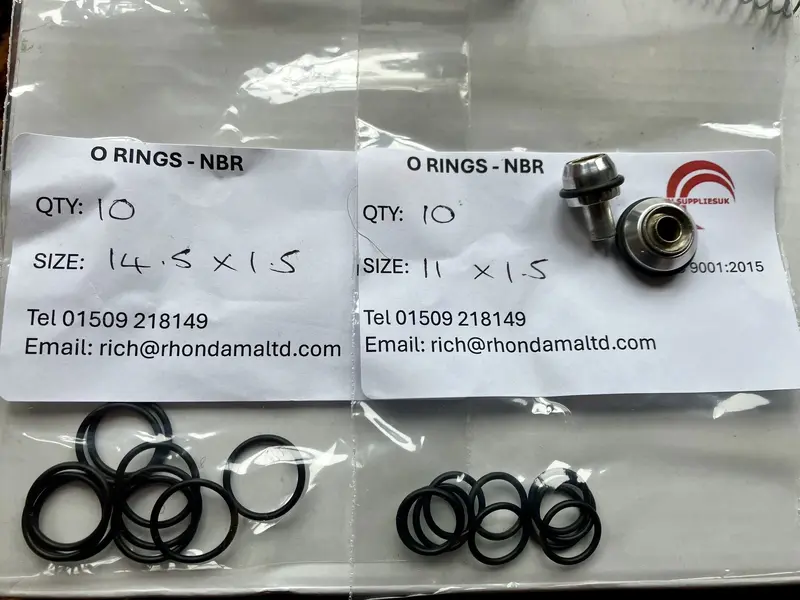
The rubber o-rings are available online at an inflated price, but I chose to measure my own and buy a lifetime supply for a few quid. The measurements are included in the photo for anyone wanting to know the specifics…

IMG_5921.jpeg
 
Actually, that job wasn’t as bad as I thought, and it went back together easily enough. Liberal amounts of grease was used in ensuring a smooth operation for years to come. The original factory grease around the tension springs was changed out too because it had hardened like plastic!

IMG_5922.jpeg

I do have some NOS spare rubber bellows, but I figured I’d try and salvage the ones I have for now, using bleach and a magic sponge. It worked pretty well, so I’ll repeat the process for the others.

Also. I’ve omitted the brake shoe guides as I never understood what use they were. I always thought they spoiled the lines of the brake, so I generally don’t run them. Plus, the original white ones haven’t faired the years very well, and they more often than not look dirty and yellowed.

IMG_5925.jpeg

And a picture of that all important front brake mounting bolt…

IMG_5927.jpeg
 
Last edited:
The wheels are now true (although I’m never confident with the Minoura wheel stand), but will need a last little go in my cousins Park stand to get them bob on. I can’t justify the expense of a quality wheel jig, but as I’m approaching double figures of wheel sets built, maybe I should!

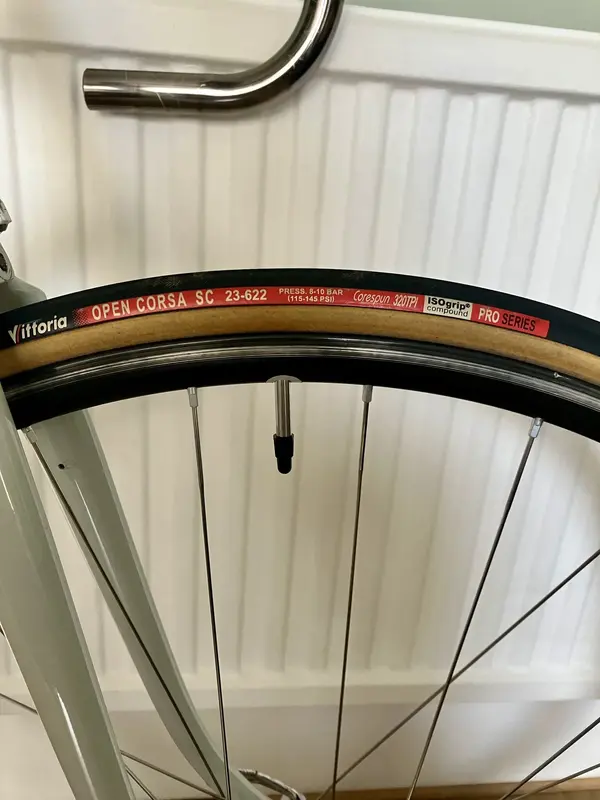
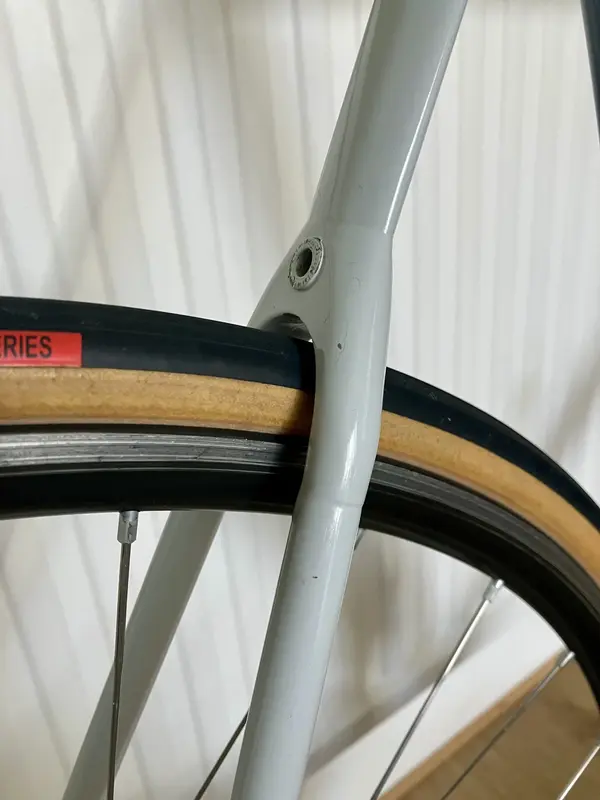
The rim tape turned up, and I instantly get them on so I could mount the tyres. I’ve been saving these tyres for this bike for a while now. They’re my all time favourite tyre, and if I see them, I buy them. I love that Vittoria still make amber wall tyres, but their current logo is a tad garish for older bikes. I wish they’d just do a run of 23mm ones with a more appropriate logo for us old boys. Feel free to start the campaign on my behalf.

IMG_6091.jpeg

I’ve converted my main road bike to TPU inner tubes. I was initially dubious about their claims, but after finding a brand I liked the look of, I bought a few sets. The difference on the road is noticeable; the bike feels more responsive, and it should do as each wheel is approximately 100g lighter. I chose ‘Think Rider’ tubes from Temu of all places because they’re reasonably priced at £5 each, plus they have a nice silver valve rather than the common black. This makes them ideal for retro applications, which is what you can see here. They’re not the lightest tube out there at 27g, but they’ve pretty valves, and they’re reliable. So far I’ve had no issues with them, and I’ve found I can run them about 20psi less than I have been with butyl tubes.

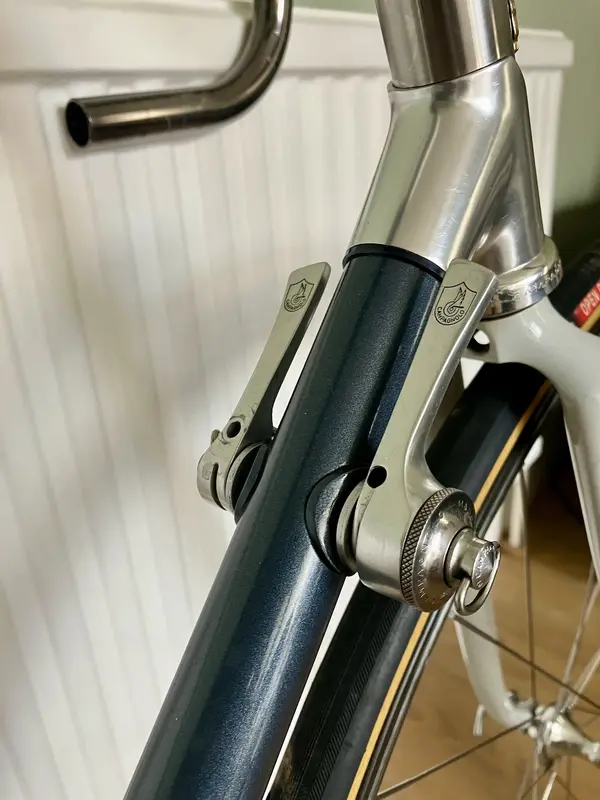
Clearance under the wishbone is lovely and tight!!

IMG_6092.jpeg

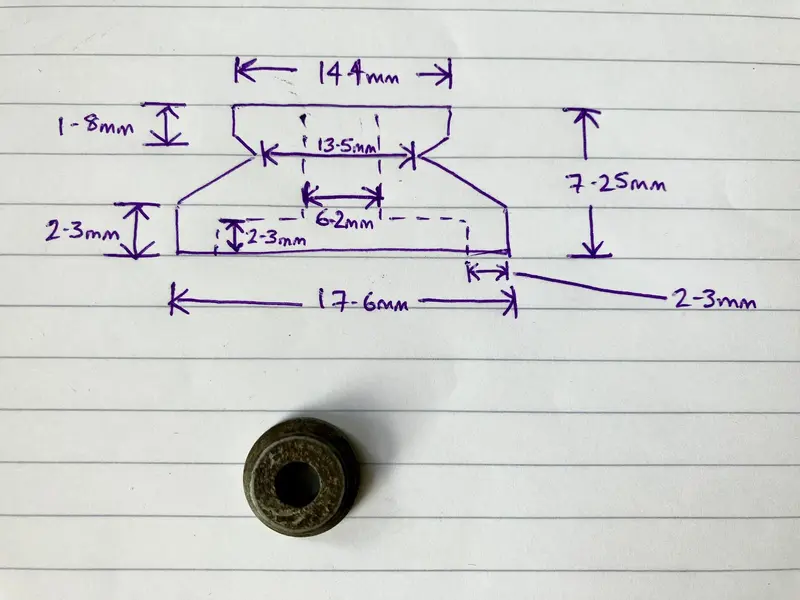
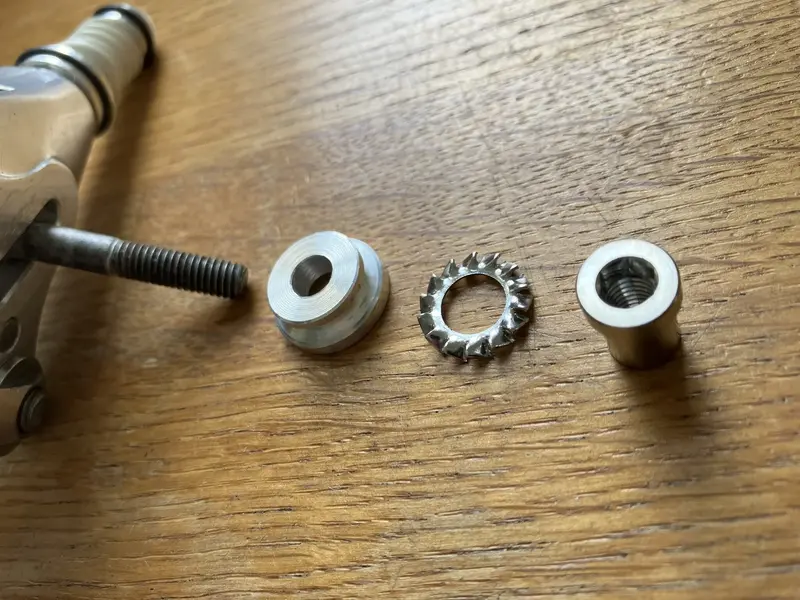
I’m not entirely happy with the mounting washers and bolts for the delta brakes, so I’ve taken the measurements for having them reproduced in either alloy or titanium. The originals are steel, and have rusted too much. I could restore them, but rust always come back when it’s more than just surface rust. Instead, having them replicated in alloy not only makes them lighter, but they’ll never rust. The bolts will be titanium, because they’ll never rust either.

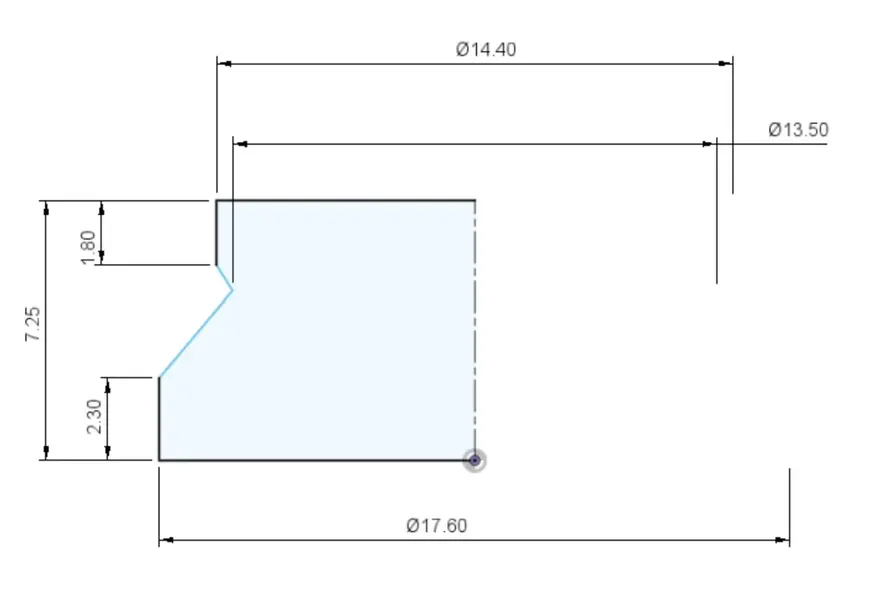
I’ve entrusted the job to Danson, who’s been a fantastic help in the past with other odd bits. I sent over the measurements, and within no time he’d come back with the technical drawings ready for sending to the lathe.

Here’s my problem, and this is actually the better one (minor, I know)…

camphoto_824023566.jpeg

So I sent him this (I’m so amateur)…

IMG_6096.jpeg

And he sends back this…

IMG_6097.jpeg
IMG_6098.jpeg

I’m excited to see what turns up when he’s finished.

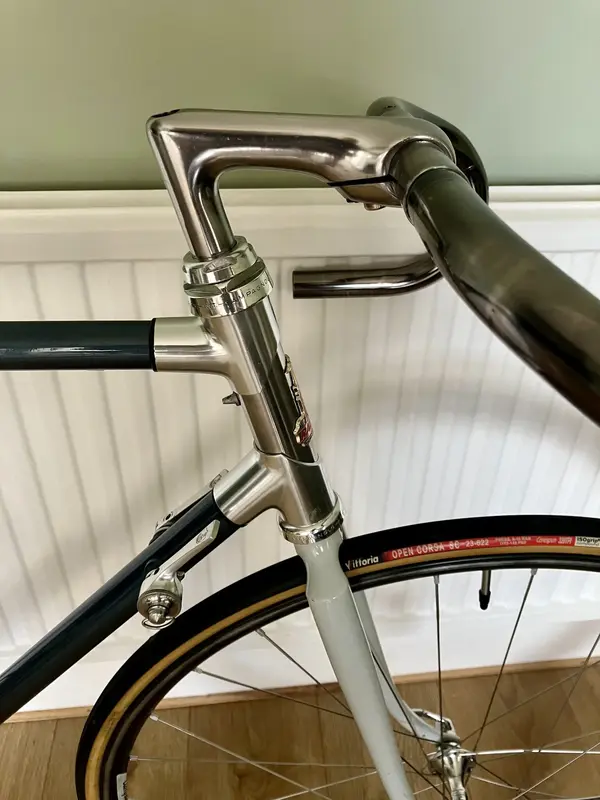
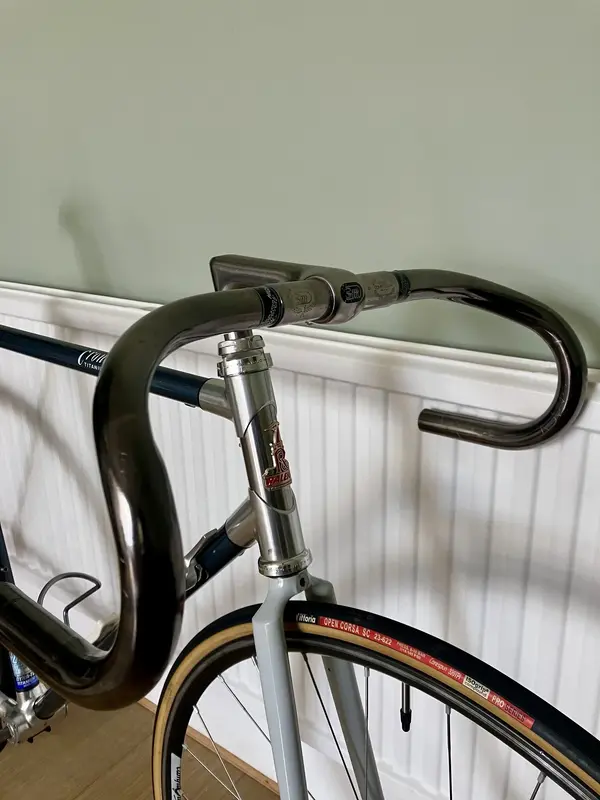
I’ve tried a few stems on the bike, all 3TTT, but various finishes. I’m settling on the mild gunmetal finish you see here because it kind of matches up with the titanium headtube. I had a fully polished stem on there, but it just didn’t sit right. Bars are 3TTT Super Competizione. I love the Ergo bars, but these are more in keeping with the year and demand at the time. They’ve a single groove at the front for the brake cable to hide inside under the wrap.

IMG_6094.jpeg

IMG_6095.jpeg

The gear levers became an issue because when I first imagined this bike, it was always 7 speed - dictated by the narrow rear end. Now that the back end has happily taken a 130mm hub for some time, I’m pushed to use a cassette hub, which in turn really dictates the upgrade to 8 speed. I’d totally forgotten about the levers, so was annoyed with myself when I fitted them and ran through the clicks, only to find 7 of them!

Solutions outside of buying another set of early synchro levers weren’t great. I remembered I had a few of those old synchro inserts in a toolbox in the shed - could there be an answer in any of them? No, they were all 6 or 7 speed. Different spacing for different brands of cassettes was all Icould find (it was so hard to get indexing before 1990!). I found a solitary 8 speed lever on eBay, which took a few weeks before my bid won and it subsequently turned up in the post. It was the lever produced just after these, late 1991 just before the curved levers (which actually work the best). Upon fitting this new lever, I realised that the bracket which stops it from going too far forward was missing. It was missing from the listing too, and I hadn’t noticed. Not an issue, I’ll use the existing one - no I won’t, because Campagnolo changed the size! Determined to make these 7 speed levers 8 speed, I stripped both old lever and the new one down. The inserts looked interchangeable, so that’s what I did, and here is the 8 speed synchro lever…

IMG_6093.jpeg

So, the is as far as it gets for now. Brake calipers will likely be next, along with levers and saddle. I’m putting off the unenviable job of stripping back the cranks and polishing them by hand, but they really need doing now before they hold everything up.

IMG_6099.jpeg
 
Last edited:
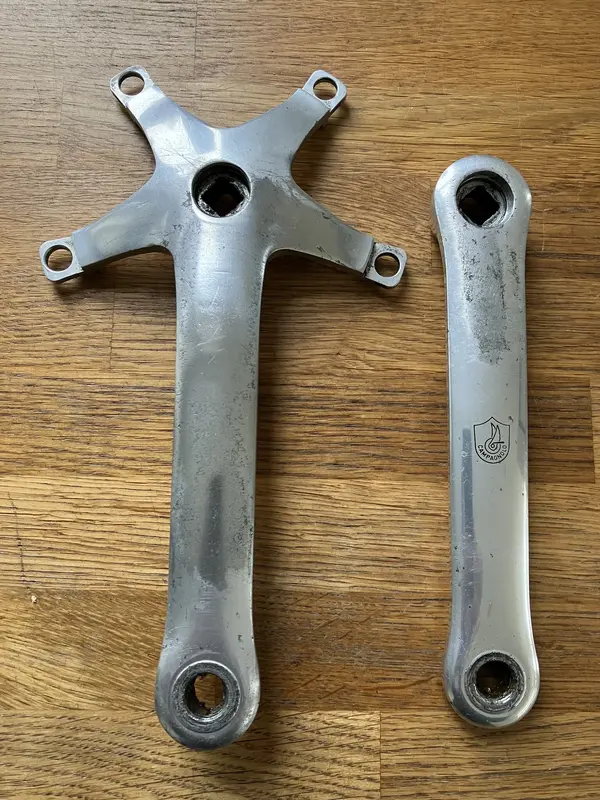
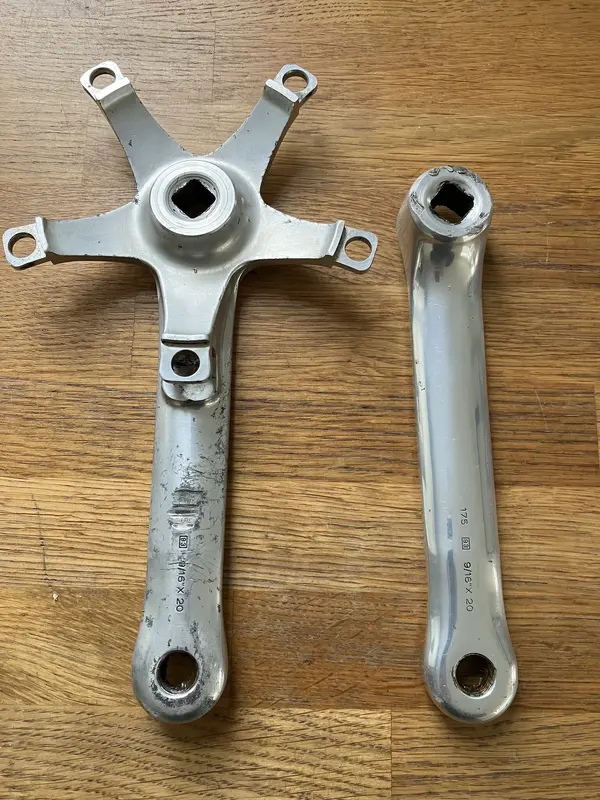
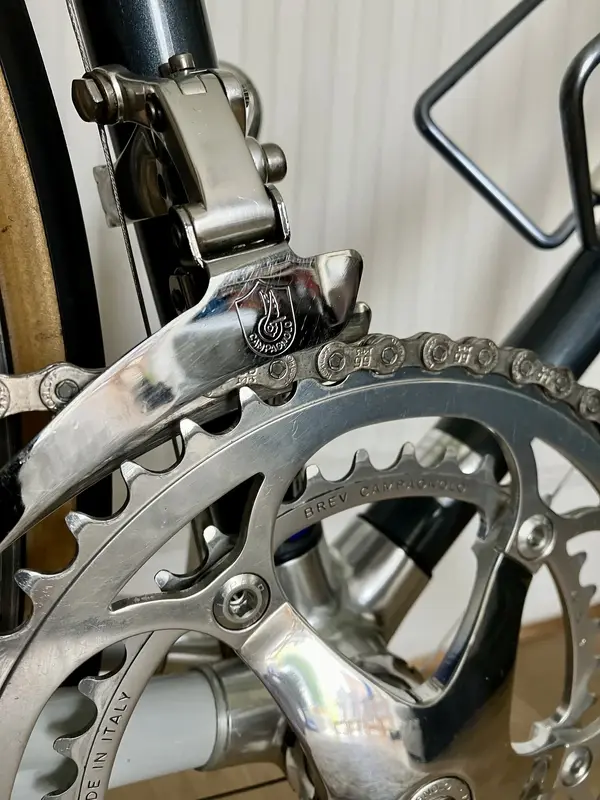
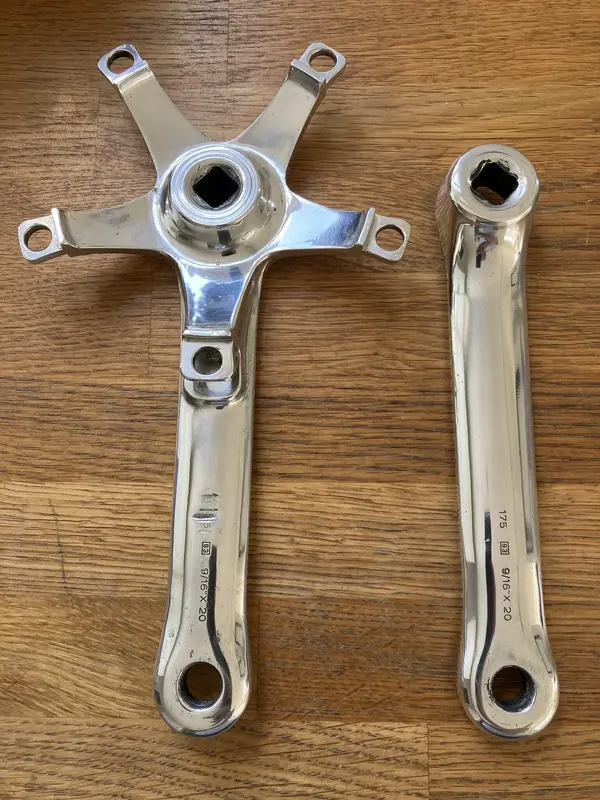
I’ve a few sets of C Record chainsets that are in need of restoration of some sort, whether it be scuffed cranks or worn rings. The set I’ve chosen for this build are probably the worst condition, and they’ve no rings, self extractor, or bolts. The plan was always going to involve polishing them…

IMG_6130.jpeg


IMG_6129.jpeg

Not everything will polish out, especially the deep scratches on the back of the drive side.
I started the process by hand, using the course grade of emery paper to take out the rough parts, and remove the anodising that was left. It was taking so long to do, that I gave up and took them to a metal polisher in Liverpool for finishing. Whilst I was at it, I took a few other bits for future projects. The results are so much better, and although the cranks aren’t perfect, they’ve got a new lease of life for this build.

IMG_6215.jpeg

IMG_6214.jpeg

The pictures show them straight from the polisher, so there’s still a bit of dry polish here and there to remove.
 
Last edited:
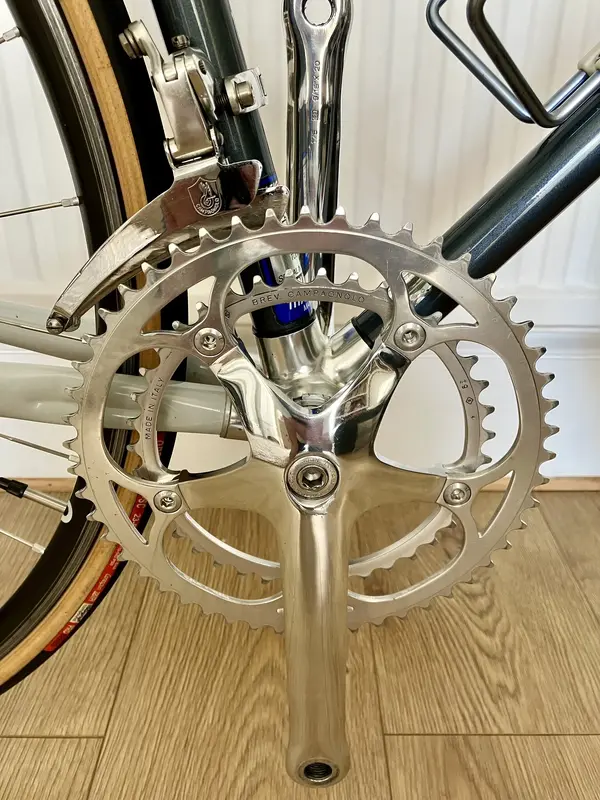
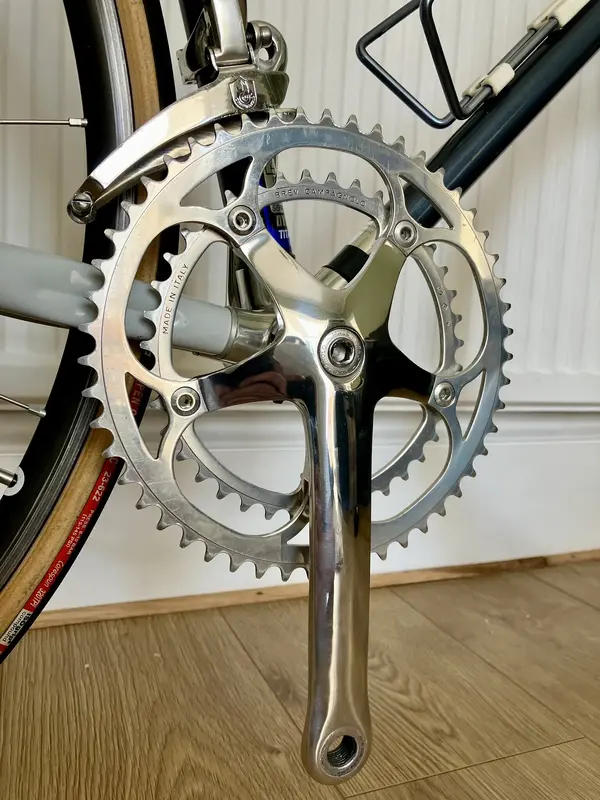
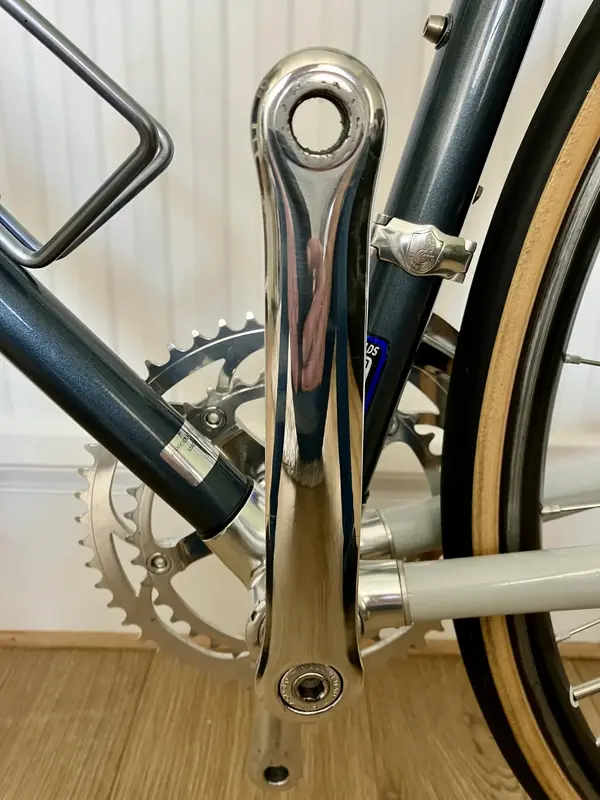
With the cranks polished, I can build them up and set in place. I’ve used alloy chainring bolts rather than the genuine ones, as it takes a bit of weight off, along with looking fresher than the half rusty chromed originals. The outer chainring is unbranded, and as close as I could find to looking like a Campagnolo one. I’ve gone to a 51T because of the tighter ratios on the cassette I’m using. My cousin gave me the chainring bolts a few weeks ago, which was a nice surprise, so I’ve put them to use here, rather than looking for the genuine self extractor bolts. You can’t use the titanium self extractors from China either because C Record cranks use a reverse thread. IMG_6220.jpeg

IMG_6222.jpeg

IMG_6228.jpeg

Although the brakes aren’t yet ready to install, I’ve rested them in place to visualise things further along than they are (we all do this right?).
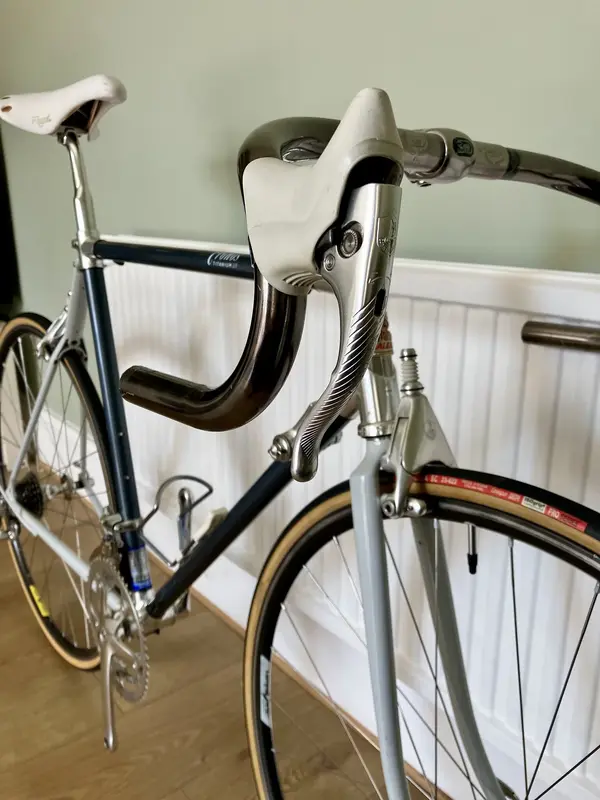
The levers are the later powergrade type, so the braking efficiency will be at its maximum for this set up. I’ve read that the later 5 pivot deltas didn’t need the powergrade levers as much as the earlier generations, but I can’t confirm that anywhere. The hoods are in pretty decent shape, but will need a clean up to get them as white as possible!

The saddle is an old favourite, but this time in white.

I’ve procrastinated over the cable outers for weeks, and can’t settle on a colour. I almost went with very light grey, but then started leaning towards white. I had a set of pearl white like the originals, but they look dirty. 😂

IMG_6223.jpeg

IMG_6224.jpeg

IMG_6221.jpeg

IMG_6225.jpeg

IMG_6226.jpeg
 
It’s been a distracting month or so with work, and home commitments, so very little time has been spent on the finishing of this.
A couple of hours this week has seen it push to almost being completed.

I actually installed the gears and brakes with white outer cables, but they couldn’t settle on me. I’d initially had a very light grey in mind, then switched to genuine pearl white ones in a quest for originality. But the original thoughts of light grey wouldn’t go away!

IMG_6558.jpeg

IMG_6557.jpeg

Brakes were a bit fiddly to set up, despite having done that task numerous times since 1990; they were just awkward to balance. It’s likely because they’ve been apart, and the main pivot points on the arms needed fine tuning to ensure equal tension either side.

IMG_6555.jpeg

IMG_6554.jpeg

IMG_6550.jpeg

I forgot to show the spacers made by Danson too. So, from left to right, there’s the hollowed out alloy spacer he made, then there’s the stainless serrated washer, and finally a titanium allen bolt. It’s very subtle, but on the whole, much cleaner and a tad lighter.

IMG_6338.jpeg

Once the cable colour was decided, I could dial in the shifting. For the life of me, I couldn’t get the rear gear lever to synchronise properly. I had it apart several times, fiddling with the insert and checking it was a match, but it just wouldn’t play. The colour marking on the insert has worn away, and despite it having 8 clicks, they’re not the same as Campagnolo’s spacing for 8 speed.
Rather than buy another insert, I decided to get the 1991 spec levers which are a much better design, with a far greater reputation for reliability. I wrestled with the idea, as I was trying to stay close to my original build when the frame would have been new. But when I think back, I actually bought the first ergo levers when I finally received my frame in 1991, so I see this as a very minor compromise.

IMG_6553.jpeg

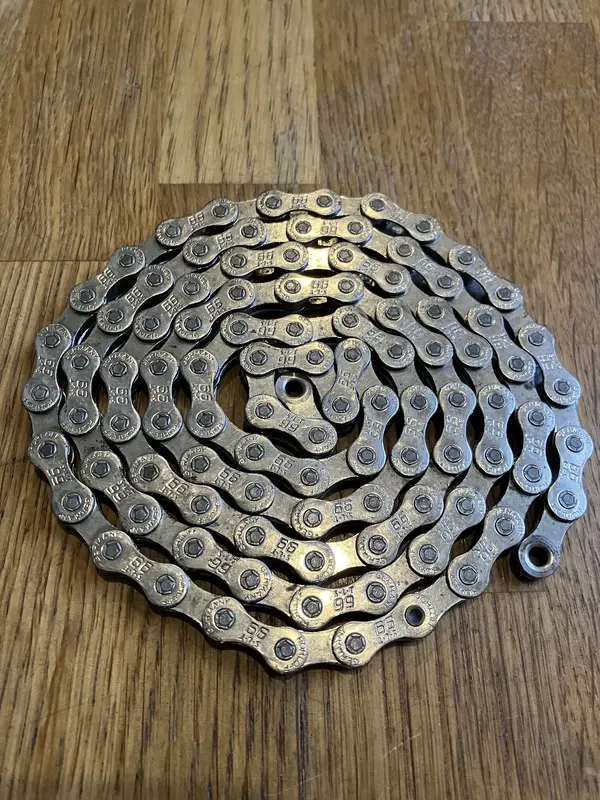
The choice of chain is same as it was back then, a Rohloff SLT-99, as endorsed by Campagnolo. They’re actually becoming pretty hard to find, and consequently they command a premium price. This one was very lightly used (checked on my Rohloff chain checker), but painfully it was three links short when installed. Luckily though, I’ve always kept those extra few spare links over the years of using these chains. So a quick delve into my spares revealed about 11 brand new links from all those very old chains.

IMG_6470.jpeg

IMG_6552.jpeg

These weren’t the prettiest of C Record mechs, but they were actually the first that properly worked as they emulated Shimano’s slanted parallelogram.

IMG_6551.jpeg

On the list of the final few things to do, there’s bar tape (now I’m happy with cable lengths and lever position), a down tube decal, and a bit of a project with some pedals. Originally I used Time Titan Magnesium, but finding cleats is almost impossible (why hasn’t anyone 3D printed these yet?). I’m opting for my other favourite, which is the Look Carbo Pro, but I don’t like their limited colours of either mid grey or red.
 
Last edited:
Back
Top