Yeti ARC restoration - My #1 'want' bike since 1991

To be honest those Rivnutz would scare the holy crap out of me as they've gotta be one hell of a tight fit
and will need some persuading to get them in.... and all that fresh paint !

Got to ask, your either Brave, Dumb or fooking ballsey to leave them to last,
 
Smithjss70":2o8h7rbs said:
Are you going to pop rivet the stops yourself? Would be great to video the process if you do. I have some black ones that I want to swap out with turquoise on my ARC AS but haven't built up the courage to do it yet. :oops: :D

It's not so much the installation but the drilling out of the current ones and having to disassemble the front end to shake out the rivet.


For the stops, I did drill them out before and will rivet them back in. Actually, I've already done so. The drilling out of the rivets is not hard at all. I was a bit nervous when I did it. I've drilled out rivets before, but for this I didn't want to F'up the frame. Just use a small bit, drill the center, then (if you have to) go the next size up. The rivets are 3/8". I used a bit smaller than 3/8 to pop the center of it out, then used a 3/8" to slowly drill it out. No issues.
 
Re:

so cable stops and rivets....

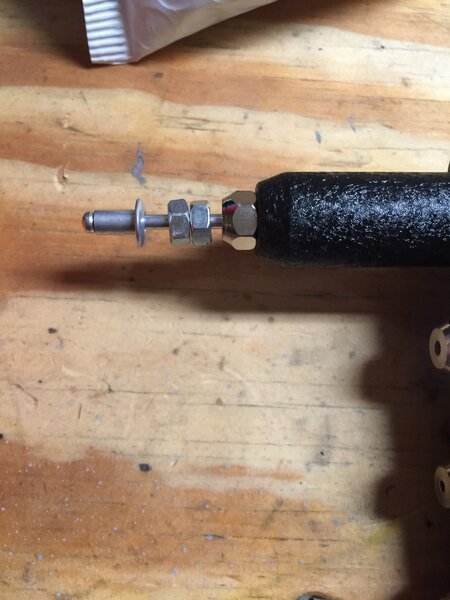
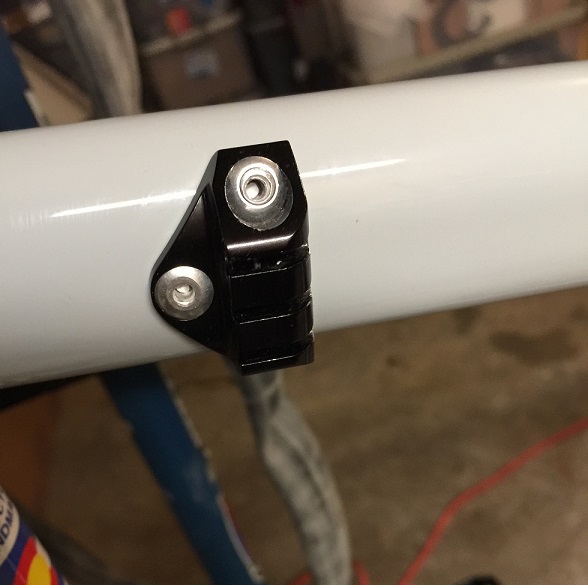
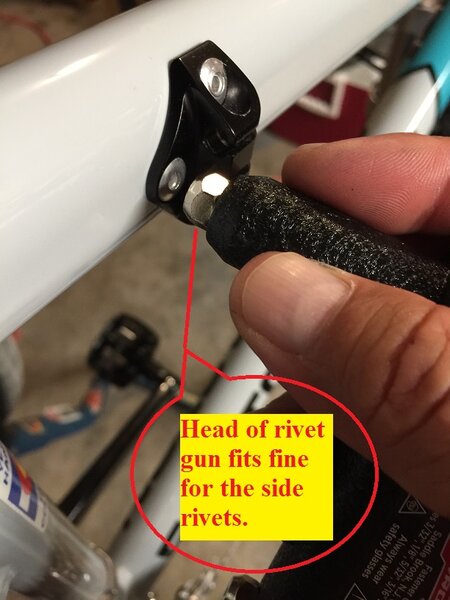
I believe the rivets were 3/8". Mounting the stops using the side holes was easy due to the amount of room for the head of the rivet gun.
 

Attachments

  • IMG_8432.JPG
    IMG_8432.JPG
    68.7 KB · Views: 419
Re:

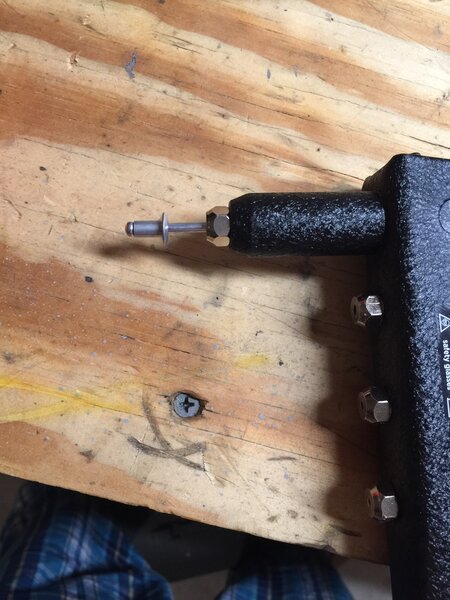
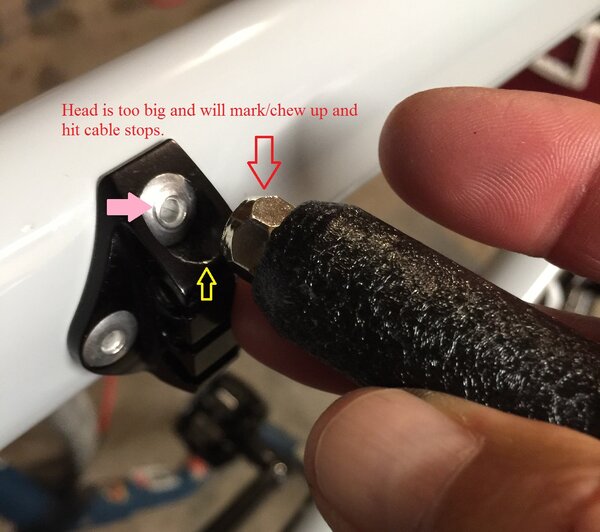
but for the top and bottom rivets, ya gotta use a cheat or else the head of the rivet gun will damage and marr up/chew up the cable stops. (at least the gun I was using had a big head on it. If you have a smaller head on your rivet gun, you many not need to use a cheat.) The cheat will leave only a very minor mark/ring on the rivet. You can see it by the pink arrow.
 

Attachments

  • IMG_8433.JPG
    IMG_8433.JPG
    158.1 KB · Views: 418
Re:

This is one of my lessons learn and hopefully someone will avoid it when they do their Yeti.
I didn't do this on the first bottom hole for one of the cable stops and it marked up the stop. Not too bad and it's easily hidden by a sharpie. I did the error on the 1st hole, but for the rest I used this cheat.
 

Attachments

  • IMG_8434.JPG
    IMG_8434.JPG
    142.5 KB · Views: 418
  • IMG_8431.JPG
    IMG_8431.JPG
    206.5 KB · Views: 418
Retro Spud":1hb6yhf8 said:
To be honest those Rivnutz would scare the holy crap out of me as they've gotta be one hell of a tight fit
and will need some persuading to get them in.... and all that fresh paint !

Got to ask, your either Brave, Dumb or fooking ballsey to leave them to last,


Rivnutz! That's what their called. I've heard it before but not cared enough for it to sink in. LOL!

Once I got the frame, I let it sit for a full week inside my house to let the paint fully cure. I'm not sure if it needed to or not, but I was just being cautious. When I installed them as a precaution, I used blue painters masking tape to tape around the holes while fitting them and taping them in with a small hammer. The holes were bigger and the fit was a lot looser than I wanted. I'm not going to install a water bottle cage. All that will be in it is the water bottle cage screw. So I just put a drop of super glue in there to make sure they didn't rattle out. Easily low tech cheat that you wouldn't know if I didn't mention it.

Brave..no.
Dumb...maybe just a little.
Ballsey...fookin' why not.
Just chalk it up to not knowing any better and flying by the seat of my pants! Haha! :LOL:
 
Re:

Another lesson learned....

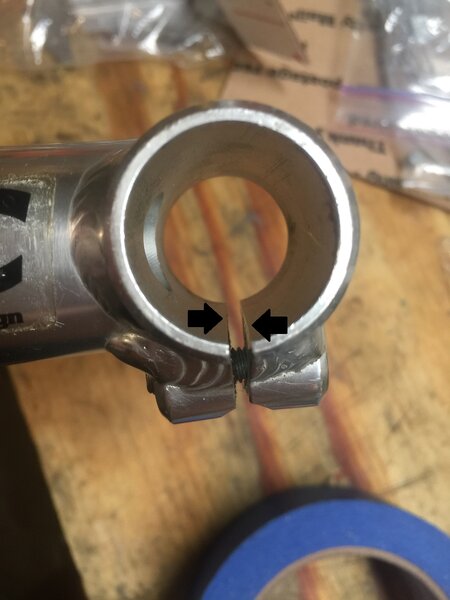
I've built many a bikes in my day mostly high end stuff, but my fair share of low end stuff for bikes sales in a shop. Rarely the exotic stuff like others on this site have done. I know of the trick preventing scratches on your handlebars by using a penny as a stop and threading the pinch bolt backwards to widen the diameter of the clamp to get the bars mounted.

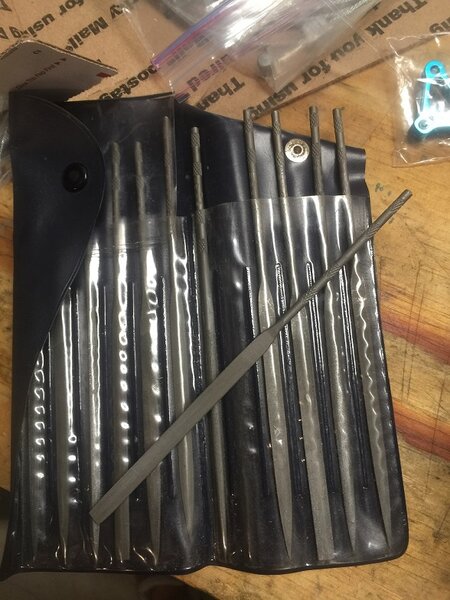
But for this build it just hit me. Maybe it's because I've been watching a lot of YouTube videos on building a custom 1911 pistol and all the filing they do to it. For this build, any points of contact on the frame or parts that would scratch up or F'up another surface, I would get out my small files and file the edges.

For instance...
- the stem, I gently filled of the square edge and any burrs that would mark up the handlebars. Since it's aluminum, I don't have to worry about corrosion.
- the seat tube and post. I gently filed off the square edge and any burrs that would mark up the seat tube when installing.
 

Attachments

  • IMG_8437.JPG
    IMG_8437.JPG
    91.5 KB · Views: 415
  • IMG_8436.JPG
    IMG_8436.JPG
    111.6 KB · Views: 415
Re:

oh, in the end, the riveted cable stops = no problem and no major casualties. :LOL:
 

Attachments

  • IMG_8430.JPG
    IMG_8430.JPG
    30.4 KB · Views: 412
Re:

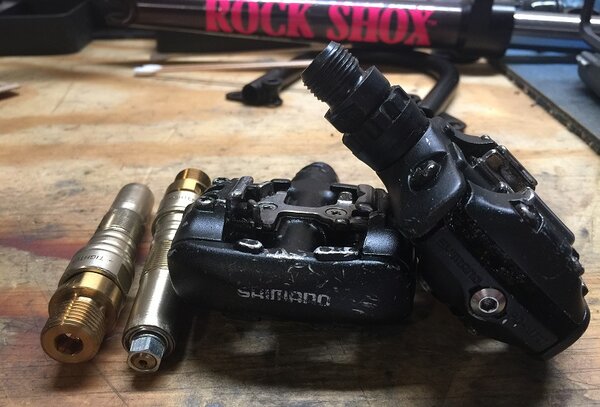
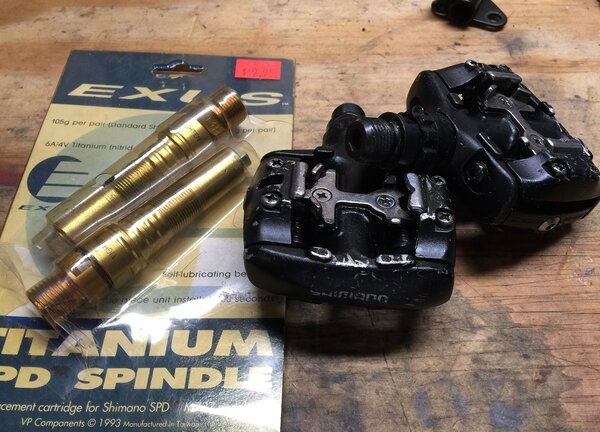
next part ... of the next part- pedals.
*It's like Austin Powers saying, "Allow myself to introduce...myself." :LOL:

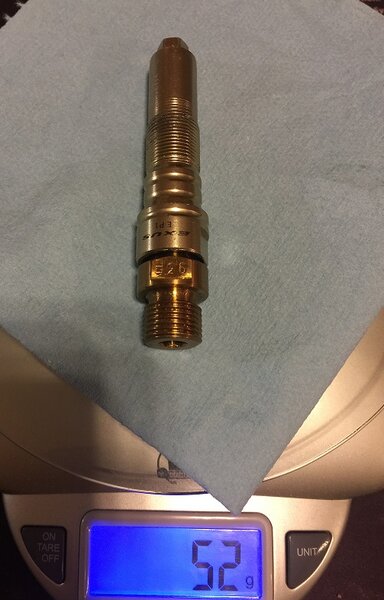
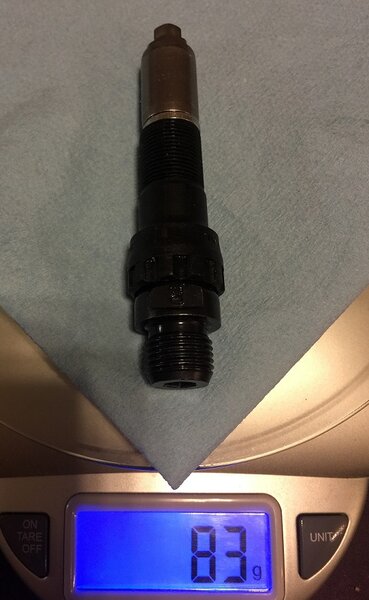
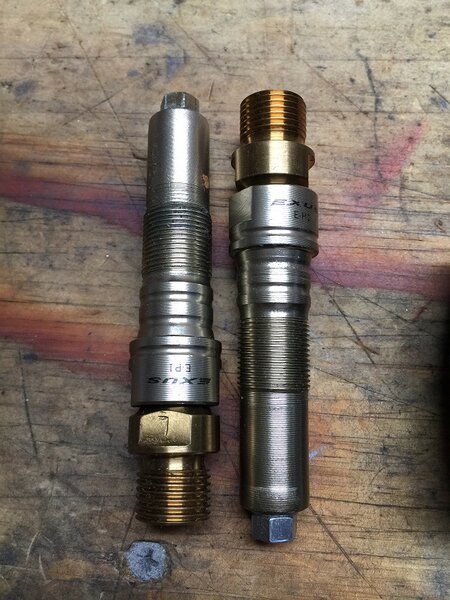
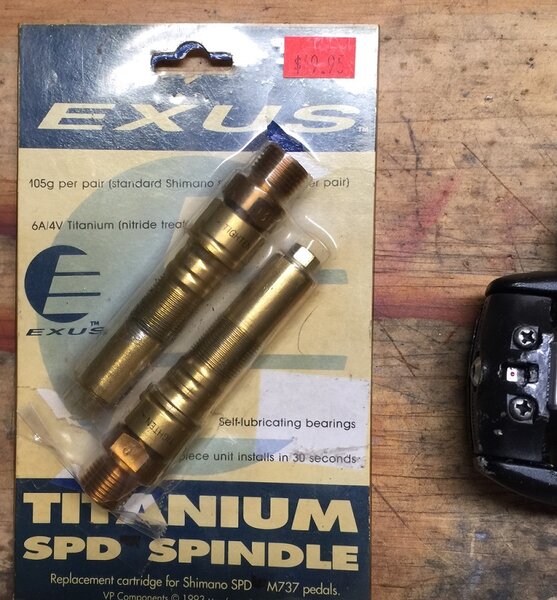
Before I even got my frame, I found some fair lightly used 737 and some Ti axles for them.
It's barely over a 30g savings per axle and could shed more weight if I were to take a good healthy shit. ....But Ti stuff is COOL! :LOL:

*price on the axle was the shop price back then I guess.
 

Attachments

  • IMG_8421a.JPG
    IMG_8421a.JPG
    61.5 KB · Views: 411
  • IMG_8421.JPG
    IMG_8421.JPG
    61.7 KB · Views: 411
  • IMG_8415.JPG
    IMG_8415.JPG
    113 KB · Views: 411
  • IMG_8413c.JPG
    IMG_8413c.JPG
    79.9 KB · Views: 411
  • IMG_8413b.JPG
    IMG_8413b.JPG
    211.8 KB · Views: 411
  • IMG_8413a.jpg
    IMG_8413a.jpg
    150.5 KB · Views: 411
Back
Top