Fixing a Victorian

That must feel good starting to get parts ready to hang off the frame.

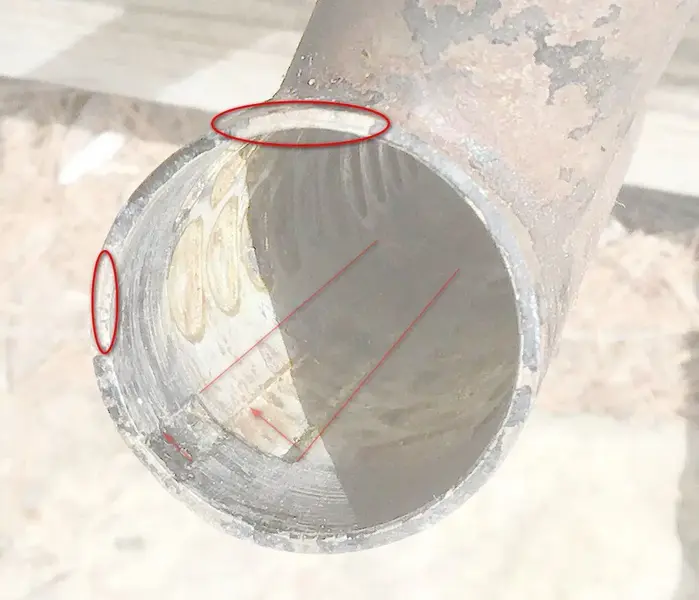
Throwing this out to you metal work folks. I'm going back to dimples, pimples or holes, so sorry to side track a bit. The photo on page 1 is down the head-tube if I'm not mistaken? Anyhow, I did some photo tweaking. This is what I think.

The head-tube starts out in life thin gauge. Probably the Sifret stuff or something seamless.

An additional "universal shim sort of thing" is made with drilled out holes in sheet metal. It's rolled to a round shape, and inserted in the head-tube. Springyness and friction keep it all in place ready for brazing. Gaps between the headtube and lattice shim are filled through capillary action.

I've marked bits in red which I think are clues. This way, I guess you get all the advantages of light and strong. You would also get a perfectly smooth outer surface, which I can't see how it could be done with pressing. I can't see how you could get a drill / milling machine in such a small diameter, but you could get a blow torch in. The end result is impressive, and could be used to beef-up other areas while keeping the weight down. I don't know if double butted tube were invented back then.

1655825232694.jpeg
 
That must feel good starting to get parts ready to hang off the frame.

Throwing this out to you metal work folks. I'm going back to dimples, pimples or holes, so sorry to side track a bit. The photo on page 1 is down the head-tube if I'm not mistaken? Anyhow, I did some photo tweaking. This is what I think.

The head-tube starts out in life thin gauge. Probably the Sifret stuff or something seamless.

An additional "universal shim sort of thing" is made with drilled out holes in sheet metal. It's rolled to a round shape, and inserted in the head-tube. Springyness and friction keep it all in place ready for brazing. Gaps between the headtube and lattice shim are filled through capillary action.

I've marked bits in red which I think are clues. This way, I guess you get all the advantages of light and strong. You would also get a perfectly smooth outer surface, which I can't see how it could be done with pressing. I can't see how you could get a drill / milling machine in such a small diameter, but you could get a blow torch in. The end result is impressive, and could be used to beef-up other areas while keeping the weight down. I don't know if double butted tube were invented back then.
View attachment 637535
Most likely right, crazy stuff. It’s probably reinforced like that in places we can’t see.
 
That must feel good starting to get parts ready to hang off the frame.

Throwing this out to you metal work folks. I'm going back to dimples, pimples or holes, so sorry to side track a bit. The photo on page 1 is down the head-tube if I'm not mistaken? Anyhow, I did some photo tweaking. This is what I think.

The head-tube starts out in life thin gauge. Probably the Sifret stuff or something seamless.

An additional "universal shim sort of thing" is made with drilled out holes in sheet metal. It's rolled to a round shape, and inserted in the head-tube. Springyness and friction keep it all in place ready for brazing. Gaps between the headtube and lattice shim are filled through capillary action.

I've marked bits in red which I think are clues. This way, I guess you get all the advantages of light and strong. You would also get a perfectly smooth outer surface, which I can't see how it could be done with pressing. I can't see how you could get a drill / milling machine in such a small diameter, but you could get a blow torch in. The end result is impressive, and could be used to beef-up other areas while keeping the weight down. I don't know if double butted tube were invented back then.
View attachment 637535
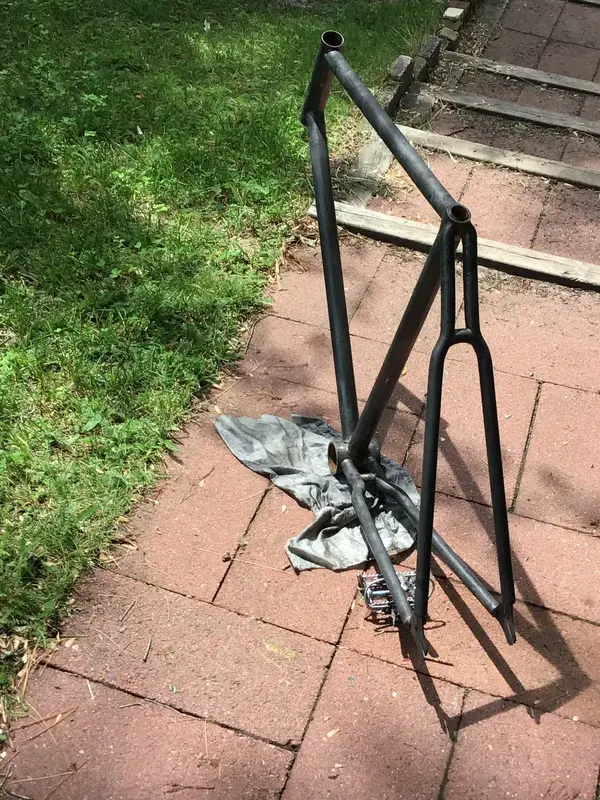
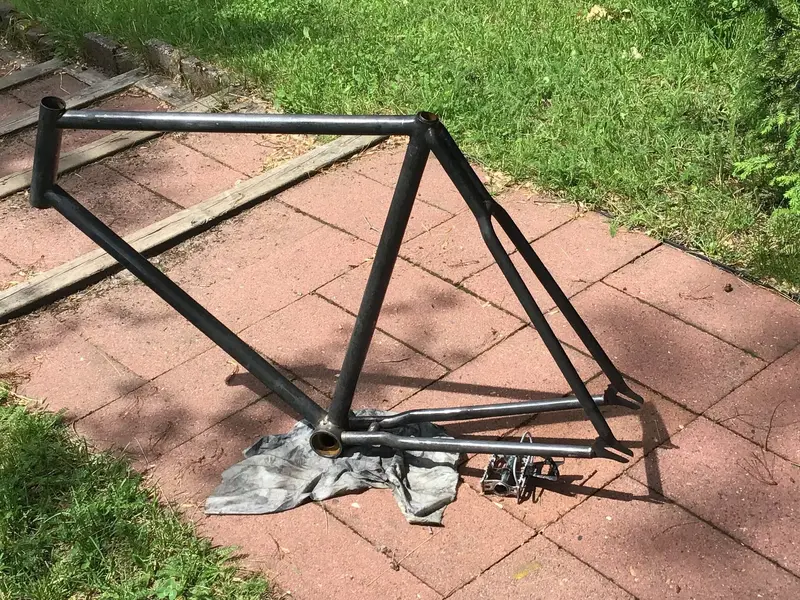
I’m not ready for parts, I have to fix the rest of the frame crack, keep it from spreading. When I hosed out the inside of the frame water squirted out a pin hole.
 
  • Sad
Reactions: Woz
That must feel good starting to get parts ready to hang off the frame.

Throwing this out to you metal work folks. I'm going back to dimples, pimples or holes, so sorry to side track a bit. The photo on page 1 is down the head-tube if I'm not mistaken? Anyhow, I did some photo tweaking. This is what I think.

The head-tube starts out in life thin gauge. Probably the Sifret stuff or something seamless.

An additional "universal shim sort of thing" is made with drilled out holes in sheet metal. It's rolled to a round shape, and inserted in the head-tube. Springyness and friction keep it all in place ready for brazing. Gaps between the headtube and lattice shim are filled through capillary action.

I've marked bits in red which I think are clues. This way, I guess you get all the advantages of light and strong. You would also get a perfectly smooth outer surface, which I can't see how it could be done with pressing. I can't see how you could get a drill / milling machine in such a small diameter, but you could get a blow torch in. The end result is impressive, and could be used to beef-up other areas while keeping the weight down. I don't know if double butted tube were invented back then.

View attachment 637535
Think you've just thrown a spanner in my works...
Ooh ye wee bugger!
Back to the begining of the thread I go..😆
 
:LOL: ......think I may of heard that before. I resemble that remark.

I just decided to get the grey matter working with a few facts and observations on the table. No googling.

Soon I'll be doing some copper pipe plumbing and soft brazing, which I'm already procrastinating over way too much, and find this thread more intriguing. It did occur to me it's incredibly simple, straight forward, repeatable, and well within the grasp of production at the time. Was even thinking of having a go myself with some plumbing off cuts just to see.

I think Nabeaquam would be able to confirm the theory with some good light, a quick clean, a closer inspection and some light scratches around the holes and where the shim doesn't join completely.
Yup...brain needs more input...more pics!
It's that or I'm going for a bloody long swim 😆
 
  • Haha
Reactions: Woz
Etching with phosphoric acid. the only things I didn’t disassemble are the bb cups. I tried a little pounding, no heat. When they didn’t budge I left them. If I mess one up I’ll never find replacements. Good enough, perfect. The winds shifted from the north to the south yesterday afternoon. Went from 4C early am to 40C. So far today now at noon its only 30C. I hoped the massive heat bubble just south of us would stay there. The further west in Michigan’s Upper Peninsula you go the hotter. 3B6D34C6-D398-41A6-A475-7CE20F8C3654.jpeg A807CD84-699C-4C6A-AA79-C404FFE80DD4.jpeg
 
:LOL: ......think I may of heard that before. I resemble that remark.

I just decided to get the grey matter working with a few facts and observations on the table. No googling.

Soon I'll be doing some copper pipe plumbing and soft brazing, which I'm already procrastinating over way too much, and find this thread more intriguing. It did occur to me it's incredibly simple, straight forward, repeatable, and well within the grasp of production at the time. Was even thinking of having a go myself with some plumbing off cuts just to see.

I think Nabeaquam would be able to confirm the theory with some good light, a quick clean, a closer inspection and some light scratches around the holes and where the shim doesn't join completely.
When the inside of the frame dries I’m poring phosphoric acid in there. This should clean it up. I’ll use an LED riding light to look in there.
 

Latest posts

Back
Top