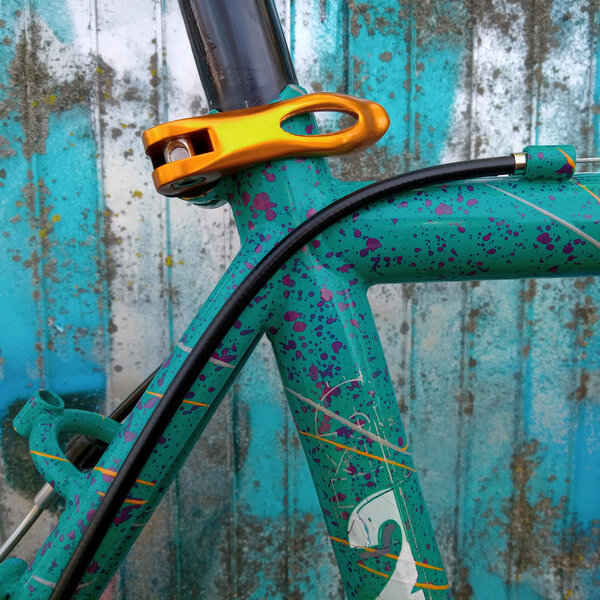
1992 Corratec 2005 drop bar conversion

frkl

Retro Guru
I’ve already posted about this bike in various places on the forum, but now here is a proper bike thread, since the bike is finally coming together.

I got the bike, a 1992 Corratec 2005, in Fall 2021, from the original owner, still living in the town next to the one where he bought the bike 30 years ago. The original bike store sticker is still there, and I get a kick out of preserving these whenever possible.

I stumbled on it when I was looking for a replacement for my Shogun drop bar conversion. I had cracked the frame in a roof rack/garage door type accident and had been on the fence about whether I should replace the frame, since there are still NOS examples to be had. I ultimately decided not to. The aluminum frame always struck me as a bit too harsh, and so I decided to look for an early 1990s steel mountain bike as a base for a new drop bar conversion. I had also had kind of enough of 1-1/4-inch headsets :).

Here is the bike as it was a few months ago, already converted. Don't worry, the stem adapter was a temporary mockup so I could figure out the riding position using my piles of unused Ahead stems. I have since sorted this out properly and I'll post the results in a future update.
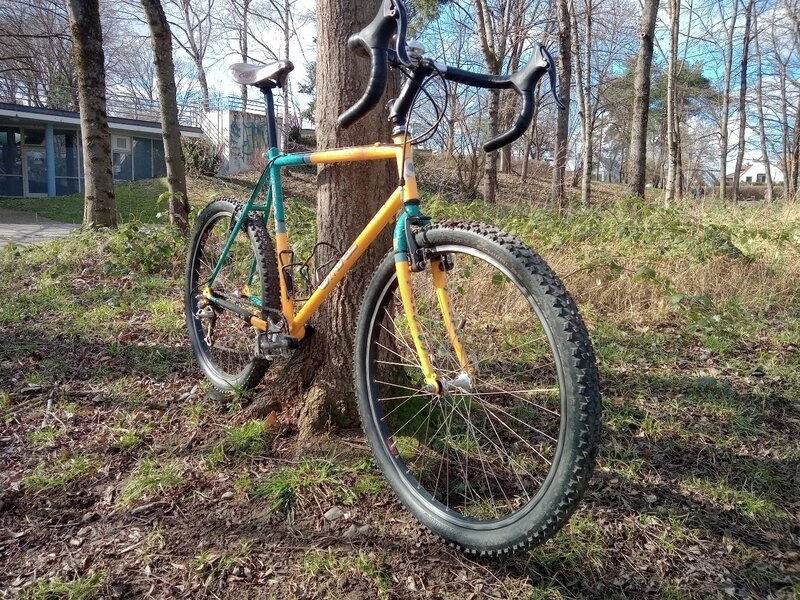
IMG_20220223_131745_149.jpg

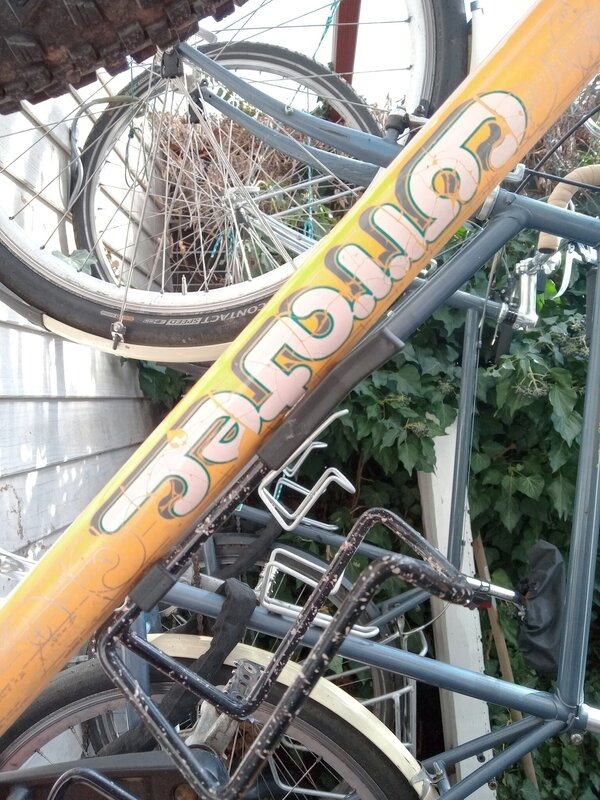
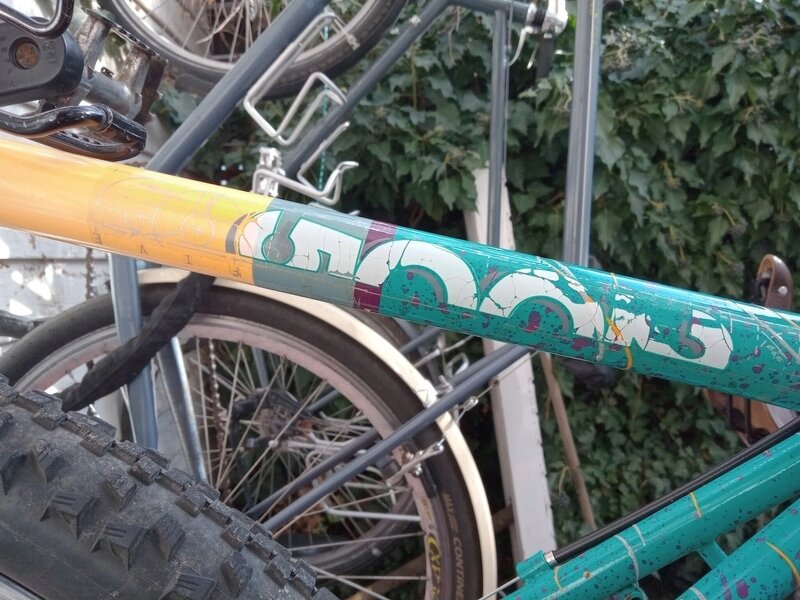
I'm not originally from Germany, so my world is full of new-to-me bike brands, and Corratec was always fascinating to me. When I found the bike, the price, 50 Euro, was right, and the paint job sold it:
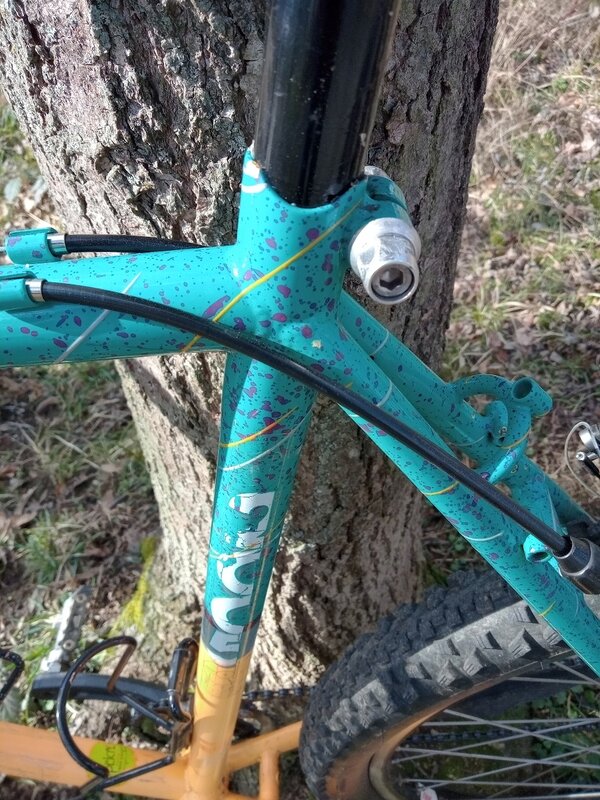
IMG_20220223_132145_912.jpg

The 2005 was a mid-range mountain bike in the Corratec range, a few years before they went all bow-bikes, all the time. Thanks to @joglo, who collected a trove of 1990s Corratec catalogs at mtb-news.de, for the catalog scans! The catalog presented the 2005 as a do-everything bike, and I thought this was perfect for a bike destined for riding on the roads and trails in the Black Forest.
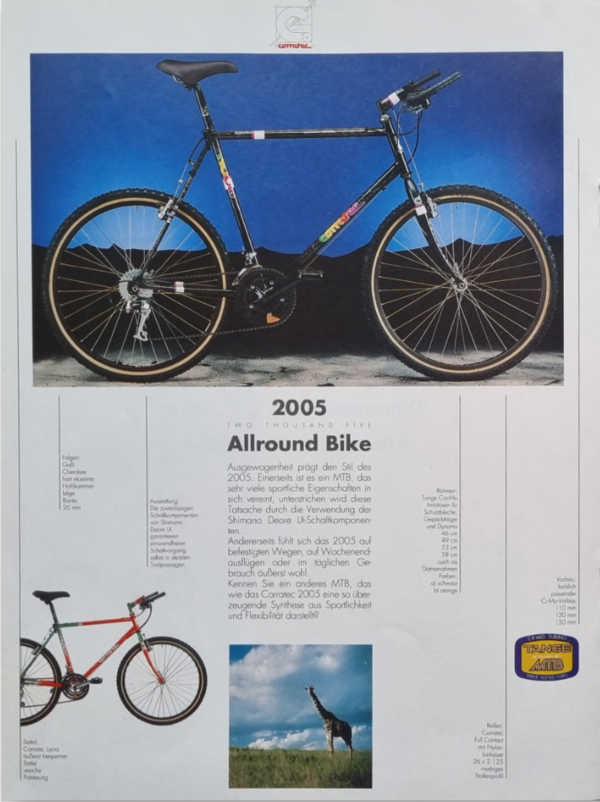
Screenshot from 2022-03-23 13-25-16.png

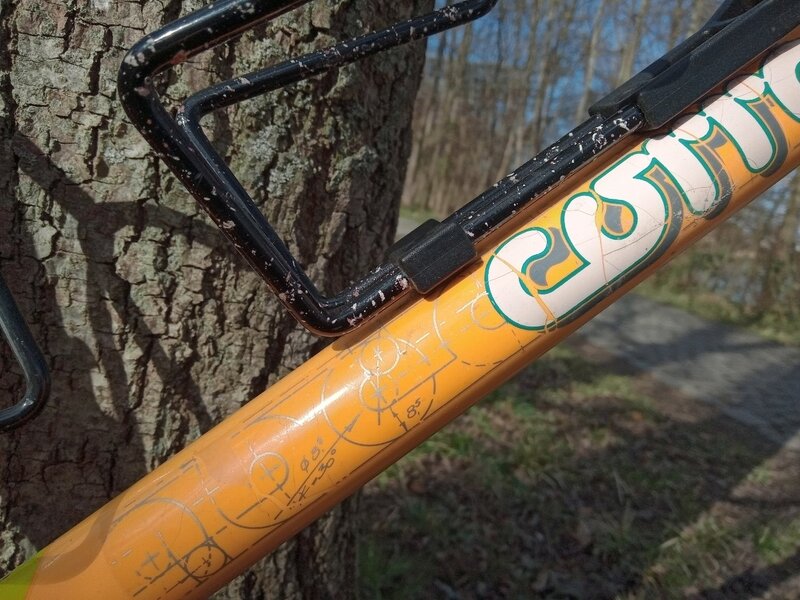
The bike was spec'd with a mix of LX where people would notice--the shifters and derailleurs--and 400LX everywhere else. The frame was in great condition. The decals and paint work, which were incredibly detailed, turned out to also be incredibly fragile, and I have only now sorted it, with the encouragement of the forum. More on that later.
IMG_20220223_131939_764.jpg

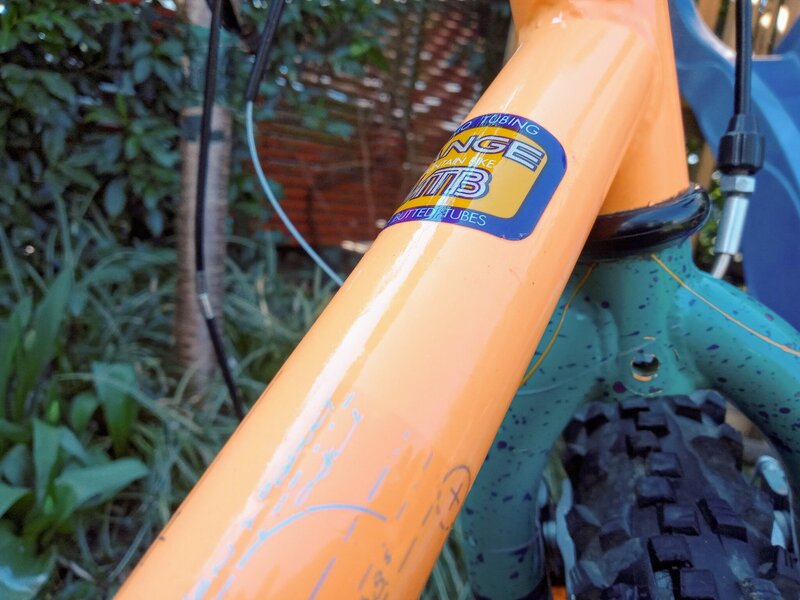
The frame itself is Tange Triple Butted MTB tubing, with a 1-inch headset and 26.4mm seat tube, and it had some unexpected surprises. Despite the prominent “I’m German” branding, including the slogan “German Power of Corratec”--changed a few years later to “German Bike Power of Corratec”--the frame, like many early Corratecs, was made in Italy. And when I bought the bike, the bottom bracket had looked a bit too big to be BSA, and sure enough, it was ITA. But not just ITA: it was a Shimano low profile JIS ITA, a great combination.

I never intended to use most of the stock components, and instead planned to move over many of the parts from my Shogun and to finally use some XT 739 and XTR 951 parts (admittedly from a few years later) in my bin. But the first thing to deal with was the bottom bracket, followed by getting the XTR Vs to play nice, then the decals, stem and shifting.
 
Last edited:
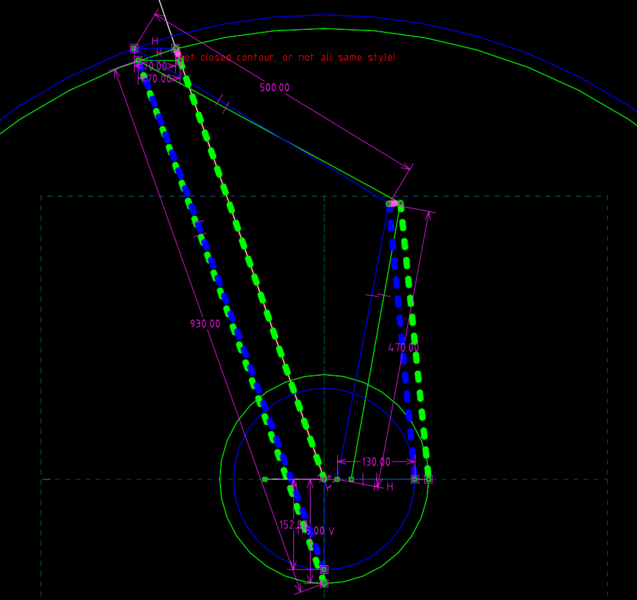
So this post is a bit of retro mtb tech meets computer simulation.

The first thing to deal with was the cranks. For about 4 years now, I have been riding short cranks on all my bikes. I switched due to knee pain, thinking that if my knee had to move less, that would be good. And it worked, I have had no problems since.

I either run 150mm Stronglight Impact Kid cranks, which are a 5 bolt, 110mm BCD, shortened Sugino XD2 on my road bikes, or Suntour XCT JRs, which are 152mm, 4 bolt, 104mm BCD on my mountain bikes. The Stronglights are nice looking, the XCTs not so much, but they work and cost under 30 Euro. Both are shortened versions of adult cranks, so plenty strong, and exactly what you would end up with if you used a crank shortening service.

The short cranks, however, have a ripple effect on riding position. I had always just improvised, raising the saddle and the handlebars a bit, and it worked out fine. But the Corratec had a seatpost with a very small setback, and I wondered if this was going to be sufficient to maintain my preferred knee-pedal relationship. So I put together a simple CAD model to understand the geometry of what was happening. I have attached the model to this post, but to run it you need to change the extension from .txt to .slvs, and you need SolveSpace, a free and open source CAD program.

I discuss the model in more detail here, if you are interested:

https://www.bikeforums.net/fitting-your-bike/1246272-cad-model-shorter-cranks.html
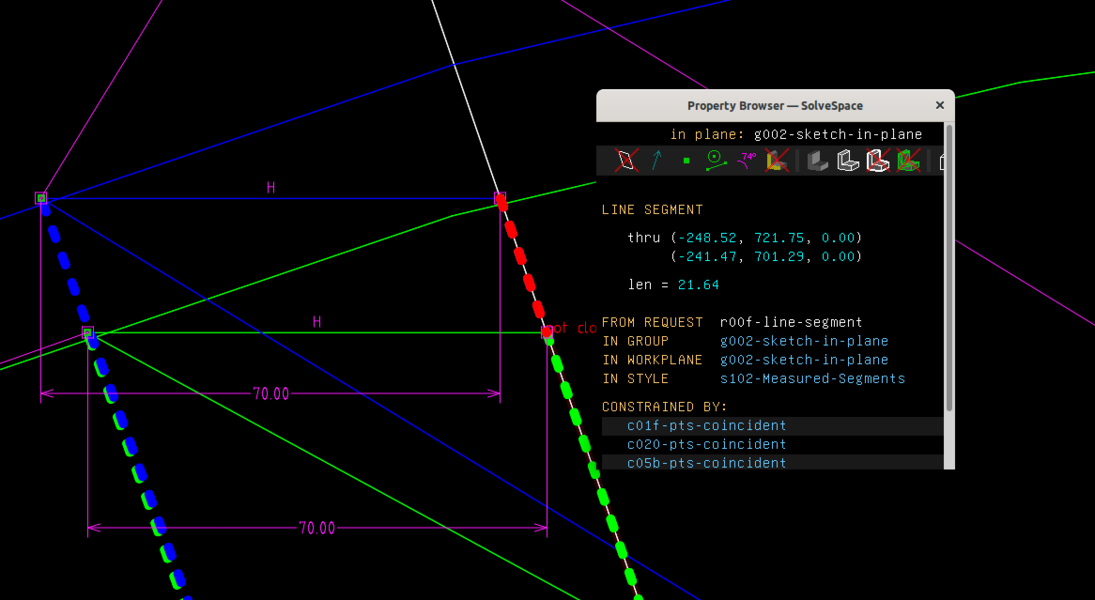
In brief, the model lets me compare two crank lengths, the original and the short. It takes as constant the distance between the sitzbone contact on the saddle to the lowest point of the pedal stroke, based on the slightly-bent-knee rule of thumb for saddle height. I can adjust anatomical measurements, and see how the position of joints changes. I can also see how much I would need to raise the saddle to maintain the same sitzbone-pedal length. In this screenshot, you can see the pedal circles, the sitzbone-pedal length, and the two large circles the model calculates that represent the possible positions of the saddle that maintain that length:

Screenshot from 2022-03-24 10-29-11.png

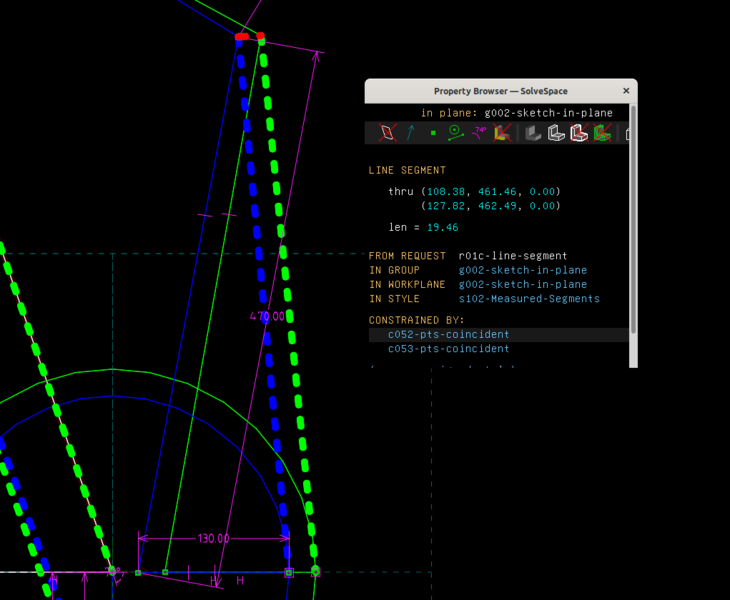
What is fascinating, ok to me at least, is that on all bikes with non-vertical seat tubes, and especially ones with slack angles, such as the 71 degree seat tube on the Corratec, you don't have to raise the saddle by the amount you shorten the cranks. This is because the saddle also moves back as it moves up. (Actually, it is of course possible to make the fit adjustment by only moving the saddle back on the rails, provided they are long enough, and not up at all!) This means that the drop measurement between the saddle and the bars is less affected than one might think. And if you raise the bars using your trusty quill stem, they also move back, thus helping to maintain the reach:

Screenshot from 2022-03-24 10-30-08.png

Here, the output "len" is 21.64mm, and is the theoretical amount the saddle must be raised. This is less than the 23mm change in crank length. Also, it was interesting to see that the knee-pedal relationship didn't change as much as I thought it would. I prefer my knee behind the pedal, and short cranks don't undo this automatically:

Screenshot from 2022-03-24 10-36-39.png

Here, the output "len" is the amount the knee moves back because of the shorter crank. It is less than the difference in crank length, but still enough to keep the knee behind the pedal. (Note that I am not advocating knee-over-pedal riding position in and of itself, I just happen to like it!)

The model basically showed me that the existing Corratec branded Kalloy seatpost, with not so much set back, was completely sufficient to maintain my preferred riding position.

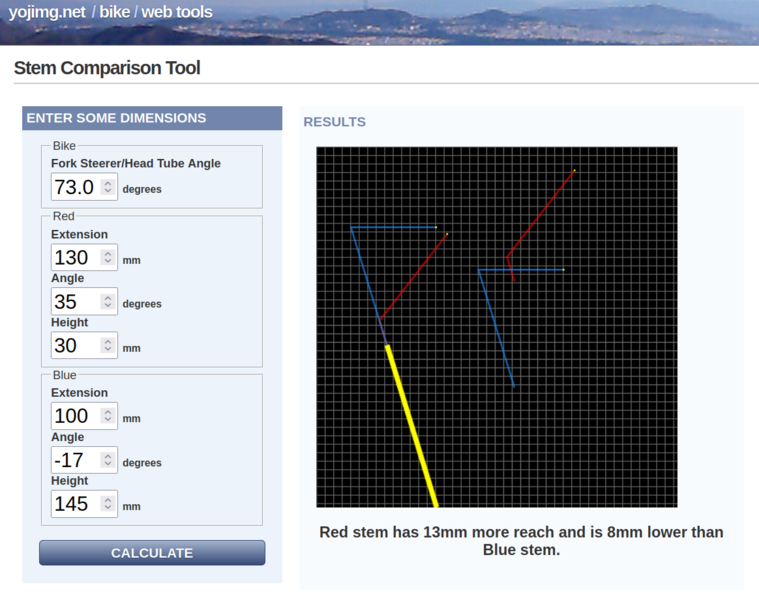
I then started thinking about stems. I had had set up an Ahead adapter with the 35 degree, 130mm rise stem I had used on the Shogun as a starting point. I use this online tool to compare different stem options and styles:

http://yojimg.net/bike/web_tools/stem.php
With the adapter set-up as a guide (red stem), I decided I wanted a bit less reach and a tad more rise. Just for fun, I used the model to see if my Nitto Technomic would work. It would theoretically, but is certainly the wrong look:

Screenshot from 2022-03-24 10-46-18.png
What I like about this model is it lets me try different combinations of quill height, extension and angle, and lets me decide if i want to achieve the position I want with different stem designs. I ultimately found a NOS welded CrMo stem with the required measurements that fit the aesthetics of the bike. I had been contemplating spraying it to match the frame, but the gloss black compliments the seat post nicely.

OK enough math for one day. But the models did save me some money and back and forth on stems and seat posts by letting me try them virtually first. And I learned a lot about fit. So worth it.
 

Attachments

  • crank length 2022-04-02 (copy).txt
    41.5 KB · Views: 0
Last edited:
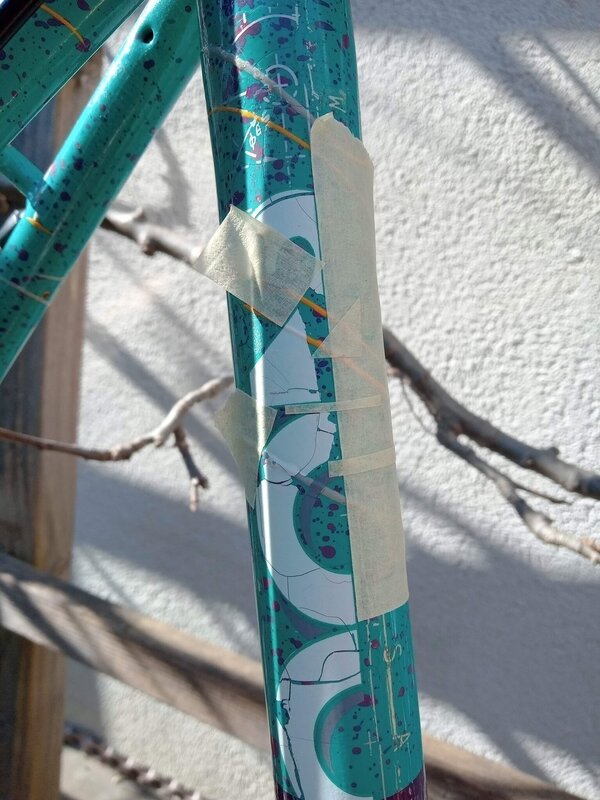
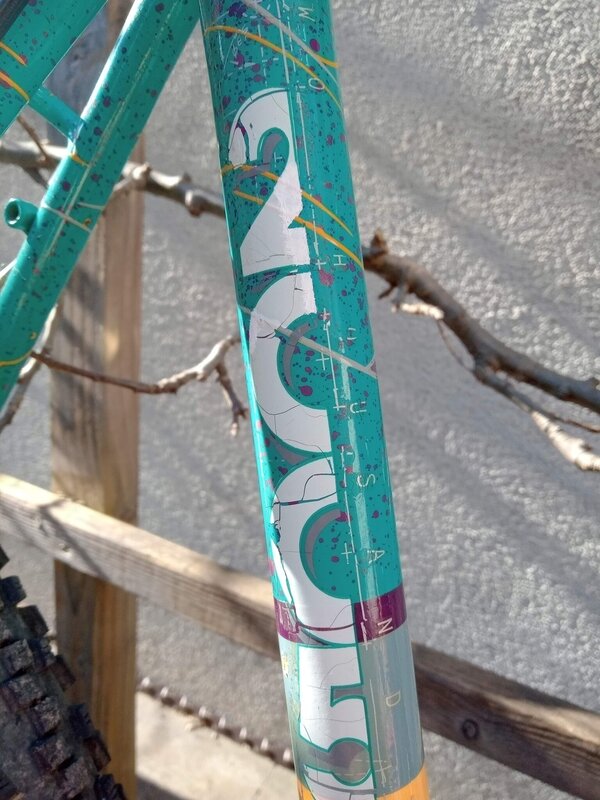
As I mentioned, the decal work on the bike was quite intricate, but unfortunately cracking all over the place. They had been applied without any sort of protective coating, and it really showed. Interestingly, the next year, Corratec had addressed the problem--switching to what appear to be vinyl stickers with a clear coat. It does not look as fine as the decals, but after 29 years they still completely intact. Yay plastic, I guess.

My thinking and some step by step follow along photos, with the help of the forum, is detailed here:

https://www.retrobike.co.uk/threads/touching-up-and-protecting-decals.442215/
But as a brief summary for the bike thread, the original state looked something like this:

IMG_20220301_134234_067.jpg

and this:

IMG_20220301_134321_343.jpg

A number of forum members encouraged me to embrace the shabby chic patina, and not try to completely touch up the cracks. This was a very good idea, and it fit with the faded orange paint, which would never be restorable to its original hue. I decided to lightly touch up big gaps in the decals, but leave the rest as is, then brush on a synthetic resin clear coat to protect the decals.

A sort of chicken and egg problem was that the condition of the decals was preventing me from properly cleaning the frame, but a dirty frame won't take paint. The brush technique helped solve this by allowing me to focus on carefully cleaning particular areas (using alcohol swabs and a light solvent) that then got the clear coat. After the coating, I could clean and wax the entire frame.

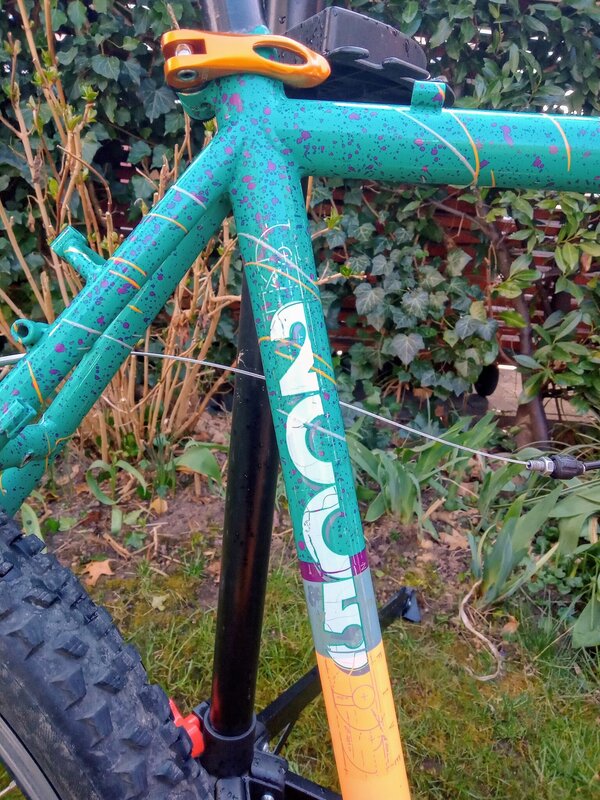
Here is the masking and touch up of the seat tube:

IMG_20220307_141235_662.jpg

I used acrylic and a brush to do the touch up here. Elsewhere, I tried an acrylic paint pen, but the results were not as good. In the future, I need to stay inside the lines better, but live and learn:

IMG_20220307_144926_746.jpg

After one coat of clear, I gave the areas a light sanding and applied a second coat. After that, I properly washed the entire frame, and then went straight to a liquid wax. Here are some of the results:

IMG_20220325_100115_250.jpg

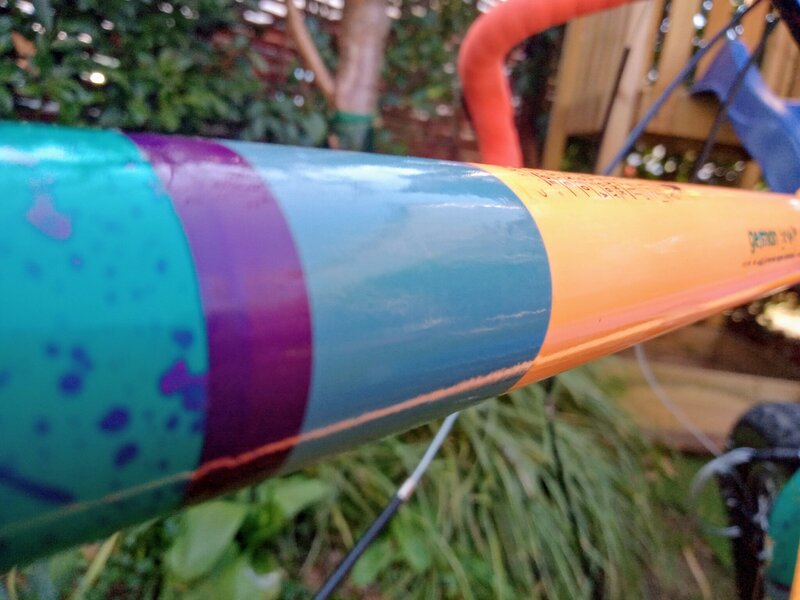
The pic above shows nicely how there is no sharp transition between clear coated and non-coated surfaces. The space between the decal and the Tange sticker is uncoated, but the reflection continues relatively constantly through it.

IMG_20220325_100056_535.jpg

IMG_20220325_095952_274.jpg

Overall not perfect, but the art is much better protected now, and the protective layer is only apparent upon really close inspection. The art is still ratty, but it is consistently and self-confidently ratty, and that was the point. In this case, not being able to tell the difference is a success.
 
Good looking bike. There was a bike restorer in Canada who recommended carnuba car wax as a gentle paint cleaner. I've also seen people use clay bars to good effect in restoring original finishes to their best. I've definitely found the carnuba to be good for paint jobs that are in reasonably good condition like this bike. I haven't made a concerted effort with the clay bar yet.
 
Good looking bike. There was a bike restorer in Canada who recommended carnuba car wax as a gentle paint cleaner. I've also seen people use clay bars to good effect in restoring original finishes to their best. I've definitely found the carnuba to be good for paint jobs that are in reasonably good condition like this bike. I haven't made a concerted effort with the clay bar yet.
I've heard about that too. I should pick some up and try it. I really hate all the chemicals involved in paint work, so it would be great to have something a little less harsh on hand.
 
Good looking bike. There was a bike restorer in Canada who recommended carnuba car wax as a gentle paint cleaner. I've also seen people use clay bars to good effect in restoring original finishes to their best. I've definitely found the carnuba to be good for paint jobs that are in reasonably good condition like this bike. I haven't made a concerted effort with the clay bar yet.
Do you use a carnuba wax polishing product or straight carnuba?
 
Quick update, not much time to work on bikes lately . . .

After the @The History Man suggested, all in fun of course :), that my son might be ashamed of my thumbie on dropbar shifting arrangement . . .

https://www.retrobike.co.uk/threads...t-1-retrobike-pic-per-post.85657/post-3225836
https://www.retrobike.co.uk/threads...t-1-retrobike-pic-per-post.85657/post-3225964
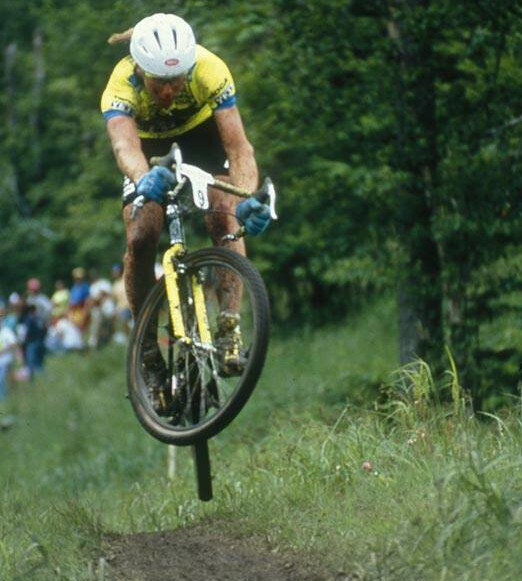
. . . I decided to use wrapping new, color-coordinated tape on my bars as an excuse to install a bar-end shifter. In keeping with the "Tomac-inspired" aero levers :) . . . (below, a picture of me pretending to be Tomac) . . .

Tomac-Jump.jpg

. . . I decided to one-up the legend by doing an aero routing of the shifter cable too, which took a few tries to get right but has produces a nice clean setup--that is, until I forgot to remove my work gloves before touching the orange bar tape . . .

Absolutely not "Tomac-inspired" is the single 32-tooth ring on the front, an admission that I am, in fact, getting old.

Some actual pics will eventually follow.
 
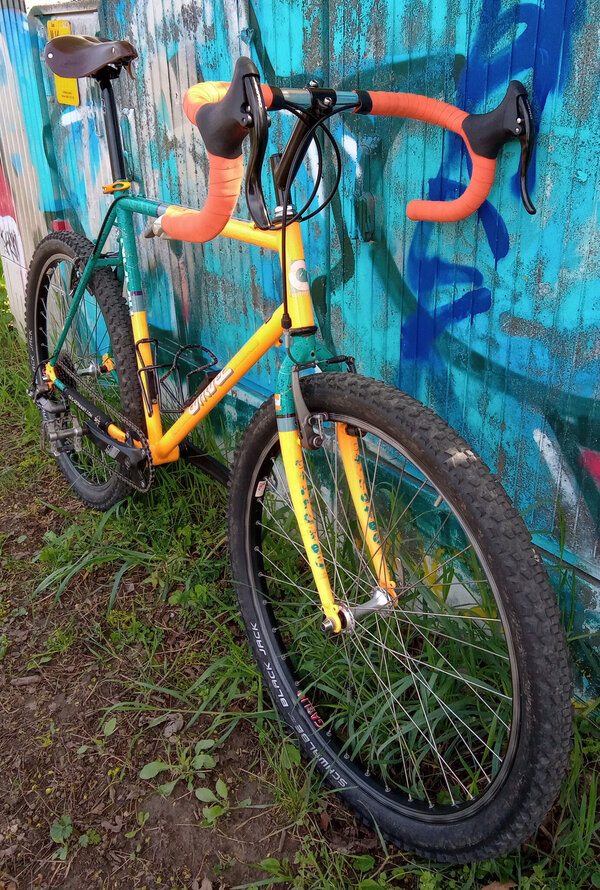
In the spirit of not letting the 5% left to do on a project become an excuse not to go riding, I took the bike out for a little spin along the river and to take some pictures. I want to start doing my Cent Cols rides again as soon as possible, and the weather is starting to stabilize.

There are a bunch of odds and ends still to be sorted out, but nothing that will keep me from going on a ride and checking off a few passes.

IMG_20220411_124843_843.jpg

I really like how the seat cluster turned out, with the orange QR:

IMG_20220411_125053_498.jpg
 
Back
Top