1960s 'Martyn Young' 531 build (properly finished page 5)

Actually I might know someone who could do that job (I don’t own a pillar drill anyway, so it’s not something I could do anyway, regardless of my lack of skills). It would be a good solution.
 
I think I’m going to go for drilling the stem. Presumably the hole needs to be at an angle to allow for a straight pull, and the first part of the hole needs to be a good tight fit around the outer cable housing, and it then becomes narrower for the bare cable. Any tips @Midlife ?
 
Last edited:
The cable usually has a ferrule as it enters the stem so the hole is the same size as the ferrule not cable. It's usually vertically above the straddle wire.

There's a couple of examples on the net.

Might be easier to bolt a hanger to the stem above the headset top nut. They were not about BITD so not period
 
Thanks both for the tips. I had a chat with my neighbour who has the right tools for the job and he was confident it’d be easy enough. I’ve seen it done with no threaded part, just a wider top section for the ferrule to sit in, so I think I’ll do it that way. Obviously that won’t allow for an adjuster screw but I think that’s okay and it’ll look neater.
 
As before, this build continues to be an up and down affair. On the down side unfortunately I was right the first time that the BB shell threads are shot - though just on the non-drive side. Given they were re-tapped after the frame was repainted that's quite annoying. I'm weighing up getting the threads repaired (this would almost certainly require a new sleeve (?) putting in first so not a quick job for someone), or using the threadless BB option, but the latter would also require the BB shell being chamfered for a proper fit from what I can tell?

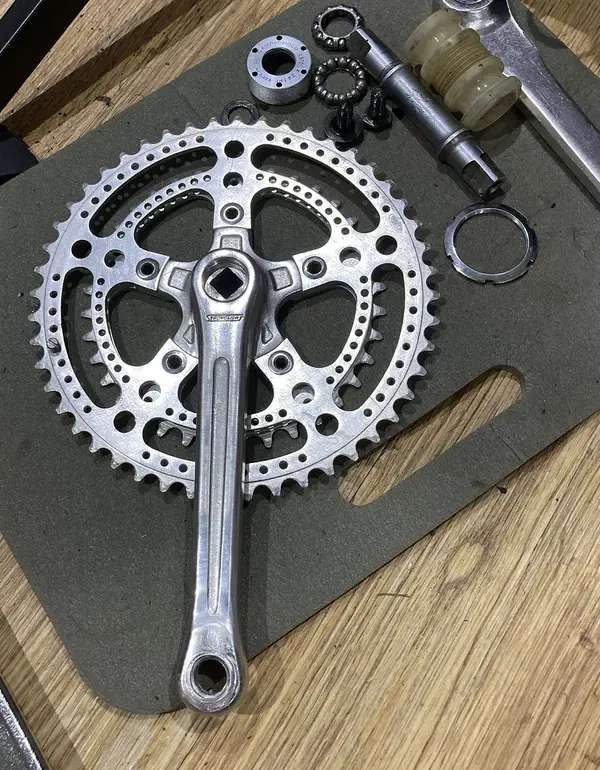
On the plus side, I found the same model chainset I already had, but drilled. This one will more look the part, I think. I think it will also work fine regarding getting the right chainline, so it's just a case of actually getting the BB sorted first.


IMG_1502.jpg
 
Some actual progress – mainly good news, as it turned out the BB threads just needed a tap running through them again, so the Campagnolo Nuovo Record BB is now installed. I also asked them to do one of the dropout adjuster threads, but unfortunately it turns out that one is totally shot and they actually managed to snap the tap bit inside the adjuster hole. Luckily that's not really going to effect the use of the bike, but it will look a bit incomplete to me without the adjusters in. There is about 5mm of the hole free on the outer side so I'm thinking of using epoxy to glue an adjuster screw in after cutting it down to the right length. Obviously there won't be anything on the other side in the actual drop, but that will be less noticeable than not having the screw outside the drop. I'm still pondering that one.

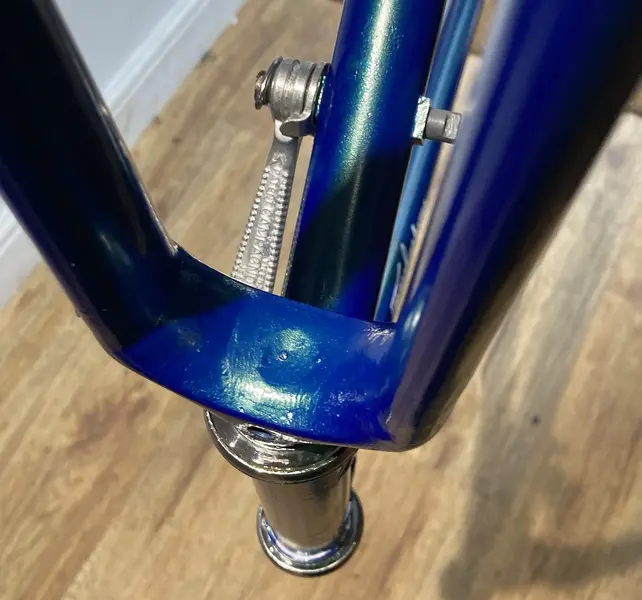
While at the bike workshop, they pointed out that the underside of the fork crown has been filled in, which indeed is a bit unusual. I'd forgotten about that particular detail. It's been filled in with metal as well, not just filler.


IMG_1603.jpg

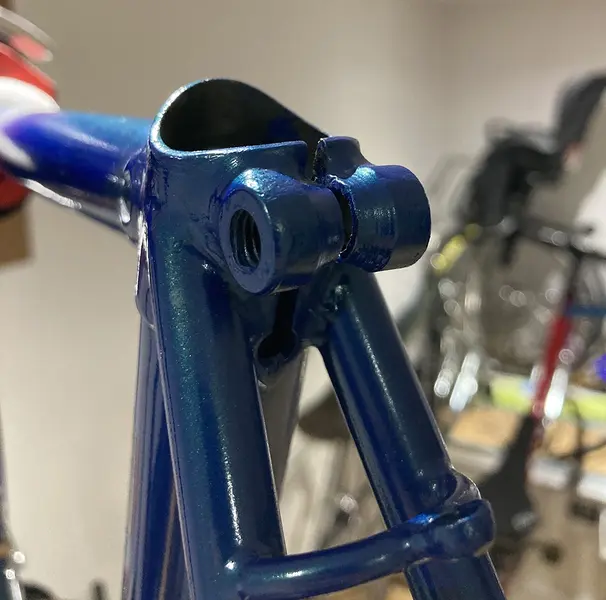
Another feature of the frame that I'm guessing points to it being from the 60s is the chunkier seat-clamp. This one does allow for a recessed bolt/nut, but it seems to take an M8 rather than M6 thread. Is that an older standard for these? It does mean I'm not 100% sure what seat-bolt to go for.


IMG_1557.jpg
 
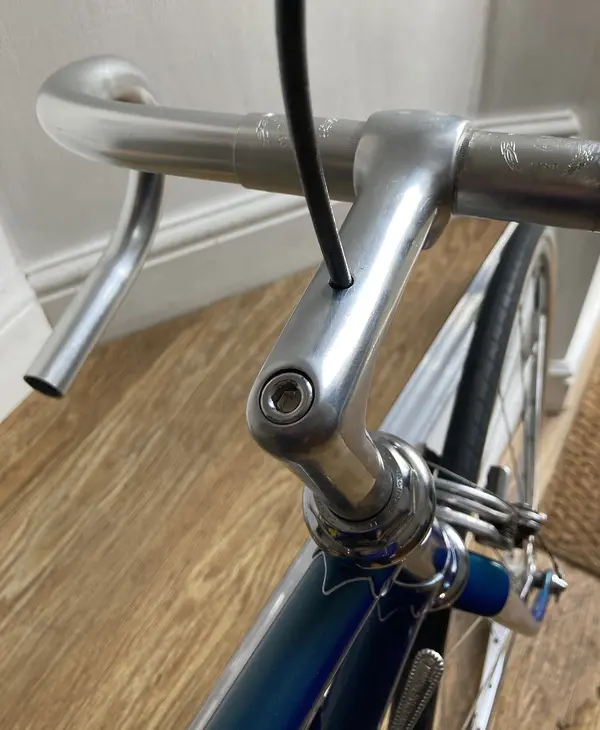
There's more pondering than actual doing happening at the moment, but the stem does now have a hole. The cable pull looks good, I think.

IMG_1666.JPG

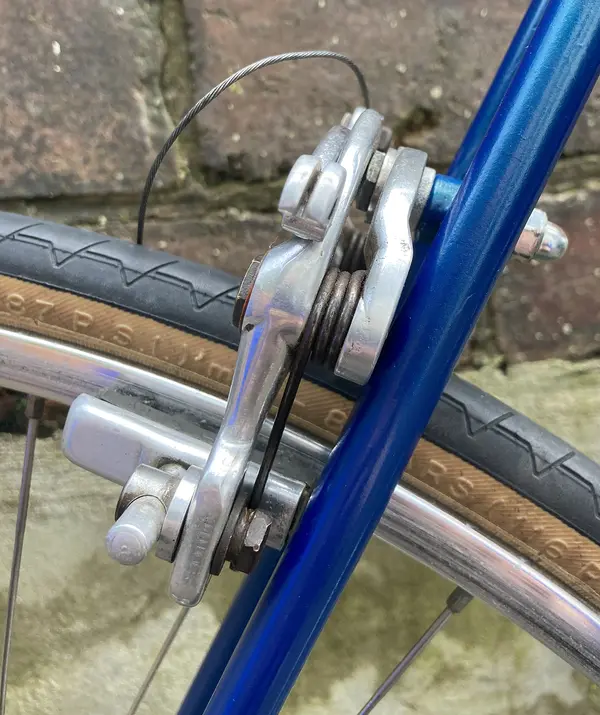
I have found myself in the odd situation of putting centre-pull brakes on a frame that has also been drilled for recessed calipers, meaning fitting the Mafac Racers is not entirely straight-forward (not much is so far with this bike). The front brake is fine, but the back is uncomfortably close to the seat stays so I'll have to experiment with different washer/nut combinations to get it to be a tight enough attachment but with some room past the stays.

IMG_1669.JPG
 

Latest posts

Back
Top