Yellow Hobbs winter beater of distinction (WBOD)

Securing that canti stud. I had a look at re-swaging it, but because it’s partially behind the fork blade I can’t get anything on it that I was confident enough I could give a decent hit without also hitting the fork. Next best is resorting to a bit of materials science.

Aaaaaages ago (2016) I needed to re-seat the valve hole eyelet on an early Fiamme sprint rim for my Parkes Lightweight. Again, it was an awkward job, a little bit corroded and I wasn’t confident I could get an appropriate hit on it without also mangling the rim. I decided to set it in place with some aerospace permanent structural epoxy and I’m happy that repair will outlive the rest of the rim:

View attachment 917719

View attachment 917721

The canti stud is swaged, so it can’t pull out but it does spin. One of the key features of this adhesive is it’s incredibly strong in shear. So a thin fillet around the back edge of the canti stud should be sufficient to stop it spinning even when I tighten the canti bolt.

I cleaned it back to bare metal using a combination of Stanley knife blade and small screwdriver, then degreased with isopropanol:

View attachment 917720

Then dabbed the tiniest amount of adhesive round the edge using a tiny spreader. Rotated the stud a couple of times to hopefully work a bit under the swage too:

View attachment 917723

The dab of red paint is on the side of the stud that had more yellow paint on it. I figured that was probably the side facing the open side of the bracket (which got hit with the most paint when it was sprayed) and when the stud is that way round it’s also the most parallel with the other stud.

Now it sits for 24 hours to cure.
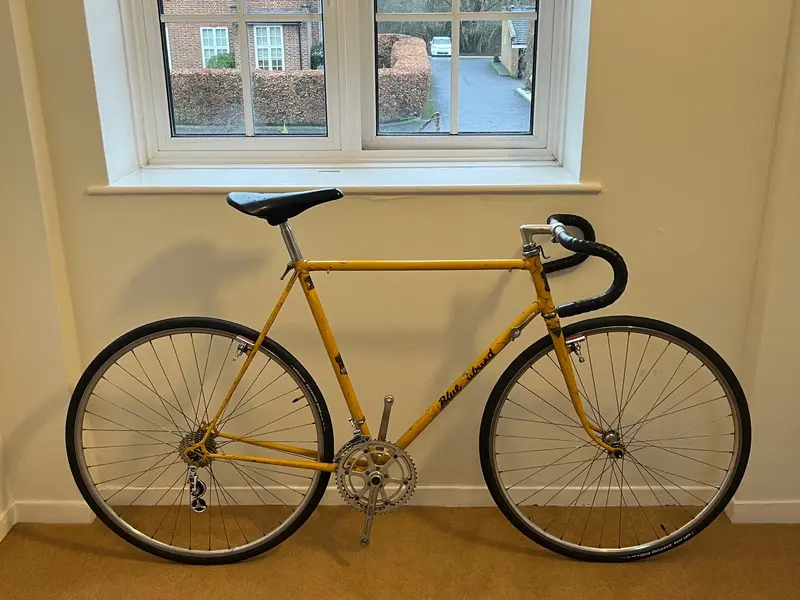
So many skillz : )
 
This must have been tapped the wrong way round bitd. What’s just really confusing like I said is I swear last night I had the left-threaded side on the drive side and the right-threaded cup on the non-drive side. Something would have got mangled in the process.

LBS had the frame for literally 3.5 hours earlier to chase the threads. That’s not long enough to destroy the bb threads by bodge-threading them the wrong way on both sides and then make an invisible correction.
 
Great frame, build and thread. Following with interest.
Can I ask what aero grade epoxy you are using? I have a couple of bike and non-bike projects I could use it on 😁
I am guessing it won't be cheap lol
Does it keep well once opened or is it like all adhesives I have used in the past, in that once opened they need to get used or they go off/harden?
Cheers
Sure, it’s Scotch Weld 9323. It’s used by all the F1 teams to hold the cars together and many of the aerospace manufacturers 👍

Yeah, it’s not cheap and it does have a use by date.
 
Great build so far! Not sure if I overlooked this while reading the thread, but I'm curious as to your plans for the paint on the frame. Will you leave the yellow as-is, repaint it, or restore/touch-up blemished spots?
 
Great build so far! Not sure if I overlooked this while reading the thread, but I'm curious as to your plans for the paint on the frame. Will you leave the yellow as-is, repaint it, or restore/touch-up blemished spots?
The yellow is staying as-is. The project, budget and amount of work has drifted a bit*, but this is still destined to be a winter beater that can get wet and salty that I don’t have to worry about.

*a lot
 
Back
Top