You are using an out of date browser. It may not display this or other websites correctly.
You should upgrade or use an alternative browser.
You should upgrade or use an alternative browser.
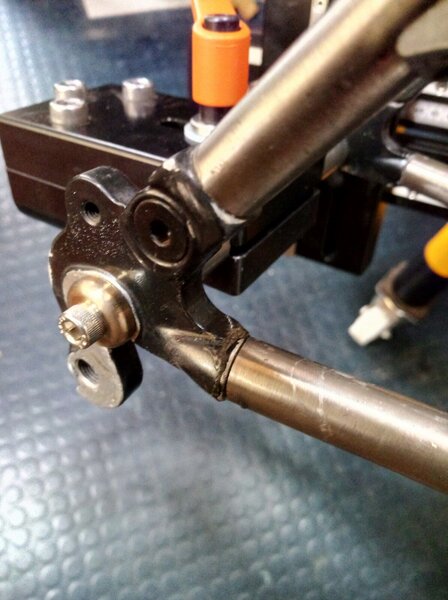
Ti chainstay coming out of lug dropout repair.
- Thread starter CTK
- Start date
focomat 1c
Retro Guru
Re:
You don't mention how the frame is constructed , it looks as if it might have titanium tubes
resin bonded into alloy lugs ? in which case it is probably game over unless you want to
get into frame building ! It looks like the bond has failed , and you won't be able to
re-activate the resin by heating it . Its a question of heating all the joints until they
weaken sufficiently to pull the frame apart , followed by a thorough clean up and
re-bond ( preferably in a frame jig ) Good luck
That's the plan.. Frame received.if you can get the 2 tubes apart then you could use an epoxy adhesive
All the best,
66 triumph daytona
Senior Retro Guru
- Feedback
- View
Any chance of a few pics of the repair process?danson67":1ac5fdhp said:That's the plan.. Frame received.if you can get the 2 tubes apart then you could use an epoxy adhesive
All the best,
OK, all done...here's the process.
Inspected the other joints first, moving and pulling by hand, to see if there was any sign of failure.
All OK, so tap RH dropout rearwards with a soft mallet to open the joint.
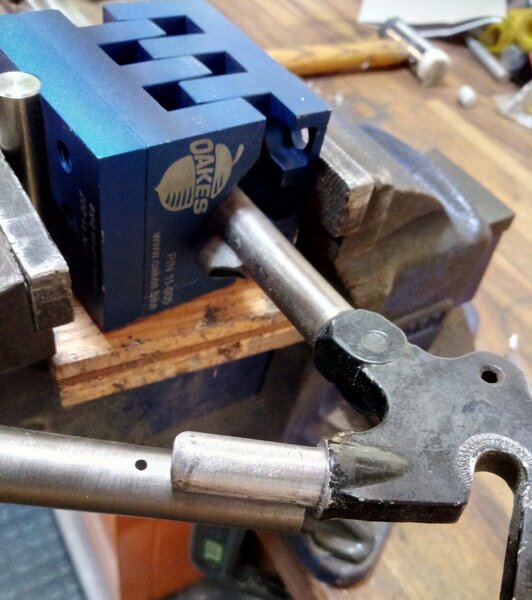
The joint moves easily enough, but there is too much spring in the Ti frame tubes and the plug is too long to exit the tube.
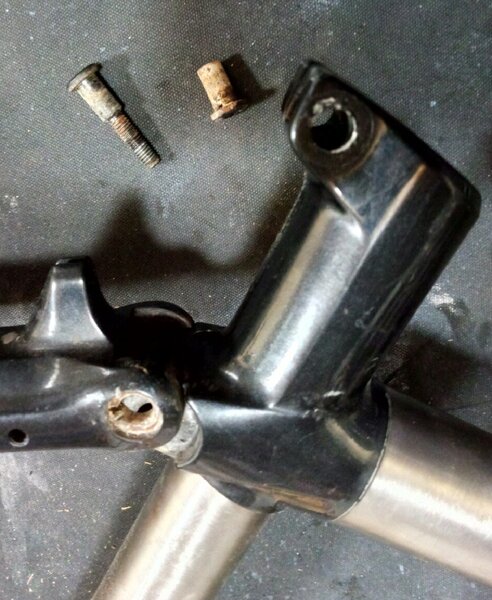
So, I undo the top bolt of the seatstay yoke. It's just like a seat clamp bolt. This creates a longer, less stiff, structural length to gain some flex:
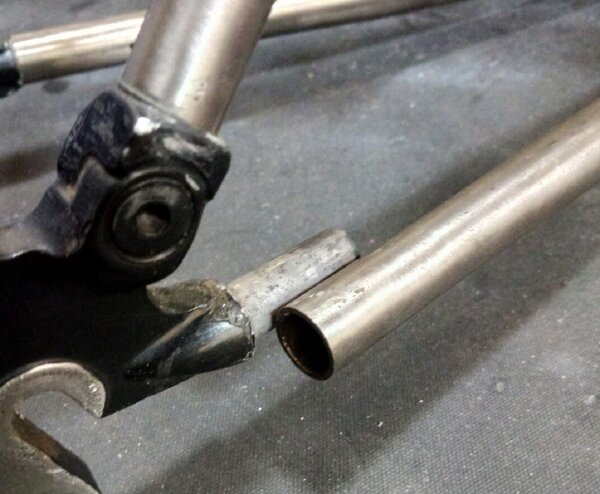
This works fine, and the joint can now be pulled apart by hand.
The plug is an impressively long, but very smooth forging, and the bonding surface to the aluminium appears to have failed, rather than a deterioration of the adhesive itself.
Old adhesive residue and corrosion fur removed from plug with emery cloth, surface roughed up to aid adhesion:
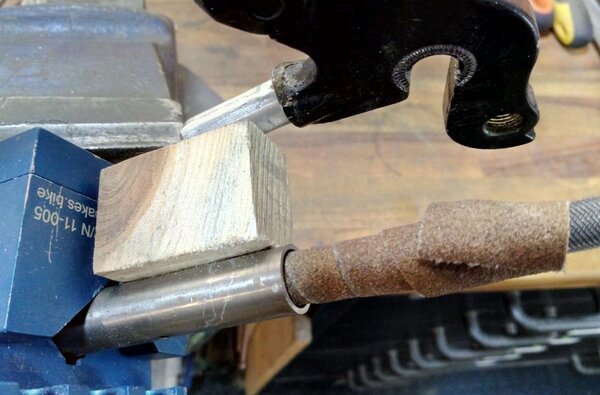
Chip and scrape out as much of the old adhesive as possible from the inside of the tube.
The chainstay is too narrow to fit a sanding drum inside, so emery wrapped around fat round file to clean back to the metal surface and abrade.
Small wooden block fitted to temporarily spring the frame enough to get good clearance into the end of the tube:
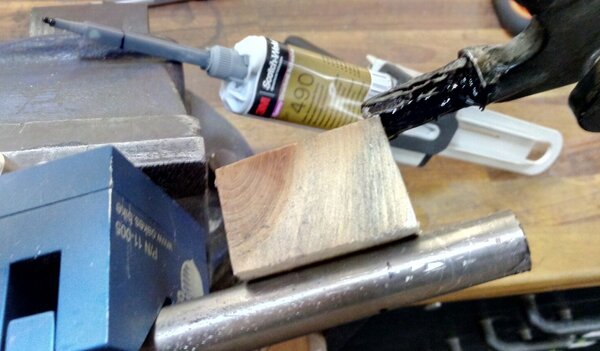
Clean all surfaces with acetone and apply adhesive (3M 490, 2-part structural epoxy) to inside of tube and outside of plug:
This epoxy is usable a few hours, so no need to hurry, but it does mean that it needs to be well fixtured while it cures (6hrs+).
So, spring the plug back into the chainstay, press home, refit the top bolt, and clean off the excess adhesive with 70% alchohol while still wet.
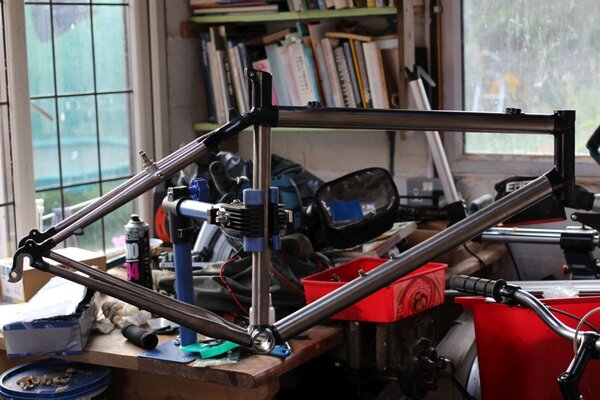
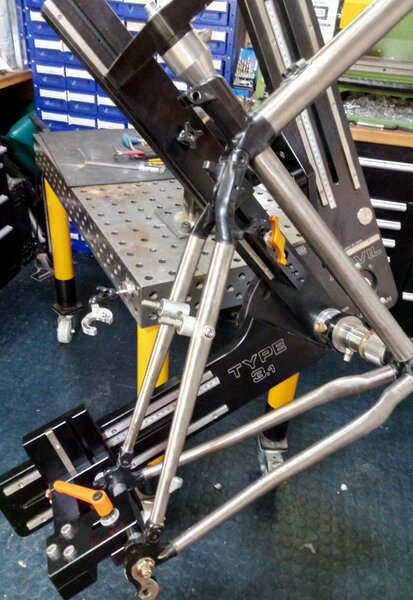
Then fit a 135mm x 10mm dummy axle to hold dropout in alignment, and put the whole frame in my jig overnight:
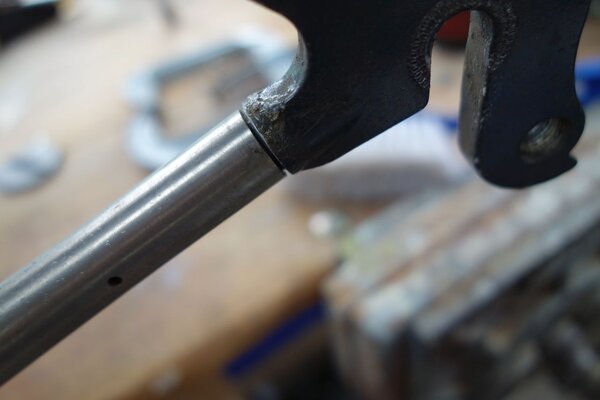
Finished
All the best,
Attachments
doctor-bond
Feature Bike
Re:
Lovely work and a v. Satisfying read.
Lovely work and a v. Satisfying read.
Similar threads
- Replies
- 22
- Views
- 2K
