You are using an out of date browser. It may not display this or other websites correctly.
You should upgrade or use an alternative browser.
You should upgrade or use an alternative browser.
Superb leather saddle repair kit that actually works!!!!!!!!
- Thread starter Peachy!
- Start date
Laserblueexige
Dirt Disciple
Just another recommendation for this product and thanks to Pechy for putting the video together otherwise I think I would have simply bought a replacement. It was remarkable easy and I completed the task in about 30 minutes. My wife was so impressed with the result she is trying to get me to do her horse saddle which I think I will take a rain check on!!
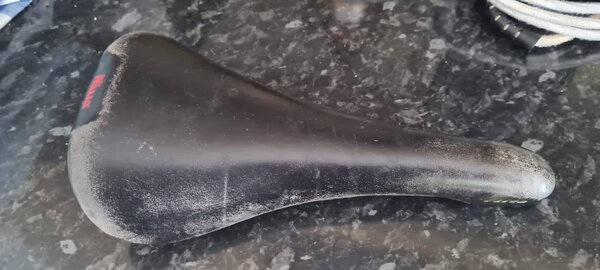
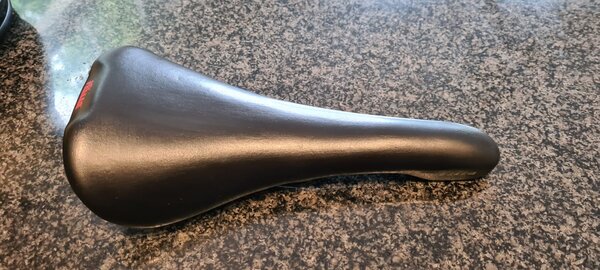
Before and after pictures.
Before and after pictures.
Attachments
Peachy!
Retrobike Rider
BoTM Winner
Gold Trader
rBoTM Triple Crown
rBotM Winner
98+ BoTM Winner
Claud Butler Fan
VCC Claud Butler ME
- Feedback
- View
Re: Re:
Proper job Laserblue....
Pictures please....
Proper job Laserblue....
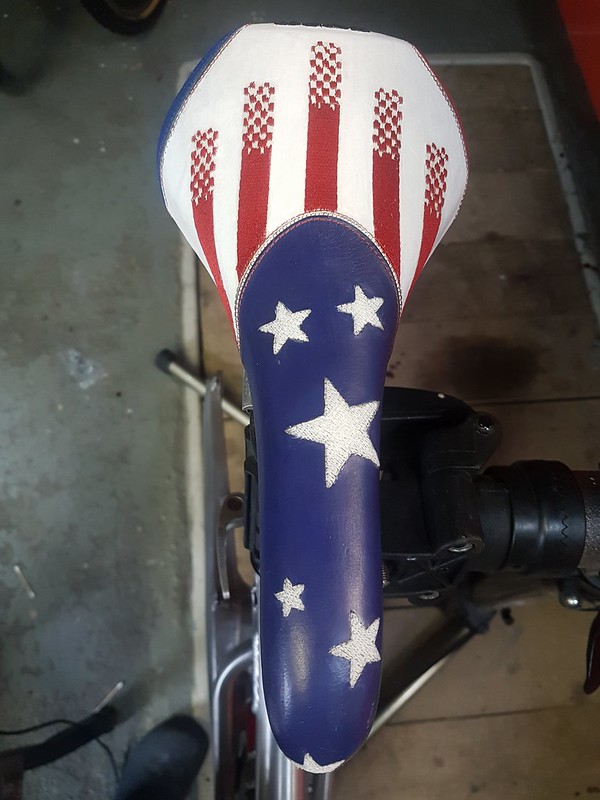
yakboy":8r1px7e7 said:The white leather dye I used on the Stars and Stripes saddle took about 10 very light coats to get a colour I was happy with.
Pictures please....
yakboy
Manitou Fan
Re: Re:
Before

After

Peachy!":tps402fs said:Proper job Laserblue....
yakboy":tps402fs said:The white leather dye I used on the Stars and Stripes saddle took about 10 very light coats to get a colour I was happy with.
Pictures please....
Before

After

Laserblueexige
Dirt Disciple
yakboy....deep respect, that can't of been easy!
Peachy!
Retrobike Rider
BoTM Winner
Gold Trader
rBoTM Triple Crown
rBotM Winner
98+ BoTM Winner
Claud Butler Fan
VCC Claud Butler ME
- Feedback
- View
Now then...
We’ve covered refreshing colour and finish, but what about tears & holes?
Well the company that sells the renovation kit also sells “leather filler” & “leather glue” I’m guessing these products will work fine cosmetically, but I want to see if they will be up to the task of actually being ridden, not just hung on a wall... so, to that end I posted a wanted thread for a Selle Flite titanium, rough as you like, to see what’s out there.
Captain Stupido answered the call with this sorry specimen for about the price of postage;


Last edited:
Peachy!
Retrobike Rider
BoTM Winner
Gold Trader
rBoTM Triple Crown
rBotM Winner
98+ BoTM Winner
Claud Butler Fan
VCC Claud Butler ME
- Feedback
- View
First jobs, a deep clean.
I pull back the leather at the rear so that it I’m less likely to soak the sponge layer and also I polish the rails, then pull back the rest of the loose leather ready for some contact adhesive... I put plenty on as I’m not worried about clean up, a good citrus based adhesive cleaner makes light of any mess... 10 minutes clamped up whilst I make a brew..


I pull back the leather at the rear so that it I’m less likely to soak the sponge layer and also I polish the rails, then pull back the rest of the loose leather ready for some contact adhesive... I put plenty on as I’m not worried about clean up, a good citrus based adhesive cleaner makes light of any mess... 10 minutes clamped up whilst I make a brew..


Last edited:
Similar threads
- Replies
- 4
- Views
- 1K
- Replies
- 61
- Views
- 15K
- Replies
- 15
- Views
- 6K
- Replies
- 14
- Views
- 6K


