- Feedback
- View
Having followed various thread on wheel building for some time I thought I’d have a go at a Snowflake,
I’m no expert just a champion fiddler so this is no more than my own experience and I’m sure more accomplished wheel builders will look in horror at my amateur efforts and limited grasp on the dynamics of stress loading and structural integrity etc.
Now I have to fess up this isn’t actually my first effort as I did the ones on my Ozone Co2 however they were on Pulstar hubs and a little easier, as the straight pull spoke are free to rotate on the hub which in turn allows you a little extra tolerance
After measuring a “Normal” cross three spoked wheel with the same rim and a similar hub dimensions to a M730 I decided upon 272mm “J bend” spokes (was a gamble in fact so much you can’t use an on line calculator to work this out) so I only bought Sapin spokes rather than DT Swiss as they were decidedly cheaper and yet still Double butted
With the increased stress on the rim due to the spoke angles I’ve chosen a rim with eyelets, and whilst I’m at it I wouldn’t recommend using a prize Ringle or Hope hub either
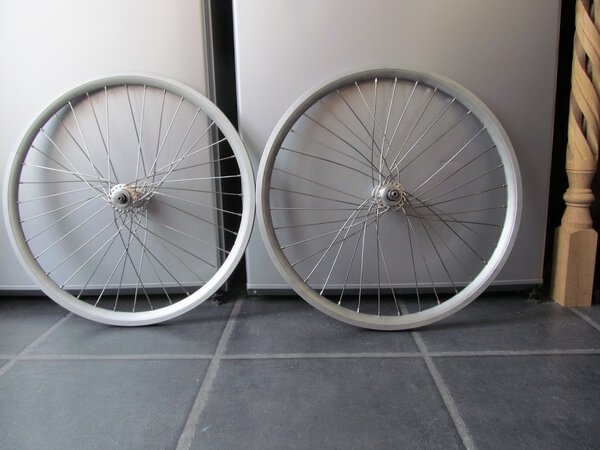
My starting point

The result of a few hours of bending with just finger and thumbs, couldn’t do all 32 in one sitting as my fingers hurt like hell…. And before those who know me point this out,
Since I actually own/possess just four fingers and two thumbs these days (that’s another story) I thought I was doing well
Contrary to popular belief you DON'T use pliers and twist them around each other, its far more refined than that, and actually quite a tactile if laborious process,
all you need is two graceful curves to start with if you bend with pliers you’ll lose the gentle curves and create kinks that you’ll never be able to pull out

Using a similar spec wheel I test fitted two and was pleased with the overall fit and the look of them, and let’s be clear here a good snowflake is ALL about the look, after all there’s little else going for them
The 2mm or so longer spokes are going to weigh more
Break a spoke and you’ve lost two since they use each other for tension
Trueing a wheel takes longer
In all other aspects the rules for spoking up is no different to any other (cross three) spoked wheel, especially when they cross, with upper spoke passes behind the rear of the lower one.
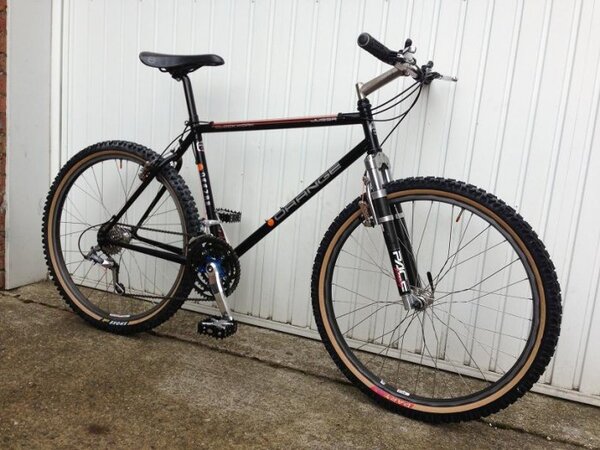
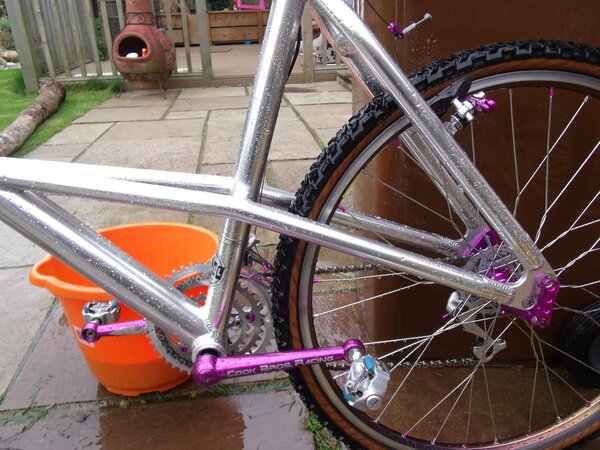
But they look way Kool and just scream the 1990’s louder than lashings of Purple Anno!

To complement the build I re-used some (used but not ridden) alloy Nipples from a nice Mavic SUP CD Bronze rim as I liked them and to coin a phase of bollocks I read elsewhere on here the Subtle nuance is visually rewarding :shock:

In order to get the Hub and Rim built with the correct alignment/orientation I spoked up just one side without the rim and then messed around with the position until I was happy it fulfilled all of the below requirements before popping in the first nipple.
A The Spokes allow clear passage for a pump to access the Vale (especially important on a snowflake)
B Looking through the Valve hole you can see the Hub label (Aesthetics only)
C. The label can be read when sitting on the bike (Aesthetics only)
D. The Mavic Rim label is viewed and read from the drive side (Aesthetics only)
E. Ensure the spokes use the correct left and right holes drilled in the rim (really bad school boy error to make and the only one on the list that will affect the strength of the wheel especially with the increased angles that the spoke enters the rim when snowflaked)

A view through the Valve hole

^^^^^^
A The Spokes allow clear passage for a pump to access the Vale (especially important on a snowflake) Check
B Looking through the Valve hole you can see the Hub label (Aesthetics only) Check
C. The label can be read when sitting on the bike (Aesthetics only) Check
D. The Mavic Rim label is viewed and read from the drive side (Aesthetics only) Check
E. Ensure the spokes use the correct left and right holes drilled in the rim Check
The Snowflake is almost done….

Just need to tension them up and ensure rim is true however before you do that, take the time and effort to ensure all the spokes cross evenly starting and stopping at a uniform height, I do this with the rubber coated handle of the grips you can see in the picture above and use it either just above or below the twist to move them up or down a fraction, if they're way out you'll need to start again.

Go experiment,
If you’ve an old worn out wheel (and lets face it we’ve all got them) remove two spokes and have a go, who knows where it might lead.
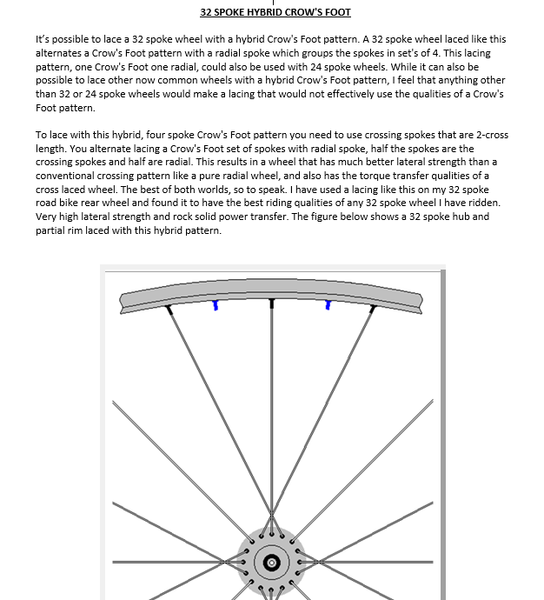
Anyone for a crows foot
I’m no expert just a champion fiddler so this is no more than my own experience and I’m sure more accomplished wheel builders will look in horror at my amateur efforts and limited grasp on the dynamics of stress loading and structural integrity etc.
Now I have to fess up this isn’t actually my first effort as I did the ones on my Ozone Co2 however they were on Pulstar hubs and a little easier, as the straight pull spoke are free to rotate on the hub which in turn allows you a little extra tolerance
After measuring a “Normal” cross three spoked wheel with the same rim and a similar hub dimensions to a M730 I decided upon 272mm “J bend” spokes (was a gamble in fact so much you can’t use an on line calculator to work this out) so I only bought Sapin spokes rather than DT Swiss as they were decidedly cheaper and yet still Double butted
With the increased stress on the rim due to the spoke angles I’ve chosen a rim with eyelets, and whilst I’m at it I wouldn’t recommend using a prize Ringle or Hope hub either
My starting point

The result of a few hours of bending with just finger and thumbs, couldn’t do all 32 in one sitting as my fingers hurt like hell…. And before those who know me point this out,
Since I actually own/possess just four fingers and two thumbs these days (that’s another story) I thought I was doing well
Contrary to popular belief you DON'T use pliers and twist them around each other, its far more refined than that, and actually quite a tactile if laborious process,
all you need is two graceful curves to start with if you bend with pliers you’ll lose the gentle curves and create kinks that you’ll never be able to pull out

Using a similar spec wheel I test fitted two and was pleased with the overall fit and the look of them, and let’s be clear here a good snowflake is ALL about the look, after all there’s little else going for them
The 2mm or so longer spokes are going to weigh more
Break a spoke and you’ve lost two since they use each other for tension
Trueing a wheel takes longer
In all other aspects the rules for spoking up is no different to any other (cross three) spoked wheel, especially when they cross, with upper spoke passes behind the rear of the lower one.
But they look way Kool and just scream the 1990’s louder than lashings of Purple Anno!

To complement the build I re-used some (used but not ridden) alloy Nipples from a nice Mavic SUP CD Bronze rim as I liked them and to coin a phase of bollocks I read elsewhere on here the Subtle nuance is visually rewarding :shock:

In order to get the Hub and Rim built with the correct alignment/orientation I spoked up just one side without the rim and then messed around with the position until I was happy it fulfilled all of the below requirements before popping in the first nipple.
A
B
C.
D.
E.

A view through the Valve hole

^^^^^^
A The Spokes allow clear passage for a pump to access the Vale (especially important on a snowflake) Check
B Looking through the Valve hole you can see the Hub label (Aesthetics only) Check
C. The label can be read when sitting on the bike (Aesthetics only) Check
D. The Mavic Rim label is viewed and read from the drive side (Aesthetics only) Check
E. Ensure the spokes use the correct left and right holes drilled in the rim Check
The Snowflake is almost done….

Just need to tension them up and ensure rim is true however before you do that, take the time and effort to ensure all the spokes cross evenly starting and stopping at a uniform height, I do this with the rubber coated handle of the grips you can see in the picture above and use it either just above or below the twist to move them up or down a fraction, if they're way out you'll need to start again.

Go experiment,
If you’ve an old worn out wheel (and lets face it we’ve all got them) remove two spokes and have a go, who knows where it might lead.
Anyone for a crows foot


