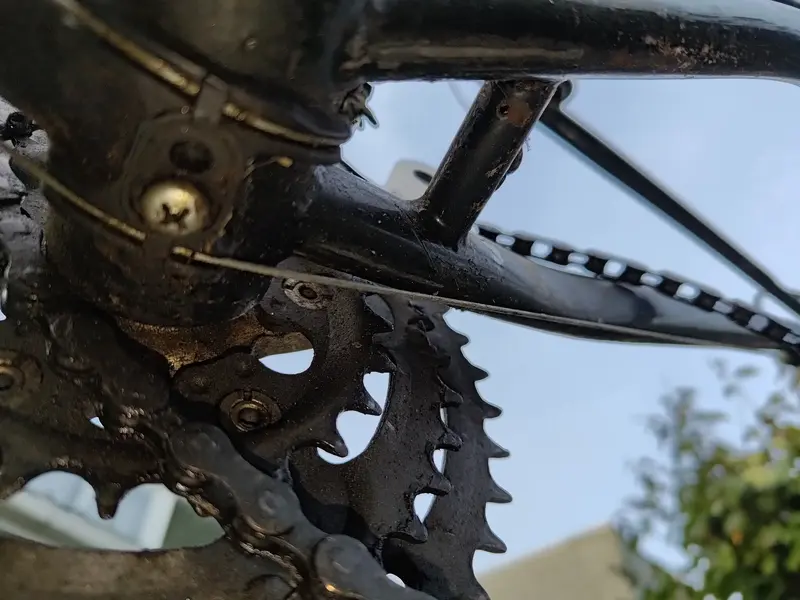
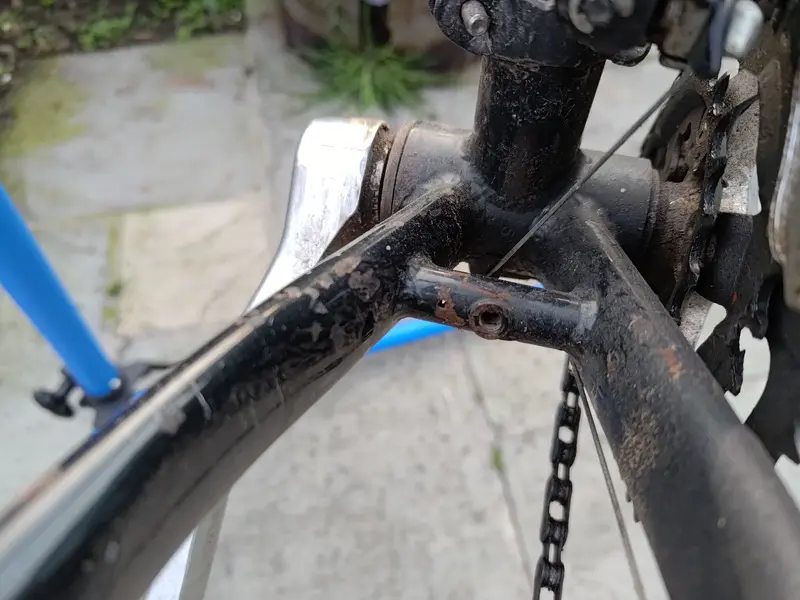
Rust pinhole on chain stay bridge, just how goosed am I?

veganhaggis

Dirt Disciple
Feedback
View
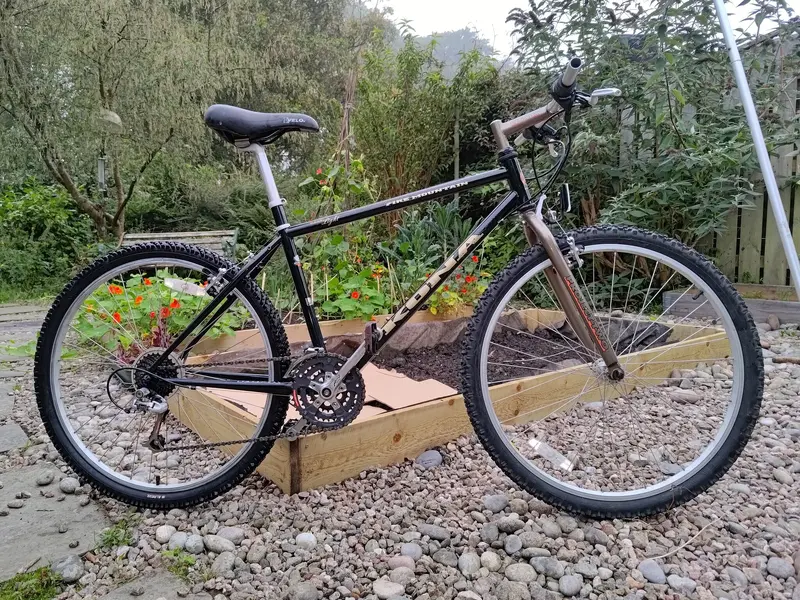
Picked up a 96 Kona Fire Mountain recently, all looked great but when I got it home for a proper clean I spotted some daylight shining through the chain stay bridge. What do we reckon, salvageable with rust treatment (evaporust & fluid film) or not to be trusted?
 

Attachments

  • P_20240907_191635.jpg
    P_20240907_191635.jpg
    1 MB · Views: 63
  • P_20240907_182146.jpg
    P_20240907_182146.jpg
    439.1 KB · Views: 63
  • P_20240907_182129.jpg
    P_20240907_182129.jpg
    364.2 KB · Views: 64
Some frames don't have a bridge at all, it's not structural as such, merely something to screw mudguards to.
If it really bothers you, a good framebuilder could swap in a new one but will roast the paint finish in that area.
 
Thanks for all the replies so far. I've given both holes a solid poke with a screwdriver and a closer inspection. Both look perfectly round and even, and not even a flake of rust came away. So the bridge itself seems solid, and I'm now wondering if the holes are intentional. Not sure if any Kona experts can weigh in on whether or not this is totally normal? 🤔
 
Chainstay bridges occasionally have breather holes to aid brazing, but they'd be symmetrical.

If the bridge is solid, then it doesn't matter about the holes anyway. - clean it up, apply rust prevention inside, fill the holes, repaint the bridge then just get riding and forget that problem along with all the others👍
 
I have holes on my Konas that are off to one side on the bridges, I had the same fear but it was just a bit of surface rust. On one that was resprayed this was confirmed when stripped down.
 
I wouldn't be worried about. No different to a breather hole to let the flux gas out while brazing. Treat it with a bit of rust converter to stop any growth of the rust, them hit some paint over it.

Actually, what *I* would do if I was worried (which I wouldn't be) is clean the paint off, drill the rusted hole out, treat it with rust remover, and then give it a zap with the MIG welder to fill the hole, file it smooth, repaint, and wonder why I wasted half a day doing all that.
 

Latest posts

Back
Top