Rossin Pursuit Build

bramv":1600sgnt said:
really nice, i like the ratty look of it.
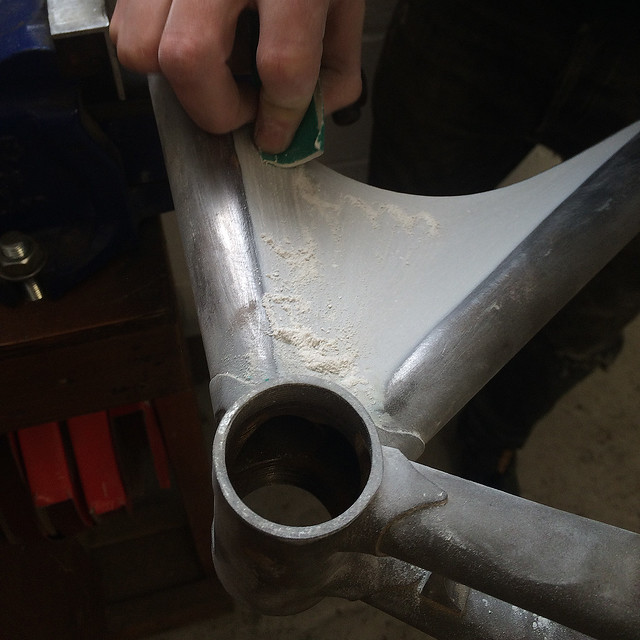
the steerer tube look quit long for the headtube or is the headset that high?

keep up the good work ;-)

Hey,

Yeah the steerer tube was always slightly too high. I probably need to trim about 10mm off of it when I come to fit it all together again.

9516981225_a5eefb4fcd_z.jpg
 
Townman":1alwg7fp said:
Hey,

Yeah the steerer tube was always slightly too high. I probably need to trim about 10mm off of it when I come to fit it all together again.

I'd rather just put a spacer on there.
 
what a cool bike.

Ive got a Rossin road bike and been looking around for info on the brand. Not much out there. My Rossins a tiny bit big for me. Think I'll sell it. Bit too posh for me.
 
Re:

Hi Matt,

Thanks for the contact, Just had a quick look though nice project. As you can see from my Rossin TT restoration on LFGSS It's a lot of fun & hard careful work, don't rush anything! As for the riders name you must not remove & replace with decals, mask it off & blend the new paint up to it,
Replacement decal will just be wrong, If you need any advice feel free to drop me a line. I'm well past the messy part now & just looking for the right parts which is a very slow task. :D There are a couple of my other bikes restorations on there as well.
 
Hello All,

I have been super quiet form this for a very long time. (Almost a year and a half!) Well good news is that the Rossin Restoration is now complete! I'll try and get some work in progress images later as well as some completion photos!

Cheers,
Matt
 
Ok, I'm going to have to go back in time to show you the full restoration, picking up from where I left off. I'll start with the forks.

The forks were probably from a different Rossin frame as they were slightly whiter than the frame itself. This may have been down to the frame ageing or the forks didn't see much light and were packed away in a room for a long time. Who knows, but it was one of the factors that made me decide to do a full restoration because of the colour difference. Having stripped the frame to the steelwork, it revealed some steel issues. Not many, but enough to warrant some brazing.

21520149493_9cde444a30_z.jpg"%20width="480"%20height="640"%20alt="IMG_6094">
21954344789_3dc0a5fb72_z.jpg"%20width="480"%20height="640"%20alt="IMG_6110">

21518358414_4023f0011c_z.jpg"%20width="480"%20height="640"%20alt="IMG_6286">
21953029150_e5b4a6600c_z.jpg"%20width="480"%20height="640"%20alt="IMG_7478">


The forks themselves had large gaps in between the where the clamp connect and the main structure of the fork. Personally I felt it was better to fill this, make it solid. Gool Ol Mario Rossin felt it wasn't necessary to do this which was unusual. Maybe he needed to get this frame done quick, or maybe he didn't care for such detail??

I brazed the gap with the help of my good friend Matthew Sowter of Saffron frameworks and filed it down leaving it clean and smooth. The final clamps were then altered and refined to fit the clamp base.

22128685982_935bb07a44_z.jpg"%20width="640"%20height="640"%20alt="IMG_4676">
 
There were a couple little dents in the frame which I brazed and made smooth. But there was a bigger problem with the dropouts. They had become crushed over time leaving big dents and grooves from the wheel nuts.

a>


I decided I wanted to smooth this back, so I had to build up the brazing first and file back the excess again with the help of my friend Matthew Sowter of Saffron Frameworks.

21953043600_96a62e4d04_z.jpg"%20width="480"%20height="640"%20alt="IMG_8340">
21518398274_21f3429747_z.jpg"%20width="480"%20height="640"%20alt="IMG_8344">

22115021396_cfa9cbef10_z.jpg"%20width="480"%20height="640"%20alt="IMG_8769">
22151386051_05132a9d0c_z.jpg"%20width="480"%20height="640"%20alt="IMG_9113">
 
Now time for the filler! Having stripped back the paint it revealed bodyfiller on the fins which built up a smooth transition to the tubes. Having asked around many many painters to see what the best approach was, none were keen to give it a go. To be honest, i'm a bit of a perfectionist so I had to do it myself anyway.

Mentioned previously, I have been lucky enough to hang out at Saffron frameworks workshop which is where the Rossin frame has been living for this past year and a half. I'd only get maybe half a day at a weekend now and again to actually do stuff to the frame. There was only a relatively small amount of work to actually do to it, but I wanted to take my time. There was no point rushing it. Plus I was the best one to judge the transition of filler having seen it in the flesh (or steel).

So, I slapped on some filler having prepared and cleaned the frame. It was quite a rewarding process applying it, waiting for it to set and sculpting into it. It was also stressful getting that perfect smooth gradient from flat steel plate of the fin to the tube. It was also hard judging the curve. I have seen many Rossin frames online and all have slightly different variations of the gradient curve of the filler. It was also difficult to apply the filler in that kind of way, unlike slapping it on a flat surface of a car body.

After I thought I was happy with the filler I gave them a primer base coat to really investigate the smoothness and transition. I sanded the paint off and if I wasn't happy i'd apply a bit more filler.

a>
21520052963_5fc09eced7_z.jpg"%20width="480"%20height="640"%20alt="IMG_0711">

22128700302_f985f525d5_z.jpg"%20width="480"%20height="640"%20alt="IMG_0730">
21954368019_6bb478fc9c_z.jpg"%20width="640"%20height="640"%20alt="IMG_0733">


21958872808_6b9e68f8fb_z.jpg"%20width="640"%20height="640"%20alt="IMG_2257">


22115050376_943cc977f4_c.jpg"%20width="800"%20height="534"%20alt="IMG_7697">
 
Re:

Crumbs! Not feeling very worthy to comment but that filling is top notch, I know it's finished so can't wait for the next instalment
 
Back
Top