Retro-modern fusion gravel build madness. The new Superb!

@Woz

I was just joking about double standards in the bike industry - the frame is French ds and nds, and so is the bottom bracket cartridge.
Got the French BB from ebay and the cups don't look as well-made as sjs ones (was not aware of them), but they were not as expensive either.

I think that the cups should be interchangeable across all square taper BBs (neco, tange, first, etc)? Or is that yet another are where the industry has come up with a million standards?

PS SJS website say they even stock swiss bb cups, although there's none available for sale. Good to know. Might come in handy one day.
Would a bb30 fit....!🤣🤔🤣🤔🤣

I'll get my coat!
 
WARNING, GRAPHIC CONTENT!

Disclaimer: I do not promote doing this to your frame and there is some very serious damage that can be done to the frame and to yourself if you're not careful. Kids, do not attempt to do this without adult supervision. You'll only have yourself to blame. I warned you. I refuse to take any responsibility for your broken frames, floorboards and arms & legs. This is not a healthy pastime - please find yourself another hobby.
Also, you'll be at risk of getting grief from true retrobikers.

I've re-created the cold-setting process as promised.
I'm not expert - I've only done this 3 times and so far did not have the gates of hell open & swallow up me & my workshop.

I haven't clamped the bridges for the photo, but when doing the actual cold set, it is recommended that you clamp them so they don't break off.
Depending on stay shape, you can drill a wooden block to the right diameter, then cut it down the middle to make clamping blocks. Alternatively, wrap baking paper on the tubes and put some 5min epoxy on them + wooden blocks on top to shape the clamping blocks to your stays. Wait for it to set, remove the paper & you're ready to clamp.
If you're lucky, you might be able to get away with just a pair of cam clamps though.

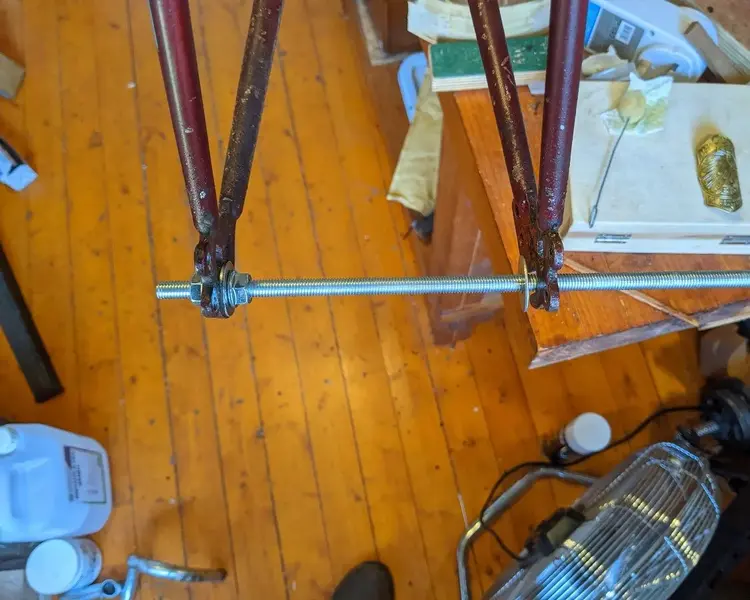
Option 1: M8 threaded rod. I'm missing a nut on the inside of the DS dropout (couldn't be bothered threading it onto a 12in rod just for the photo:LOL:).
Spread to 130+15 by turning the [missing] nut, then unwind & check if the frame has budged. Increase the spread in 5mm increments & keep checking until you reach the target (might have to go as wide as 160 or more).
Almost stress-free, but you're likely to end up with DS stay moving out more than NDS due to the chainring crimping.
This is exactly what has happened with Frannie - most of the spread went to DS and had to be corrected.

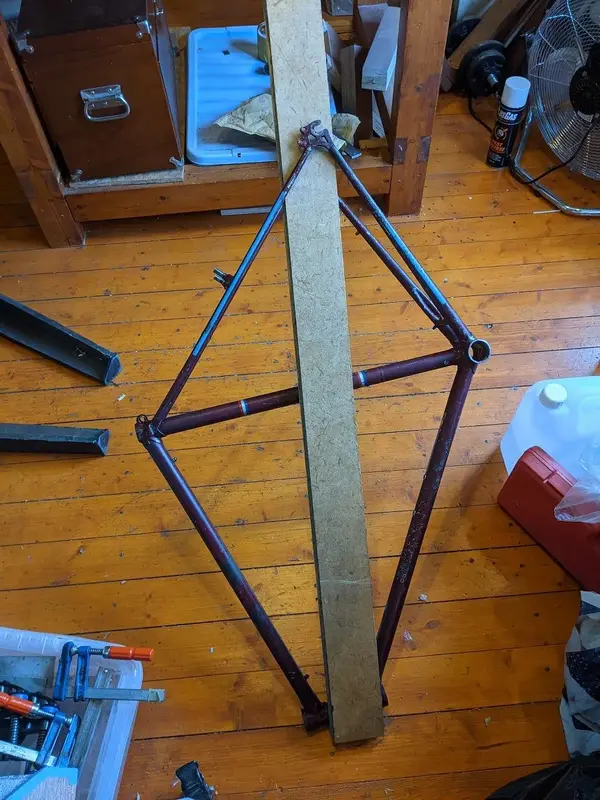
Option 2: Floorboard method. Put an end of the floorboard onto a workbench, and stick the other end into the frame. push down on the board with your knee around the seat tube to generate leverage on the stays, pushing them in or out. The frame in the photo is hanging on the floorboard and only resting on the floor on the headtube).
If you want to bend the stay back in, you need to position the board differently - check Sheldon's website for the photo.
Each frame is different, so you'll need to get a feel for the frame but once you're on it, I found it surprisingly easy to get the right amount of bend.
Very stressful when doing for the first time.
You have Sheldon's blessing (as well as more detailed instructions on his website) to do it this way. Also, the same method is described in "Lugged bicycle frame construction" book, albeit if memory serves me right, this is done before brazing on the bridges (makes sense).
So the way I understand it, doing a retrofit cold-set only differs from the process of frame building in that you bend the stays from the bridges onwards, while a "proper" frame will be bent from the lugs and reinforced by longer bridges.

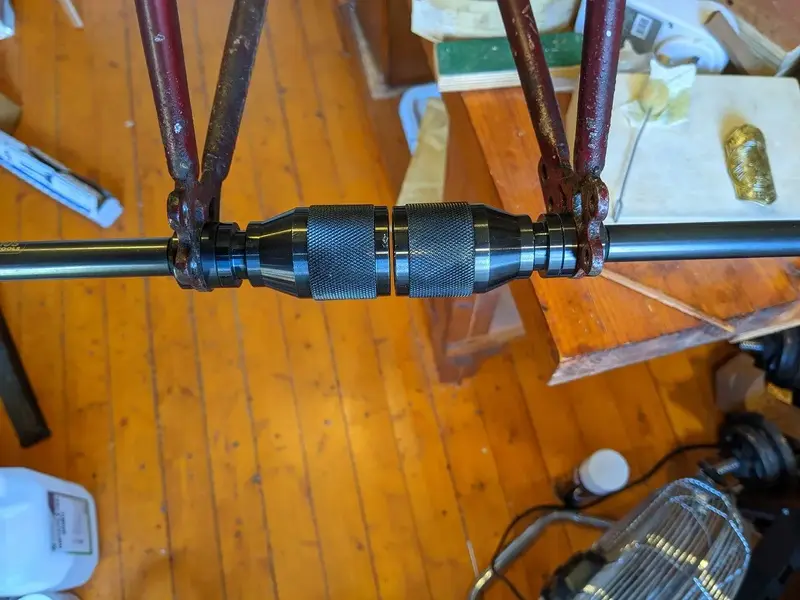
Once spread, you need to re-align the dropouts. I've got a cyclus aligning tool, which was purchased for about £34 on sale, delivered from Germany. Well worth the pennies.
 

Attachments

  • PXL_20220808_075944791.jpg
    PXL_20220808_075944791.jpg
    144.7 KB · Views: 27
  • PXL_20220808_080101330.jpg
    PXL_20220808_080101330.jpg
    153.6 KB · Views: 26
  • PXL_20220808_080426371.jpg
    PXL_20220808_080426371.jpg
    221.4 KB · Views: 27
Last edited:
PS somebody please put a bid on than Liberia road bike. I don't have the space for Francois to keep Francine company.
 
  • Haha
Reactions: Woz
That is just stella stuff. Vive Liberia Vive Acier Vive Floorboards Vive Metal Rods

1660003938289.png
 
I am feeling overly optimistic, and I am sure I will come to regret doing it so soon, but I've decided to give Frannie a new coat.
One of the reasons for the mad rush to get all the potentially destructive mods done was to take her to the powdercoaters this week.

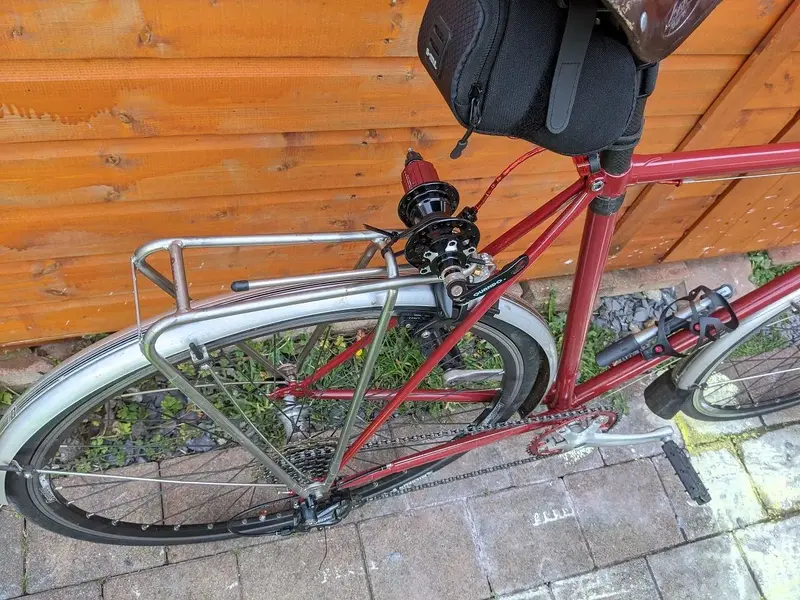
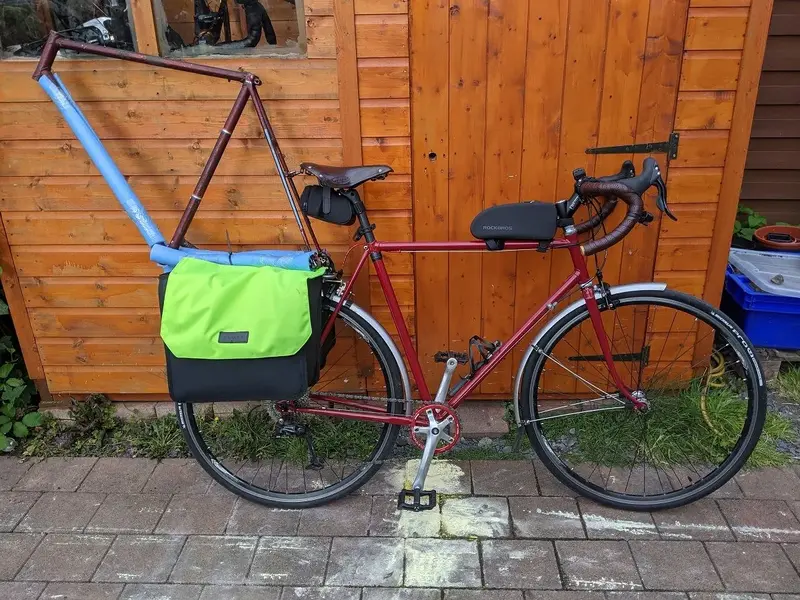
I've mentioned previously that the easiest way for me to transport a frameset is by bike - adding just an extra 8 miles to an otherwise 45-mile round commute. Public transport link is very awkward, and driving is next to impossible in morning rush hour traffic, road closures, etc - plus it's very difficult to get a parking space.
I used to have a wider rack, but recently swapped for a more elegant Tubus Fly. Instead of the usual 3 cable ties across the chainstays I came up with an upgrade that works with the Fly - tied a hub to the rack and mounted the rear dropouts onto a QR. Then added a cable tie closer to the bb.
 

Attachments

  • PXL_20220808_174804823.jpg
    PXL_20220808_174804823.jpg
    274.6 KB · Views: 27
  • PXL_20220808_180252125.jpg
    PXL_20220808_180252125.jpg
    278 KB · Views: 27
  • Love
Reactions: Woz
I am feeling overly optimistic, and I am sure I will come to regret doing it so soon, but I've decided to give Frannie a new coat.
One of the reasons for the mad rush to get all the potentially destructive mods done was to take her to the powdercoaters this week.

I've mentioned previously that the easiest way for me to transport a frameset is by bike - adding just an extra 8 miles to an otherwise 45-mile round commute. Public transport link is very awkward, and driving is next to impossible in morning rush hour traffic, road closures, etc - plus it's very difficult to get a parking space.
I used to have a wider rack, but recently swapped for a more elegant Tubus Fly. Instead of the usual 3 cable ties across the chainstays I came up with an upgrade that works with the Fly - tied a hub to the rack and mounted the rear dropouts onto a QR. Then added a cable tie closer to the bb.
You need a hi Viz jacket hanging off it!

You need a trike trailer bike recovery system!!

Amazing when you see one in the road!!
 
Back
Top