Mid 70's unknown Raleigh restoration from SA

Buff_SA

Retro Newbie
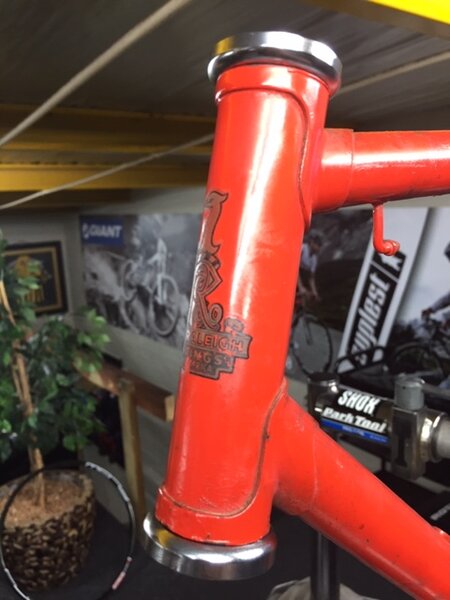
Hi, I’m new to the group and was requested to share my current restoration project with all of you due to it being fairly unique from the perspective of it being a Raleigh, built in South Africa. I'm fairly new to this whole restoration thing as well so please be gentle with me :LOL:

Now for us living here that’s nothing unique at all as all the Raleigh’s I’ve ever owned (and there’s been a few) were built in the Raleigh factory in Springs, SA. In the bicycle boom years the SA factory was producing in excess of 50 000 bicycles a year, mostly for the recreational cyclist, including the legendary Chopper (which I have in my small collection as well). The top end racing bikes however remained the domain of Europe.

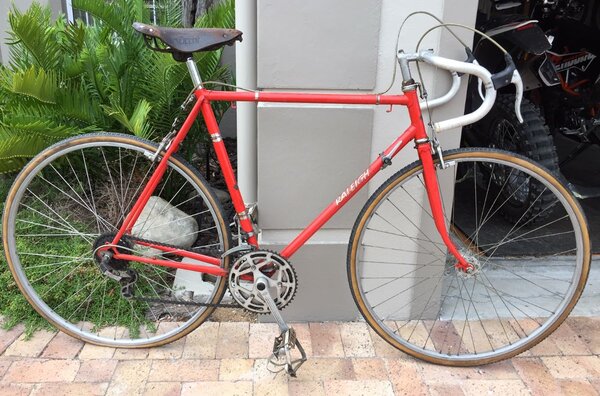
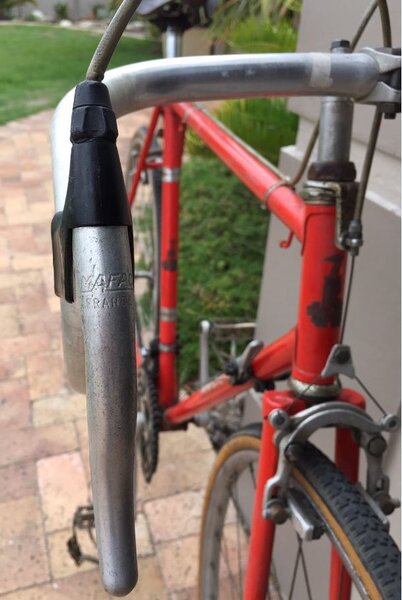
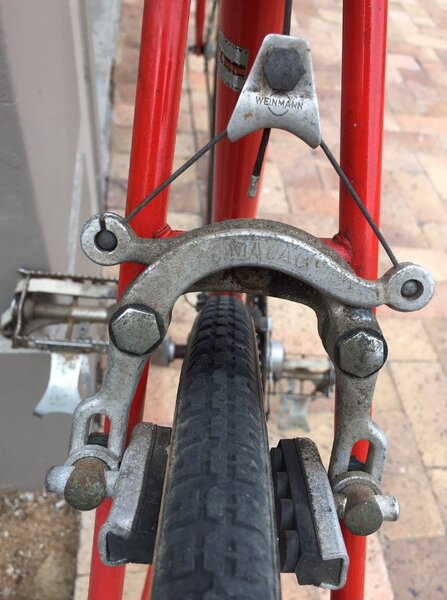
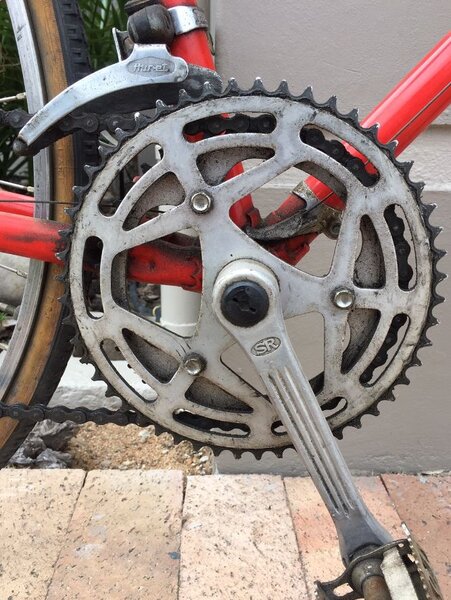
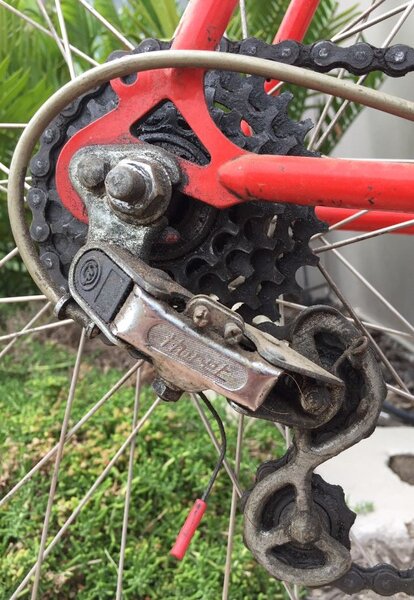
This particular bike is probably dated around the mid/late 70’s but I’m not 100% sure. I’m not too sure of the model either because it has no distinguishing features on the frame. It’s certainly not a top end frame (the brace for a rear mudguard gives that away) but the components are fairly light weight and appear more suited to a race orientated frame. It has a mixtures of components, with full Huret levers and front and rear derailleurs and Mafac brake levers and callipers. It has a fairly unique SR crankset as well. It certainly seems to be speced very different to similar dated Raleighs from Europe.
The saddle is also a fairly unique piece on the bike. It’s plate states “Lycett made in South Africa”. My search history tells me that Lycett was bought out by Brooks in the 1930’s who continued to produce cheaper version of the Brooks saddle under the Lycett name. I was not however aware that they had a factory in South Africa and I’m currently investigating this further.

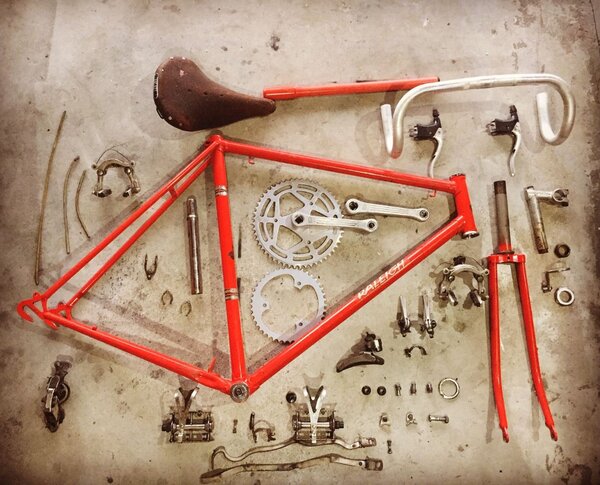
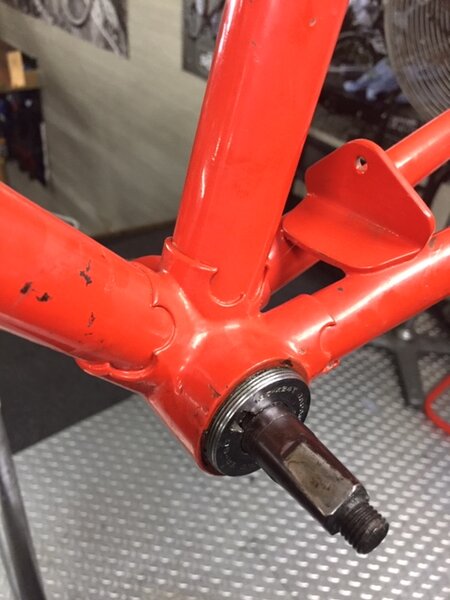
I picked it up at a very reasonable price of around 50 pound (converted) but it needs a lot of work. Fortunately most of it only cosmetic as it seems fairly original and complete with no broken parts. Some of the chrome bits are however in very poor state.

The bike “as bought”
 

Attachments

  • RaleighBefore.JPG
    RaleighBefore.JPG
    227 KB · Views: 1,101
  • BrakeLeversBefore.JPG
    BrakeLeversBefore.JPG
    71.3 KB · Views: 1,101
  • RearBrakeCalipersBefore.JPG
    RearBrakeCalipersBefore.JPG
    91.7 KB · Views: 1,101
  • CranksetBefore.JPG
    CranksetBefore.JPG
    140.8 KB · Views: 1,101
  • RearDerrailureBefore.JPG
    RearDerrailureBefore.JPG
    134.8 KB · Views: 1,102
Being fairly new to the restoration thing my enthusiasm is still very high so it didn't take me long to reduce the bike it a pile of parts. It came apart surprisingly easily and the only part to suffer under my impatience (I'm working on it) was the left side crank cap. Regretfully because it's marked with the SR logo but if that's the worst of it then I got off fairly lightly. This happened during the course of last week.
 

Attachments

  • Stripdown.JPG
    Stripdown.JPG
    195 KB · Views: 1,095
Love layout photos like this.

Are you planning any upgrades on the rebuild or do you want to keep it fairly stock?
 
Re:

The plan is to keep it as original as possible. I’m also not going totally overboard with new chroming etc. That which is damaged will be restored as best as possible and used again so the bike will still look dated.
 
After stripping the frame down I tackled the BB first and then the headset. The BB needed new bearings but the cups and races were still in acceptable condition. Had an axle been freely available I would have replaced it but sadly they're hard to find over here. Luckily it feels fine with new bearings and fresh grease.

The issue with Raleigh 26tpi fork thread I learned the hard way. I went to a mate bike shop with the frame and fork to replace the headset (because he's got all the right tools) and got stuck in right away. All went well removing and replacing the new cups but the problem came in when I got back home and installed the bearings and the headset nut... it only went down half way. Hmmm... we have a problem x 2 :? Firstly it didn't fit and secondly, I had thrown the old top cup away at the bike shop and the old nut didn't fit the new cup & bearing. Phoned up my mate and had him dumpster diving early the next morning looking for my old cup :oops: Fortunately he found it so now the headset will sport a new lower cup and bearings and the old top cup and new loose bearings until I can order in a Raleigh 1 inch headset from who knows where.
 

Attachments

  • BB_sorted.JPG
    BB_sorted.JPG
    44 KB · Views: 1,019
  • HeadsetCups.JPG
    HeadsetCups.JPG
    41.8 KB · Views: 1,019
  • HeadsetBearings.JPG
    HeadsetBearings.JPG
    44 KB · Views: 1,019
To soak up my disappointment with the headset issue I decided to put in some effort on the frame and see if I could make some sort of improvement on the dull and rust spotted paint job.
We don't get T-Cut in SA and with it being a Saturday afternoon, all the automotive suppliers were closed so I tried what I had... Autosol. Low and behold, it did a fairly impressive job. Here's some before and after shots.
 

Attachments

  • TopTubeBA.JPG
    TopTubeBA.JPG
    52.2 KB · Views: 1,018
  • ForksBA.JPG
    ForksBA.JPG
    58.5 KB · Views: 1,018
Re:

I got a NOS Raleigh headset on eBay but it had to come from the USA. Do NOT have the head tube faced and reamed at the top...Raleigh cups are more like JIS (30.0mm) and will be loose if the head tube is reamed for ISO (30.2mm).
 
Re:

I'm with rogerzilla on this. The old Raleigh headset cups are incredibly hard wearing, they'll run for another 40 years no problem. I'd personally just reuse them with good quality grease and fresh balls.

Paint came up well!
 
Re:

Thanks for the feedback on the cups.

One of the first things I noticed on these old bikes is that the tolerances certainly aren't of the same high quality as they are on today's modern machines. As an example, I was able to remove the bottom cup by simply giving it a good few hard turns by hand :shock:

I also gave the stem some attention on the weekend and got it looking a lot fresher. I decided not to polish the aluminum parts with Autosol as I don't want the gleaming shine finish of a new bike so I simply used a Scotch-brite pad on my drill to give me the finish I was looking for. I tried it on one of the Mafac levers as well and I'm happy with the result.

Opinions would be appreciated though?
 

Attachments

  • StemBA.JPG
    StemBA.JPG
    58.8 KB · Views: 993
  • BrakeLevers.JPG
    BrakeLevers.JPG
    101.2 KB · Views: 993
Loose bottom cup won't be a problem - just stick an ISO bottom end in there as the cup is 0.2mm bigger and it will be a perfect interference fit. You will need to get the crown race seat cut to ISO 26.4mm (10 minute job for any half decent bike shop) or use a JIS crown race that works with an ISO bottom cup (e.g. Tange - only the crown race actually differs between JIS and ISO in their headsets, and all the other components are the same). You can even use a Tange Falcon cartridge headset and, although, you can't use the top end as it's 24tpi, you get a spare cartridge! Do cherck stack height before doing all this but Raleigh headsets were pretty tall, so you are unlikely to have issues.

The top end has to be 100% Raleigh. The races are U-shaped and not angular contact like modern ball races. However, this doesn't cause any problem. I'm running exactly such a frankenheadset on a 1980s bike.
 
Back
Top