You are using an out of date browser. It may not display this or other websites correctly.
You should upgrade or use an alternative browser.
You should upgrade or use an alternative browser.
Laïti Mono, aka the brainbreaker
- Thread starter Raging_Bulls
- Start date
Re:
I've been keeping an eye on this one for a good time, and with good reason as I too own a mono sided bike, or cantilever, if you want to be clever. In fact I nearly made a punt on this at the time that it was listed for sale. I should have maybe replied sooner....
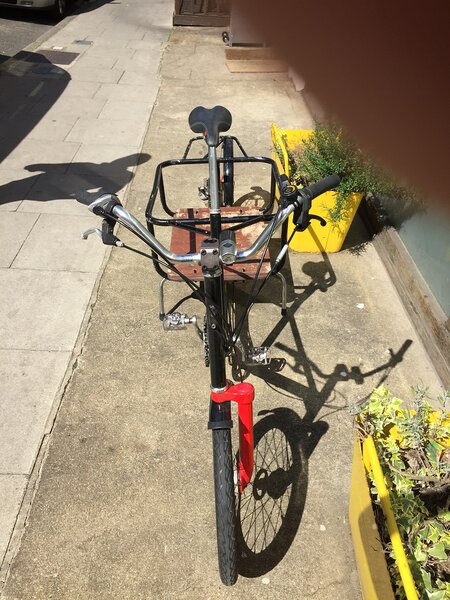
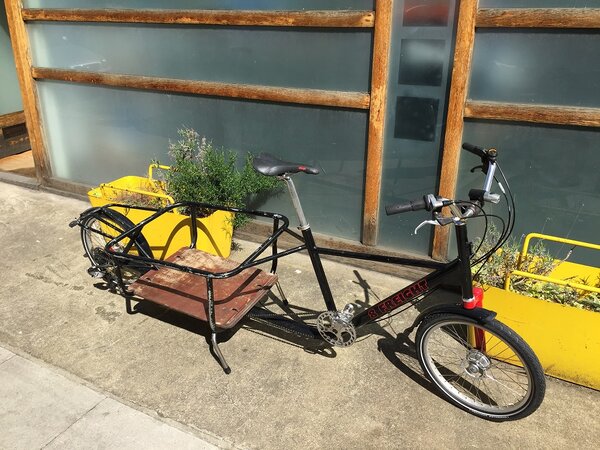
As far as I can see the wheelbase looks absolutely fine and as intended, these designs need to have a degree of offset to balance and handle properly. Don't attempt to straighten it! The forks are prone to flexing but again this isn't unusual with this type of design.
The main man as far as these types of machines are concerned in the UK is Mike Burrows, he's mainly known for the Lotus 108 bike used in the '92 Olympics but has been making some interesting creations for a good few years. He's also still busy doing so as well so I'm pleased to say that they aren't a technological dead end.. for now
A couple of links are here, for the Lotus and also a bit of an explanation about the mono design (doesn't really help explain the alignment fully , but kinda interesting)
http://en.wikipedia.org/wiki/Lotus_108
http://www.cyclorama.net/viewArticle.php?id=278
Below are some images of my Burrows-designed 8 Freight cargo bike, complete with my finger :facepalm: . Hopefully it shows the degree of offset reasonably well (the rear wheel is concealed by the mudguard). Note that mine too has drum brakes (we also own a disc-braked variant at work but the drums are much better, and last way longer. I've heard that replacement pads will need to be machined so hopefully my brakes won't die on me anytime soon !
I hope this helps! Oh yeah, don't sell it (unless I can find a home for it)
Attachments
- Feedback
- View
Re:
- -
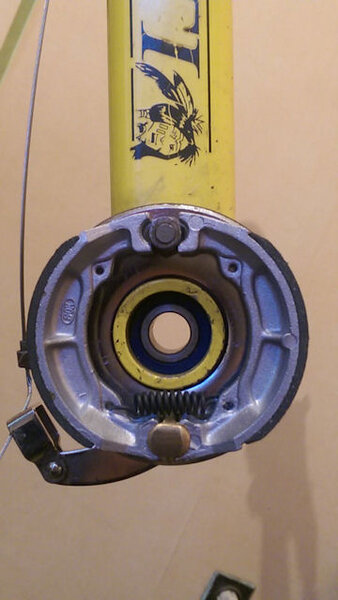
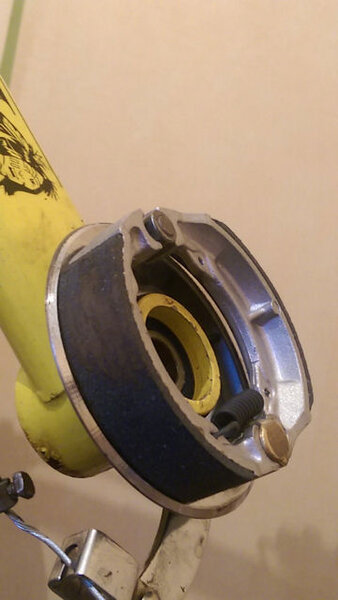
New shoes, close enough. The drum fits over them just fine and the wheel spins freely.
These are DBS part number 210613, also commonly labeled as VB313 or S613 and measuring 90mm x 20mm, just in case any other Laïti owners are searching the web for the right size.
I'm going to file down the top bit just a little though, so that the contact point is more towards the middle of the pad. I'm pretty sure they also filed out the top section when they installed the original drum shoes.
It sure is a fight getting the darn springs in place though. The new shoes' eyes are 1 or 2mm further apart than the previous ones and they didn't come with springs, so I'm going to have lots of "fun" with pliers when I install them properly.
----------
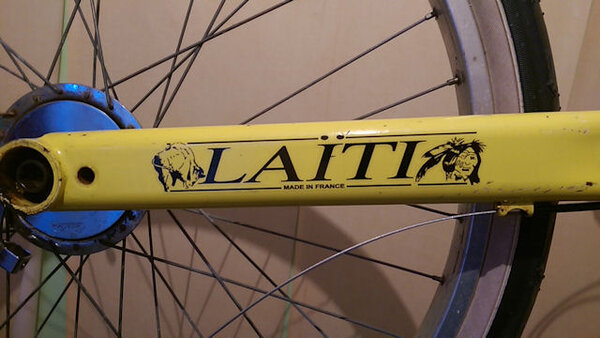
EDIT : and while I'm helping other Laïti owners, allow me to mention that this decal is one of Gil_m's reproductions. He has it on file.
I spent hours reconstructing it (from a hi-res photo of the original) in Paintshop because the original had cracks and chips (see the pics above, where you can clearly see the damage on the " i " of the inside decal).
Gil then worked his magic on the file I sent him and the end result is spot on.
I think the original was a waterslide decal. This however is a proper one, so if it gets damaged at least you can remove and replace it easily.
Attachments
@Raging_Bulls
I am also bringing back an old Laiti Navajo. I had the luck to get it in a completely original condition with very little use. I do also have these "famous" Excelioo brake hubs and their effect is also not yet acceptable. However, I did not yet work on them. Due to the fact that the bike has rarely been used I am quite confident that I can reuse the present brake shoes and that some alignment will help to increase brake power.
At the moment I am at different issue: Despite the very good overall condition of the bike, the rear central nut of the hub which locks the wheel onto the hub is totally shot. I assume this was due to the previous owner not knowing which way to loosen it. At the moment it is fixed on the bike and holds the wheel well but my attempts to loosen it were not successful so far (I did not try very hard in order to not destroy more of the nut). Can you confirm that it has a left-hand thread? It would make the attempt to loosen it a lot easier (while remanufacturing that nut would be a lot harder).
Btw.: Here are a few pictures of the bike at present from a German forum.
http://www.mtb-news.de/forum/t/zeigt-he ... 0/page-250
Thanks!
Best
Andy
- Feedback
- View
Andy,
On my own Laiti It's a regular thread (clockwise to tighten, counter-clockwise to loosen). The rear one needs a lot of force to tighten it properly, otherwise you'll have drive slip in the lower gears. (the only things transferring the power from the cassette to the hub is the inside of the bearing and the cone of the nut, both of which rely on clamping force to prevent slip)
To remove the nut, don't bother with gripping or clamping the nut itself. My Laiti's wheel nuts don't even have edges, they're just round.
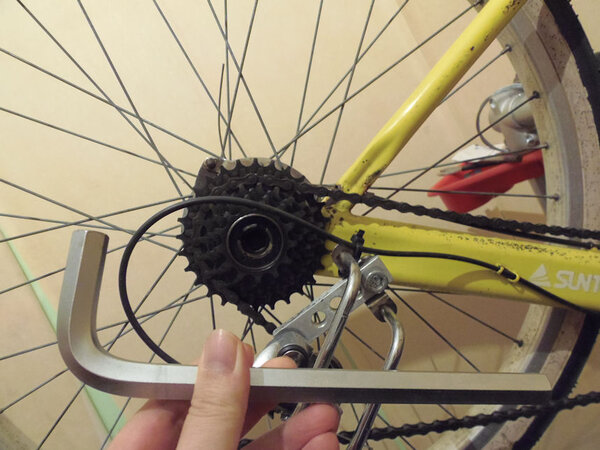
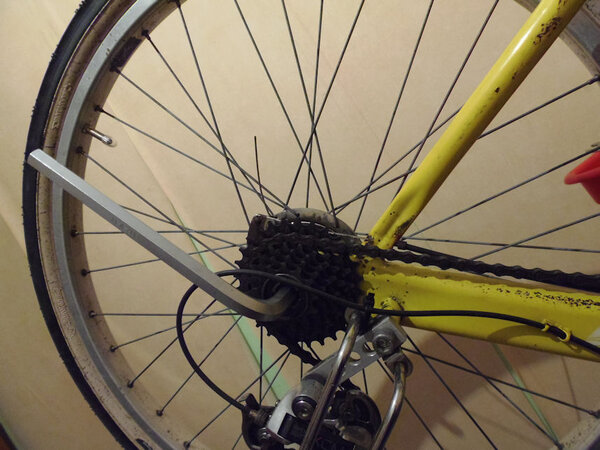
On the other side of the axle there should be a 15mm Allen head. Get a large 15mm Allen key, stick it in with the end pointing towards the rear.
Have someone hold down the front of the bike and put your weight on the Allen key (to rotate it counter-clockwise).
Stand on it, jump on it if needed, the axle is strong enough. Or clamp the key in a large vice, put the bike on top and pull it in the right direction with a couple of people if you must. It should give at some point.
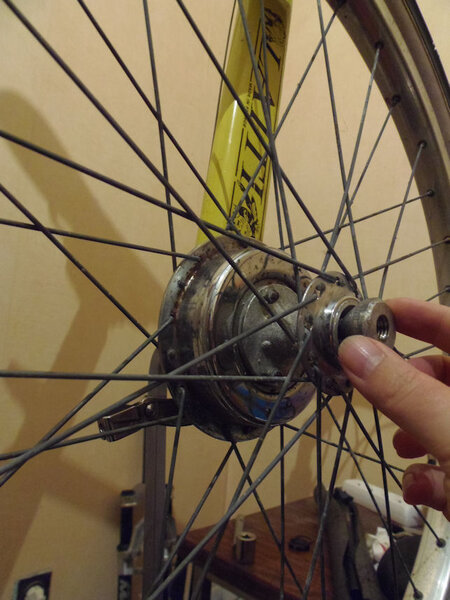
As soon as it loosens up a bit and the nut starts spinning, you should be able to screw it out by hand. (unless they used Loctite or if the thread is damaged). I can literally turn them with 2 fingers because mine have absolutely zero resistance once they're not clamping down the hub, and I haven't even used oil or anything on them.
(I'm using the front one here as an example because it was loose already and I was too lazy to take the bike out of the workstand)
Hope this helps
EDIT : As for the nut itself, you can take it to a machine shop and have it rounded off. It'll look like mine then. As I showed above, there is absolutely no need to use the nuts. I've removed the wheels and put them back on a dozen times already and it always works just fine with the 15mm allen key. Just tighten by hand until it's making contact, then use the key to tighten it properly. It won't slip.
EDIT : Whoops! I made one huge mistake. It's not a 15mm key but a 14mm one.
