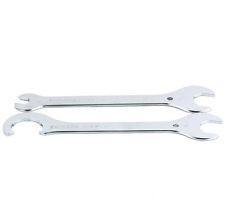
Help removing old square taper BB

wassertreter

Devout Dirtbag
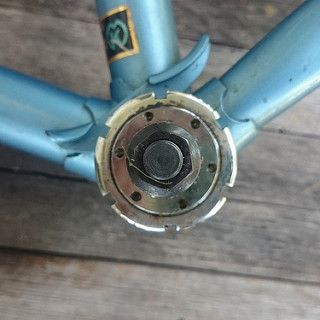
Hello, sorry I am a bit of a clean slate when it comes to vintage parts. Could anyone provide a pointer or instructions for removing this BB? I have the 3 different spanners (the one with pins and one with teeth for non-drive side, and the "36" one for DS). What order do the parts come off, and what direction to un-thread?


Feeling a bit stupid asking this. Advice greatly appreciated. The frame is a lovely early 80s KHS Turbo, so I would presume "english" BSA threading? Many thanks.
 

Attachments

  • bb.jpg
    bb.jpg
    28.3 KB · Views: 816
ring first then pins. as you look at each side, if you were to place the/a spanner upright above the BB, it should turn towards the forks and away from the seat tube. This is the same for both sides. That's how i remember it. The drive side has a left hand thread. But as long as the spanner goes down and forward it's simpler to remember.
 
Re:

Take care with the lockring, they are easy to damage. It's also very easy for the tool to slip and damage the paint. Wrap some rags around the tubes just in case.

The drive side fixed cup is likely to be very tight, so much so that it might not be possible to get enough leverage with a normal spanner. I've had to resort to a vice before. Again, be careful not to damage the cup.
 
park_lockring_10_m.jpg
 
The History Man":26vv5fjj said:
ring first then pins. as you look at each side, if you were to place the/a spanner upright above the BB, it should turn towards the forks and away from the seat tube. This is the same for both sides. That's how i remember it. The drive side has a left hand thread. But as long as the spanner goes down and forward it's simpler to remember.

Huh I thought from seattube forward (pedaling direction) would tighten the BB, so it doesn't loosen from pedaling while in use? Am i totally confused?
 
wassertreter":14q5rfcd said:
The History Man":14q5rfcd said:
ring first then pins. as you look at each side, if you were to place the/a spanner upright above the BB, it should turn towards the forks and away from the seat tube. This is the same for both sides. That's how i remember it. The drive side has a left hand thread. But as long as the spanner goes down and forward it's simpler to remember.

Huh I thought from seattube forward (pedaling direction) would tighten the BB, so it doesn't loosen from pedaling while in use? Am i totally confused?

Yes. :LOL:
 
wassertreter":orsduluo said:
The History Man":orsduluo said:
ring first then pins. as you look at each side, if you were to place the/a spanner upright above the BB, it should turn towards the forks and away from the seat tube. This is the same for both sides. That's how i remember it. The drive side has a left hand thread. But as long as the spanner goes down and forward it's simpler to remember.

Huh I thought from seattube forward (pedaling direction) would tighten the BB, so it doesn't loosen from pedaling while in use? Am i totally confused?

It's called Precession, a bit counter-intuitive as it's related to Newtons laws of motion... but yep, a left hand thread on the drive side will tighten when riding.

http://www.sheldonbrown.com/brandt/left.html

Shaun
 
Thanks everyone, went quite smoothly. Unfortunately my spanner for the NDS doesn't look like the one above, but like that:


So I took off the outer NDS ring with a pipe wrench. The BB is shot anyway.

Good news: no corrosion inside BB. Found an old 6-speed wheelset in the in-laws' basement. Will build a single speed beater for going to the station. Got almost everything else in the parts bin.
 

Attachments

  • s-l225.jpg
    s-l225.jpg
    2.8 KB · Views: 409
Back
Top