84 Saracen ATB Citybike

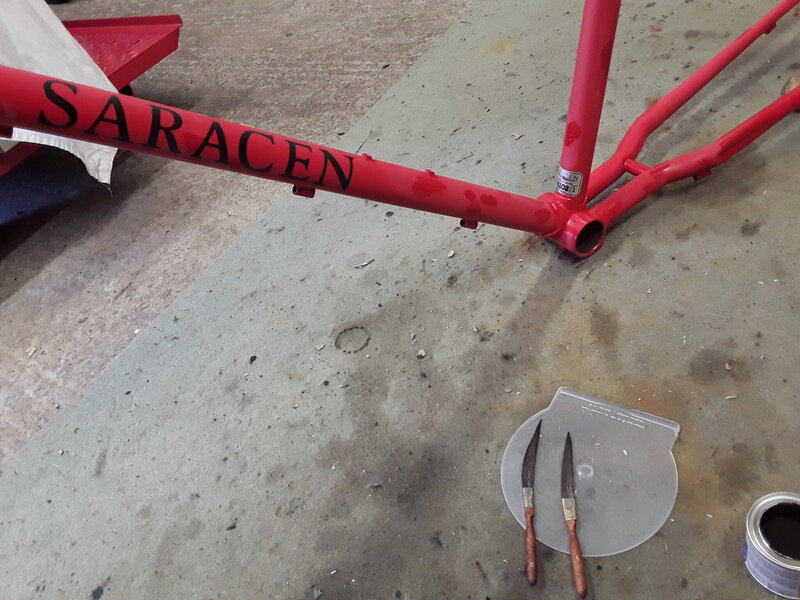
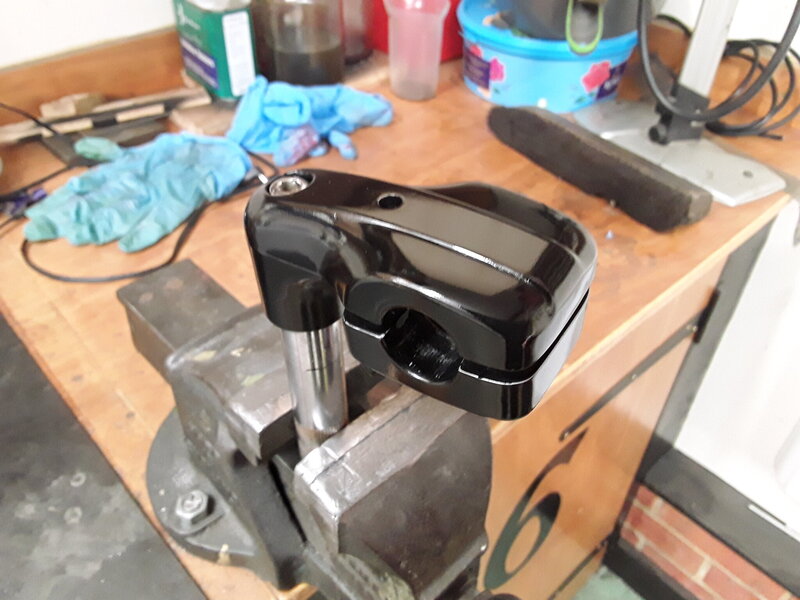
Next i needed to find the colour for the touch up. This was mixed using red, black, orange and white paint.....put on with a small brush. The pin brushes were to repair the decals with black....which has worked quite well too.

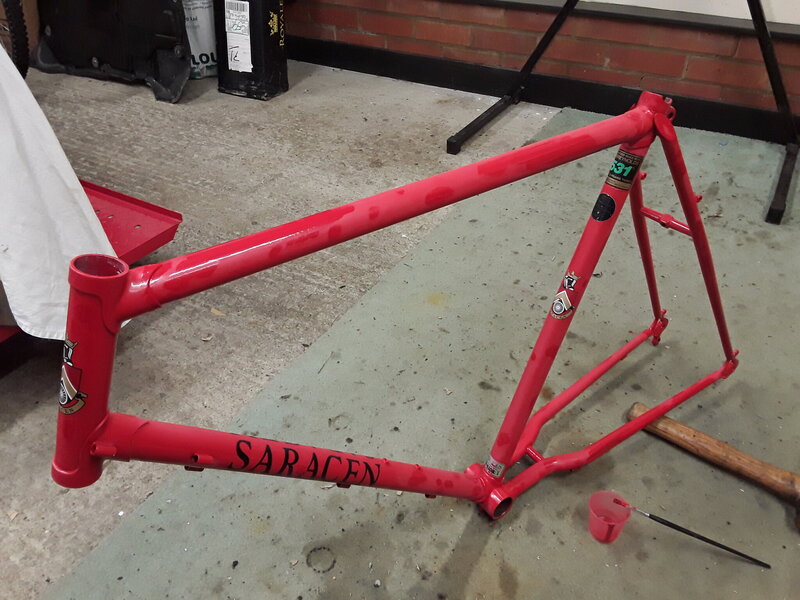
Its then flatted back, and repeated till your happy with the level of finish....

The aim is to try to hide the major damage, whilst keeping a bit of the character and life....so a bit of rub through, bit of deformation, bit of discolour is fine.....its supposed to look old and used...just not totally knackered....so very different to the rocky mountain where it was basically a air brush micro smart repair......

The touched up areas are gloss, but will cut back to pretty much the same colour.

This is far more achievable in a shed without special equipment.
 

Attachments

  • 20230904_111939.jpg
    20230904_111939.jpg
    429.6 KB · Views: 37
  • 20230904_110436.jpg
    20230904_110436.jpg
    422 KB · Views: 38
Some great skill and work from the off on this one! Keeping the paint and touching up looks like the way to go. Patina is perfection in my eyes, but at times photos can be deceiving and make things look better than they actually are.

Strong start to the thread - lots of problems to keep you busy and also keep us armchair/deskchair critics both amused and impressed! Keep up the great work! :cool:💪👍
 
Those brake hubs look amazing.......

Glad you are managing to save most of the frames patina, would have been a shame to re-paint the whole bike given the rarity and some life history is always a nice thing on these old machines.
 
Frames now had 3 coats of enamel over the damaged areas, each rubbed back and done with a new colour blend. Its looking pretty good, with a bit of patina left, but looking much smarter.

I will give it 48h in the sun then shoot some clear onto it....im using upol power cans for this (my go to), but just remember, shoot the first coat very light as spraying over enamel can get some crazy....literally....reactions!

I've also got the small parts out of the sheep dip and skuffed up the drums on the hubs ready for the new shoes after rust treatment. 320 grit is normally enough to deglaze both pads and steel drums.....obviously wear a mask a d I tend to wash, then wet the whole lot down with brake cleaner.....reason? Asbestos! It can be present in most pre 90 brake parts.....its not worth the risk.

Stems refinished and ready to go.

Finally the rims are all cleaned up and treated ready for rebuilding......
 

Attachments

  • 20230909_092438.jpg
    20230909_092438.jpg
    760.8 KB · Views: 22
  • 20230907_172929.jpg
    20230907_172929.jpg
    313.2 KB · Views: 23
  • 20230909_095854.jpg
    20230909_095854.jpg
    342.1 KB · Views: 21
  • 20230909_095951.jpg
    20230909_095951.jpg
    394.2 KB · Views: 22
Amazing work, enjoying this. Can I ask what is this sheep dip you speak of? It seems to work wonders. I have good results with evaporust but even that doesn't bring stuff up this well.
 
Amazing work, enjoying this. Can I ask what is this sheep dip you speak of? It seems to work wonders. I have good results with evaporust but even that doesn't bring stuff up this well.
I’m intrigued by @Tootyred magic sheep dip, as those parts look gleaming! 😎

Good luck with the clear coat (and getting 48 hours of sunshine!) sounds like it’s squeaky bum time with the first coat waiting to see what might happen! 😳🤞💪
 
Evaporust is ok, but baking soda and white vinegar, with a squirt of wd40 is my choice.....the trick is to shake the tin every few hours.
Would make a good mouthwash minus the WD40! 🤣 You can pretty much clean a whole house with baking soda, vinegar and a lemon.

Great job on that stem too! :cool:
 
Great project this,i was intending to buy it myself ,but ummed and aarrd about it too long,mainly regarding the frame size.Glad to see it here,a pair of amber wall knobblies will transform it.
 
Back
Top