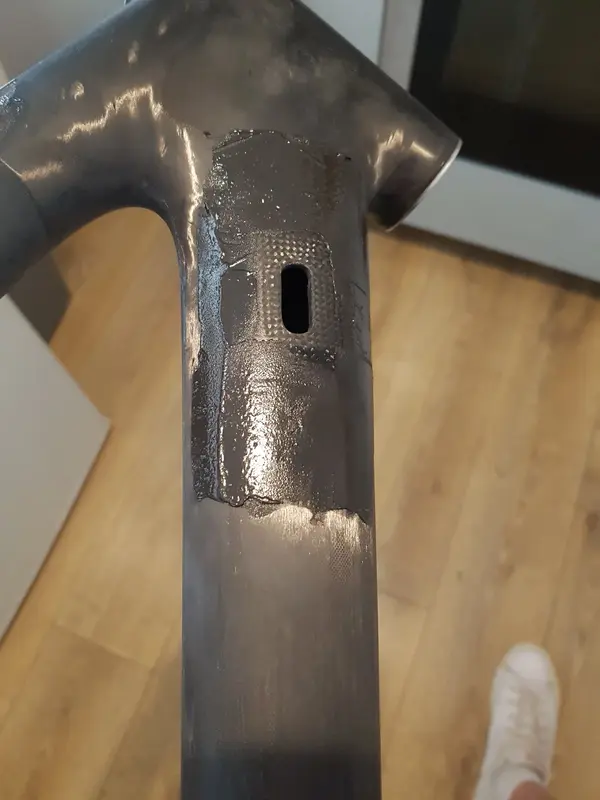
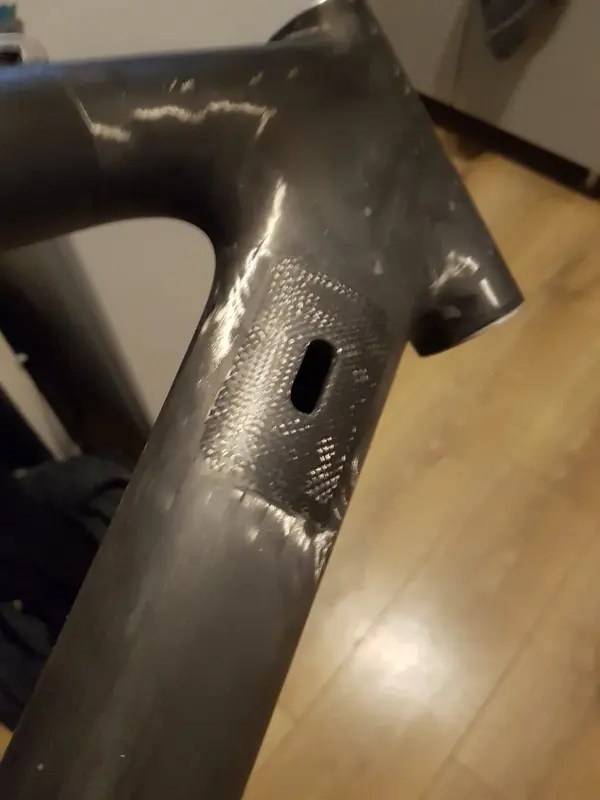
I thought very long and very hard about modding the frame further to internally route the cables/hose trough the top tube in a similar way to how i did the Seatpost cable. I really wanted to do it but decided to reign it in and scrap the idea due to a lack of confidence, Im not a carbon fiber expert at all, just a bloke whos researched a lot as well as sought advice from people in the know. If I'd have done the top tube as well who knows if the frame would be strong enough or just become a death trap? Even now three's no guarantee the downtube cable entry area wont crack. The extra layers of reinforcement around the hole are pretty much how its done on production frames, except they are done internally during the layup process in the mold. This is why I went a bit overkill with eight extra layers for a bit of peace of mind.
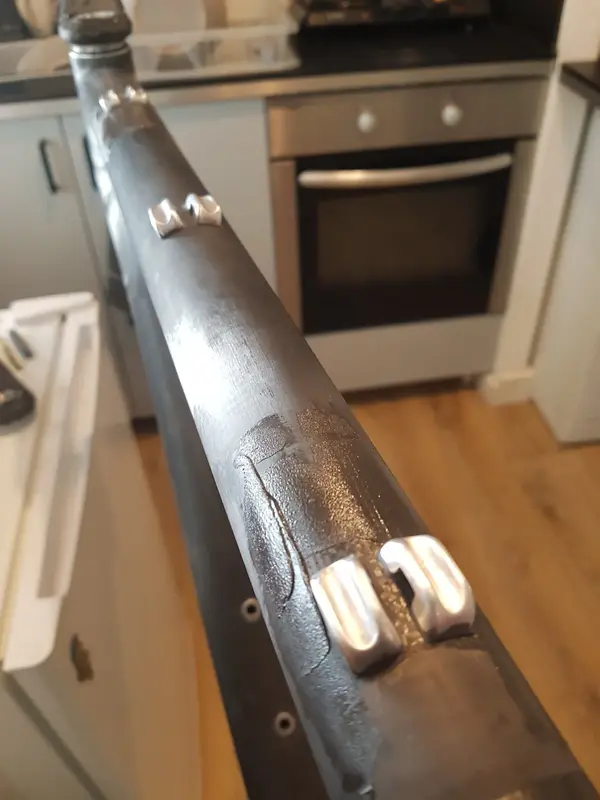
When I made my mind up to change the top tube guides I considered running them under the down tube but wasn't keen on the hose and cable being in the firing line or rocks and stones. I also thought about routing along the underside of the top tube - so I did some tests to see how the cables behave as the suspension compresses. They had a tendency to rub on the seat tube so that was no good. Routing it along the top side works well though because as the suspension moves the cable bends away from the frame.
Im done with mods and repairs now. Did have some elaborate ideas for paint schemes due to watching too many ETOE and Orion Paintworks videos on youtube! But Im not a pro painter so Im sticking to plan A which should be a stealthy matte/gloss black done with quality materials.
My filler arrived from Easy Composites this morning. So I've spent today smoothing the edges of the various carbon patches ive added around the frame.
The filler is supposed to be mixed accurately using a scale. But I'm quite used to 2 part fillers from my time working as a decorator so I just mixed it on the filler knives as I would do with wood filler, guestimating the right amout of hardener. That was a mistake as it took ages to dry and was really difficult to sand as it didn't fully harden up..
I used the wet sand method to prevent dust and help stop the sandpaper dragging. After a lot of graft I am fairly happy with the result. Any small imperfections should be filled with the high build epoxy primer.
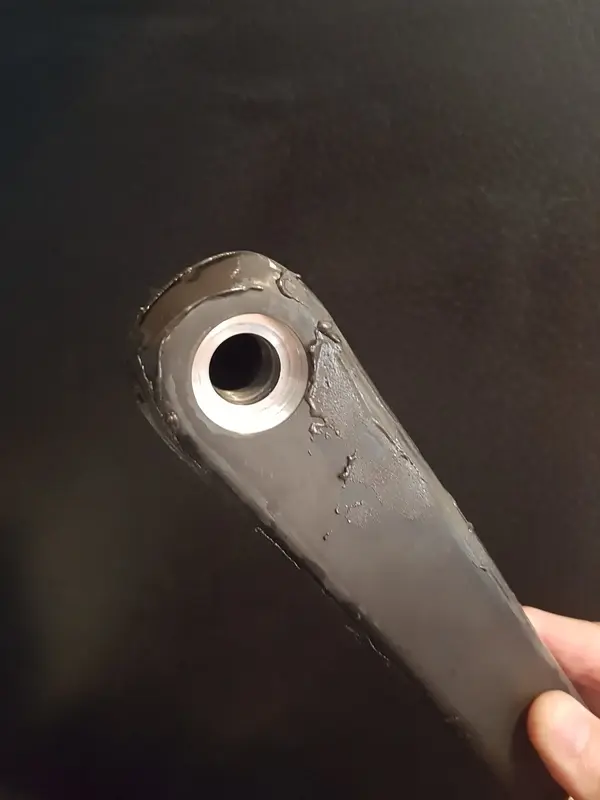
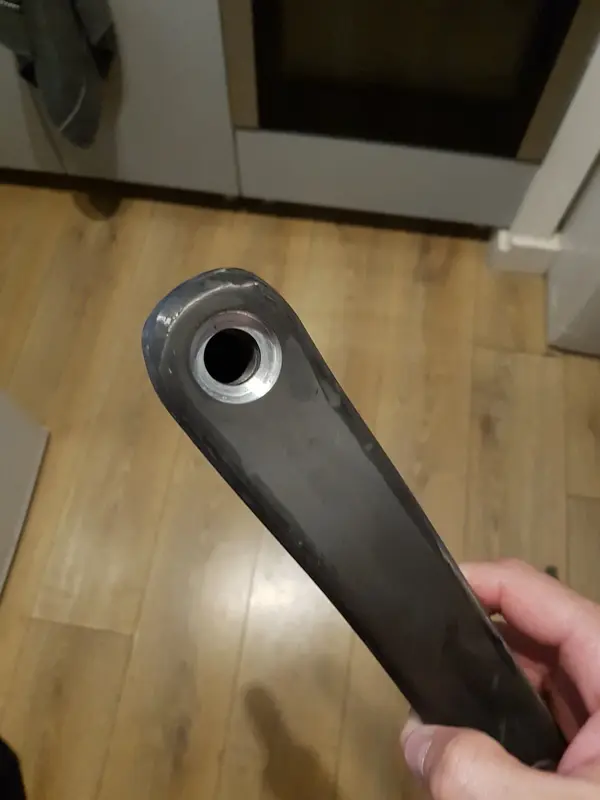
Some photos below, not much to see really. Also did a first fill on the non drive side crank arm as it was quite rough. I'll have to give it another once over and use a few grades of sanding to get it really nice as the cranks are getting gloss clearcoat .
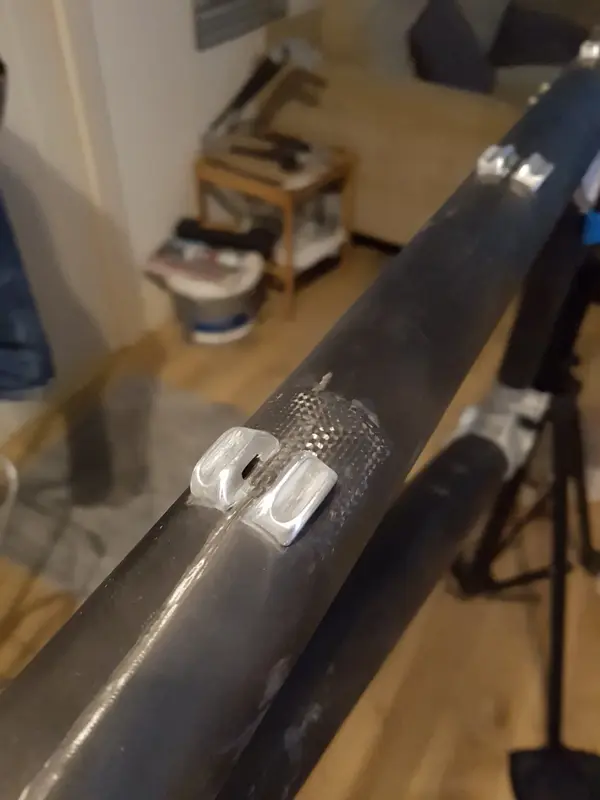
I already had the DP460 from the repair to the headtube so used it on the guides.
I initially came across it due to a post on another forum where a guy had a similar issue on a DH bike. His lower headset insert was loose (carbon frame) so he repaired it with DP 460. The bike had since survived multiple race runs down the Fort Willimam World Cup track so it must be pretty good.
I looked into it and was very impressed. Its incredibly strong and shock resistant, also gives you a 60 minute working time as opposed to DP 420 which is has a 20 minute pot life. The 460 and 420 are equivalent in strength though.
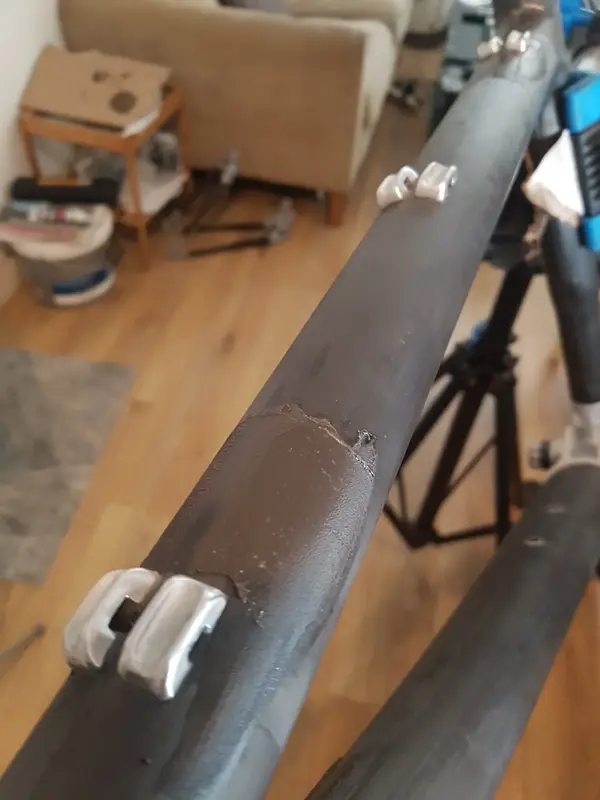
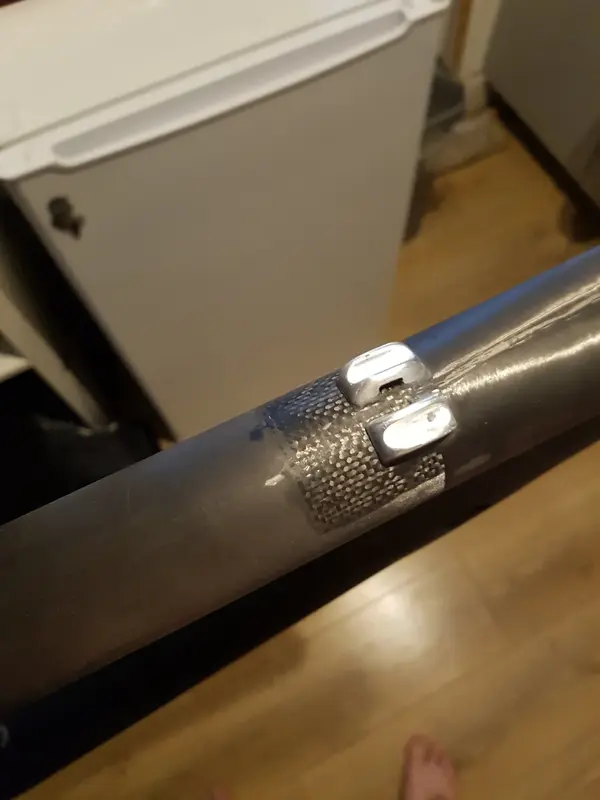
Looks like all the filler is gone but it's there smoothing the transition at the edges of the new carbon.
Removing the excess epoxy glue from the new guides was tough. If I did this again is find a better way to clamp them while drying and wipe away the excess with isopropyl before it dries.
I made a start on the painting. Applied the black epoxy primer, sanded down then applied the black metallic base colour.
Sadly my prep wasn't good enough and there's a few imperfections. I was really gutted and even started second guessing the black colour. Today I was just not feeling it and considered scrapping the frame for something else....
So i thought maybe I should do a mock up build to get a better idea of how the bike will look.
Its actually not too bad in black so I might crack on with plan A, however Im busy for a couple of weeks which will give me time to consider other options.
Need to fix the paint job with a good sanding, some more filling, and another couple of coats of high build primer.
I might change to slightly "off black" such as a charcoal grey, graphite grey, or something like that. If anyone has any suggestions on this please post your thoughts.
It's supposed to have satin clear coat with gloss decals in the same colour when its fully done. The paint in photos is just the black metallic base
(My phone camera distorts the image, she looks much better in real life)
")