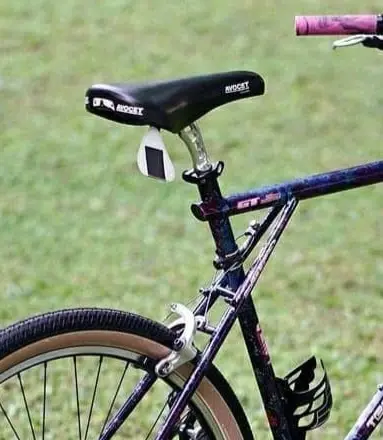
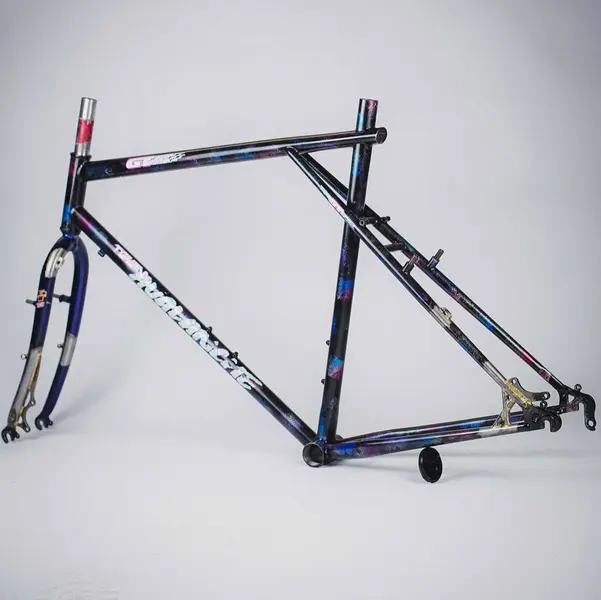
1991 GT Team Avalanche Midnight Aurora - Restoration

I've got one of those Ribble saddles on my zaskar, can't complain for a fiver
I found a non marked (sold as Velo branded) saddle with rivets for my GT Bravado for a tenner on eBay, including shipping. It has a rounded nose rather than the more beveled nose on the San Marco Regal, which I have on my Pantera AL.
 
Looking at the stem arrangement, is that a Ahead type GT flip flop stem with a quill to ahead type adapter?
Yes, it came with a later 'all in one' GT quill stem which was pretty hideous tbh, I then replaced it with an Ahead type as you mention, until I managed to find a correct flip flop stem with the double quill adapter (which I also painted Midnight Aurora) :)
 
Yes, it came with a later 'all in one' GT quill stem which was pretty hideous tbh, I then replaced it with an Ahead type as you mention, until I managed to find a correct flip flop stem with the double quill adapter (which I also painted Midnight Aurora) :)
those original flip flop stems are hard to find, I'd love to get one in yellow for my Bravado !
 
The next step was cleaning up and restoring the paint work.

Rubbing down, treating rust and reapplying clear coat worked really well (IMO) on my 1990 Team Avalanche, so I decided to do exactly the same thing.


As many of you will know, this is a laborious and time-consuming process, but totally worth it to get a result that makes that 30 year old paint work really shine again. It also makes removing the old, damaged, decals easier too.

My approached is 800, then 1200 grit wet and dry. Jenolite to treat the rust, and then a really good clean to remove the Jenolite and clear cut residue.
View attachment 781482View attachment 781483View attachment 781484
New decals came from a chap in Hungary and were applied...

Interestingly, the original decals were in some different places on this bike, (For example tubing decal on the down tube rather than seat tube) so I replaced them in the same way. Don't know why, just, did :)

I use SprayMax 2K Clear Coat. It's nasty stuff apparently, so I spray outdoors and use a proper filtered facemark and googles... this means I have to wait for a day when they temperature and humidity is just right.... In the UK, this is a summer activity only :-D and, in early September, I am running out of time... thankfully, last Saturday was spot on...

View attachment 781485View attachment 781487View attachment 781488


Clear Coat went on quite well... now I have to leave it for at least a week in the shed to cure....

Hey

Nice job!
I will use your thread for my upcoming project πŸ˜‰

I got the same frame with stem but without og fork, also i bought the hungarian decal-kit
-not really shure if i try to keep the frame original or do it the long way like you πŸ˜…
The original option is gone anyways, that thing got a discbrake conversion and i will build a restomod with modern parts also

Some questions about your work:

Have you managed to get the old decals fully off or overlayered them also?
Sandet and/or peeled them off?

My theory is the decals were applied, then clearcoated
-the decals adhesive hardened in over 30 years so it gets loose when hit and start flaking off πŸ€”πŸ€·β€β™€οΈ

Would say 20% of my frames decals are gone, seattube decal nearly disappeared, TANGE label is fully gone
(was it not clearcoated? πŸ€”)

Have you successfully sandet the whole frame without damaging the midnight arora layer!?

Did u use the made in USA decal? πŸ˜…
Seems like it belongs to the right side toptube near seattube
-this decal is missing on most frames πŸ€·β€β™€οΈ

Glad you told your sanding grit and chemicals πŸ‘

Thanks for your detailled informations πŸ™
Best regards from germany ✌️
 

Attachments

  • 20241228_200834.jpg
    20241228_200834.jpg
    61.7 KB · Views: 9
Hey

Nice job!
I will use your thread for my upcoming project πŸ˜‰

I got the same frame with stem but without og fork, also i bought the hungarian decal-kit
-not really shure if i try to keep the frame original or do it the long way like you πŸ˜…
The original option is gone anyways, that thing got a discbrake conversion and i will build a restomod with modern parts also

Some questions about your work:

Have you managed to get the old decals fully off or overlayered them also?
Sandet and/or peeled them off?

My theory is the decals were applied, then clearcoated
-the decals adhesive hardened in over 30 years so it gets loose when hit and start flaking off πŸ€”πŸ€·β€β™€οΈ

Would say 20% of my frames decals are gone, seattube decal nearly disappeared, TANGE label is fully gone
(was it not clearcoated? πŸ€”)

Have you successfully sandet the whole frame without damaging the midnight arora layer!?

Did u use the made in USA decal? πŸ˜…
Seems like it belongs to the right side toptube near seattube
-this decal is missing on most frames πŸ€·β€β™€οΈ

Glad you told your sanding grit and chemicals πŸ‘

Thanks for your detailled informations πŸ™
Best regards from germany ✌️
Hi @Martin 4130 πŸ‡©πŸ‡ͺ

Always cool to see another Midnight Aurora!!

To answer your questions:

Have you managed to get the old decals fully off or overlayered them also?
Sandet and/or peeled them off?


I complete removed the old decals, including the glue residue and applied the new ones to the prepared frame. After the old clear coat was sanded back I used a hairdryer and (very carefully!) a razor blade to remove them. Tried lots of tools, but found the old fashioned razor blade in a holder works best. I then used 'Goo Gone' to remove the remainder of the old decal glue.

Have you successfully sandet the whole frame without damaging the midnight arora layer!?

Yes, sanded the whole frame. It takes a while. I used wet and dry paper and used it very wet. started gently with 800 grit then 1200 and 1500 (I may have done 800>1500 - I don't remember) When you sand with lots of water the clear coat makes it cloudy as it comes off. You have to be careful not to damage the original paint. So it is wet>sand>rinse>check. I've done a few like this now and have avoided damaging the original paint on all of them .It sounds hard, but it is not if you do it gently.

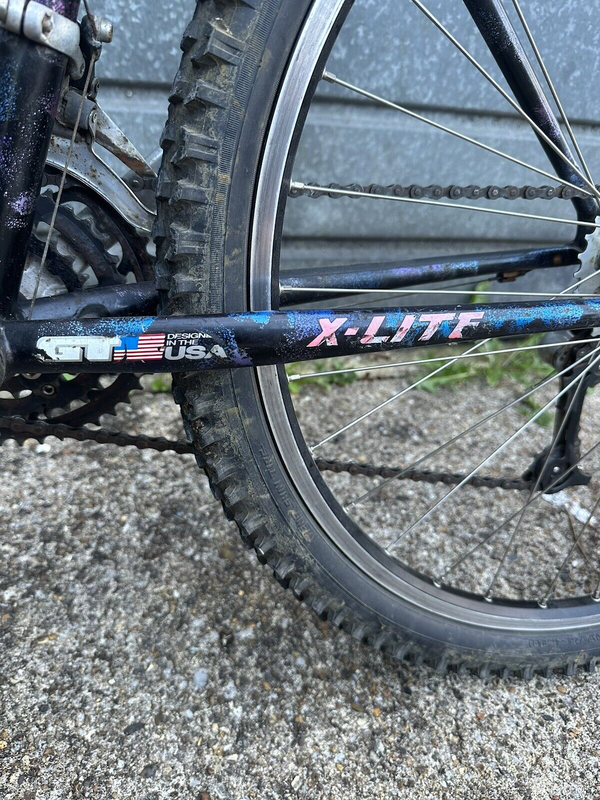
Did u use the made in USA decal? πŸ˜…
Seems like it belongs to the right side toptube near seattube
-this decal is missing on most frames πŸ€·β€β™€οΈ

Here are some photos:
The original Logo on the left-hand chain stay - near the bottom bracket - this is on the unrestored bike.

s-l1600.jpeg

The restored decal in the same place:

IMG_2758.jpeg
(This photo was an early iteration of the restoration - I've made a few more changes since this was taken)
I put the new decals in the same place as the original ones were on the bike)

I hope this helps ! Message me if you have any more questions and I'll help, if I can!

Would be great to see some more pictures of yours!

Good luck with your resto!!
 
Dude, thank you so much!

I searched the web for these informations but can't find anything!?
Won't start scratching and scribbling my frame without any knowledge πŸ˜…
I thought to handle the old decals like you said but now i know!
Now i just have to decide if i wanna start that procedure, i like the old used style also . ..

First i will build that thing, still need some parts
- it will get a modern restomod with discbrakes
(frame modifications are just finished, it's still in Utrecht/NL in the frame workshop)
and 1x10/11 gearing, GT BMX stem, motocross bars, fat street tires, front rack, lights . ..
Also i try to keep the 90's flavour with some "kinda matching" parts like a Tioga seatpost maybe some Ringle (disc)hubs, Sun rims and Kore or Syncros parts
-also there's a bit BMX influence with the GT stem, a GT padset and some Odyssey parts
-kinda hipster-bastard-GT πŸ˜…

Thanks for detailled informations!
 
Back
Top