1991 Cannondale SM800 Beast Of The East

GeneralOsik

Kona Fan
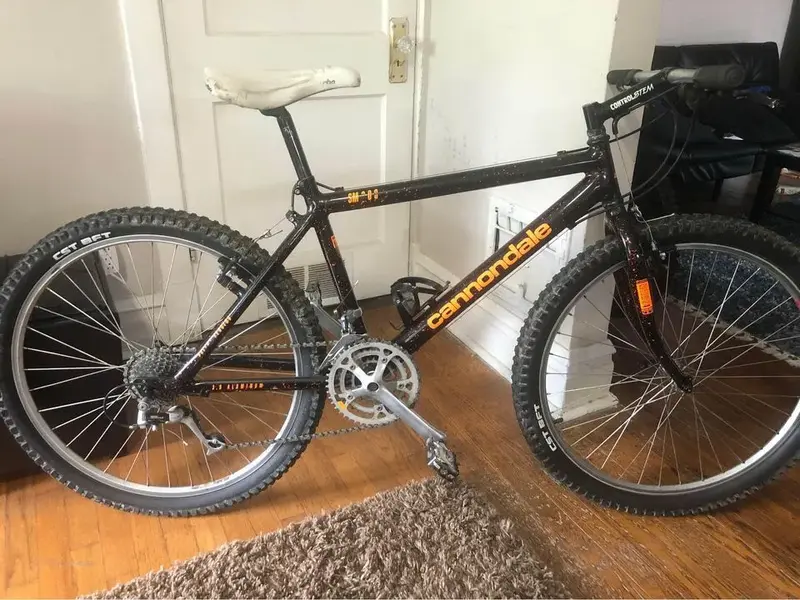
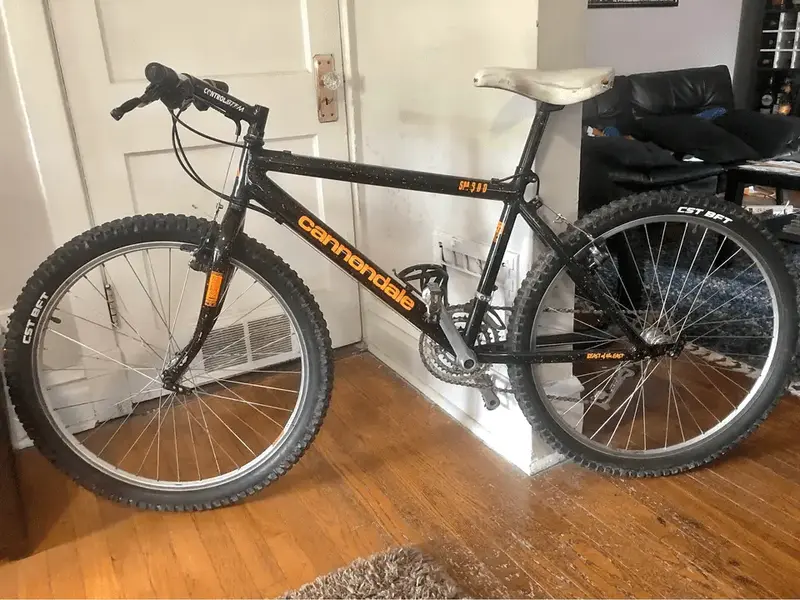
I just picked up this 1991 SM800 Beast of the East. This is my first Cannondale, and I'm excited to finally dip my toes in this side of vintage mountain biking! I just finished a restoration on a 1991 Trek 990, and I told myself I didn't need another black and orange '91 vintage mountain bike, but this was too good a deal to pass up.
280146510_7386283608111049_6340558663412827873_n.jpg
280350293_4831222023653932_8416418402837974150_n.png

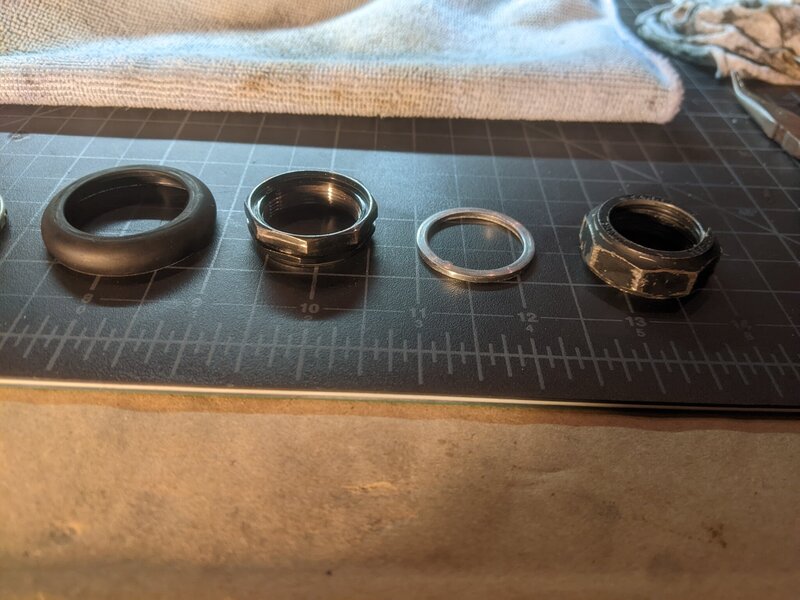
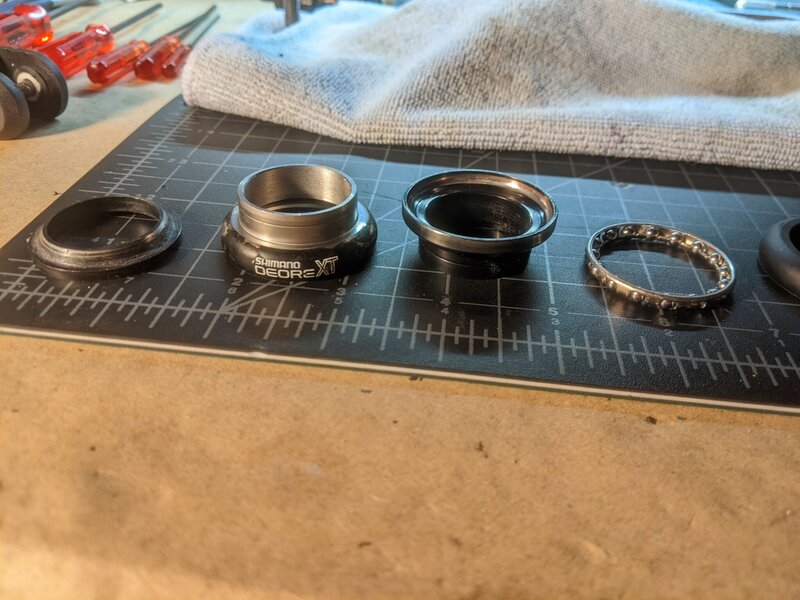
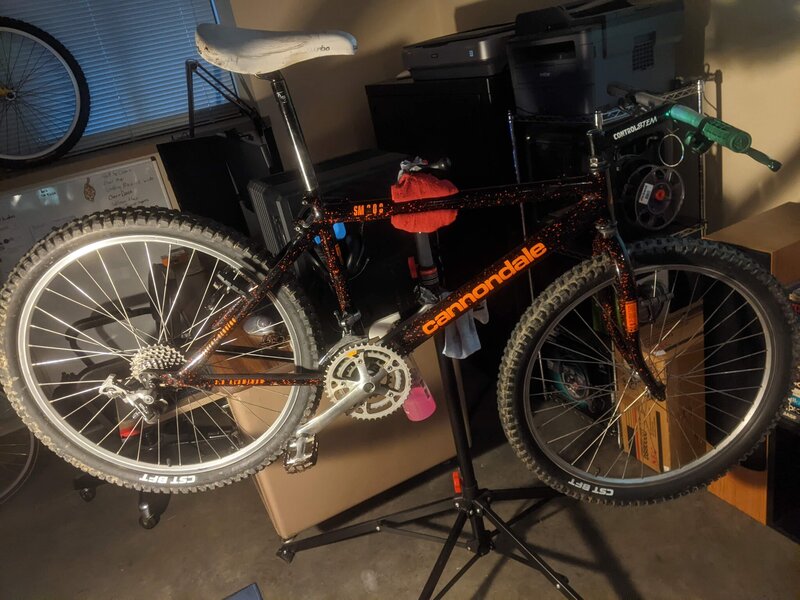
This bike is a hodge podge of mostly catalog correct groupset, with some tasteful period upgrades; DX MT61 pedals, XT M735 headset, steel Ringle Cam Twists, a single pair of DiaCompe 987s in the back, a tattered white Turbo saddle, and a loooong ControlStem. The seat post binder pin is titanium/black ano aluminum, and looks half like a ControlTech and half like an Oddysey or Ringle. Does anyone know what the original binder looked like? The handle bar is a cheap, new, AliExpress aluminum bar, tires are also too wide and rubbed some paint off the stays and front brake bosses. The XT headset somehow had a mismatched, loose bottom race, and both of the LX cranks are seized to the spindle with the threads stripped. I have some of the groupset running in an ultrasonic degreaser bath, and two tan wall Smokes on order. Tomorrow, I'll be going on the hunt for some color matched paint and vinyl decal material, to use once I get working on the frame restoration.
PXL_20220519_223443903.jpg
 
Last edited:
One of my favourite Cannondales. The font looks later era. Is the frame refinished at some point?
 
:cool: looks like my old frame. Regret selling it now, usually the case.
 
One of my favourite Cannondales. The font looks later era. Is the frame refinished at some point?
The frame has not been refinished, it's the original paint, and in decent condition. The only decals with damage are the SM800 on both sides of the top tube, and the "Patent Pending" on the drive side seat stay. There is some paint chips, scratches, rub through, and by both dropouts, there is a bit of oxidization. I think it will look better than my recent Trek 990 paint restoration, once it's done. These orange dots are so easy to replicate, and they hide so many blemishes.

It's the original fork, stamped '91. If I recall correctly, ControlTech started with their ControlStix in 1989, and their stem was just called ControlStem in 1991, like this one. The saddle is also date stamped to 1991. I think it was lightly modded in 1991 by the original owner, sold many times, and the guy who I bought it from did the tires/handlebar/grips. He only had it for a year, and bought it from "some guy in Illinois".

I'm guessing this was the doing of the original owner, but this headset is pissing me off.

PXL_20220521_185021478.jpg
PXL_20220521_185037426.jpg

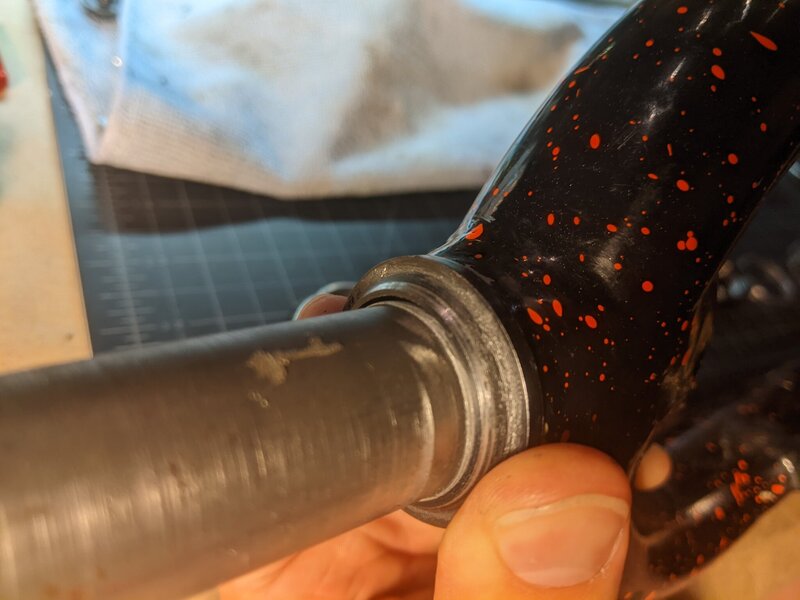
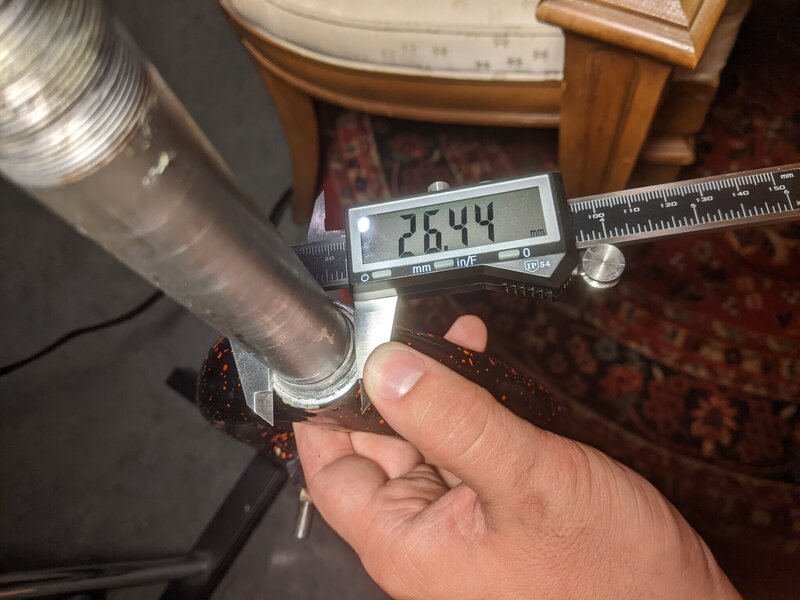
The stack is half Shimano M735, half Tange, with fork crown race that was loose on the steer, presumably from a JIS headset. I thought the fork was toast, but luckily, it measures a blonde one larger than 26.4 still, so the crown race is 27.0mm. The bottom bearing holder was destroyed as a result of this poor headset installation.

PXL_20220521_185242779.jpg
PXL_20220521_185410345.jpg

I have a new Tange Passage headset on order, looks to be nearly identical to the original spec'd unit, and it's only $15.

Later today, I'll likely be tackling the seized cranks. I think using a hack saw on the arms near the square taper, and a good crack with a cold chisel should do.
 
This took less than one episode of Star Trek: Voyager to complete, so I'm pretty happy with the results. No damage to the small chainring, bottom bracket, or the frame.

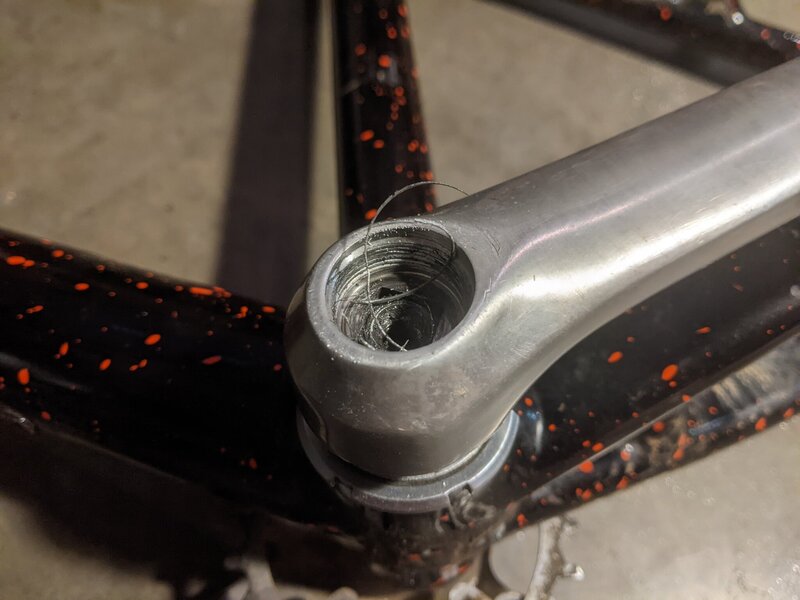
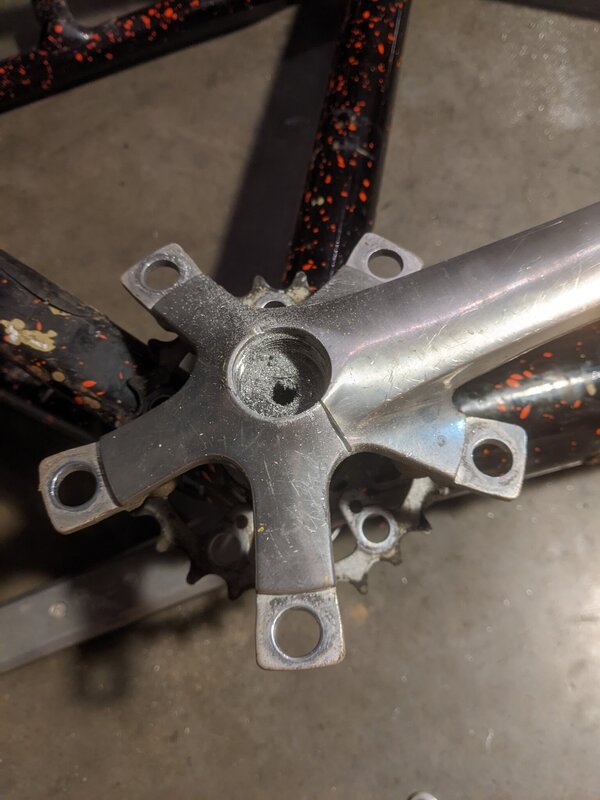
When I got the bike, I noticed the stripped threads on the drive side, so I was prepared for a fight. I took every precaution on the non drive side; cleaned the threads, soaked the taper in penetrating oil, greased my extractor tool, and even gave the center pin a couple whacks with a hammer before I started wrenching down. None of that did any good. I watched as I slowly pulled the threads out from the inside wall closest to the arm.

PXL_20220521_214558242.jpg

The cranks chose violence, so that's what I did.

PXL_20220521_214647390.jpg

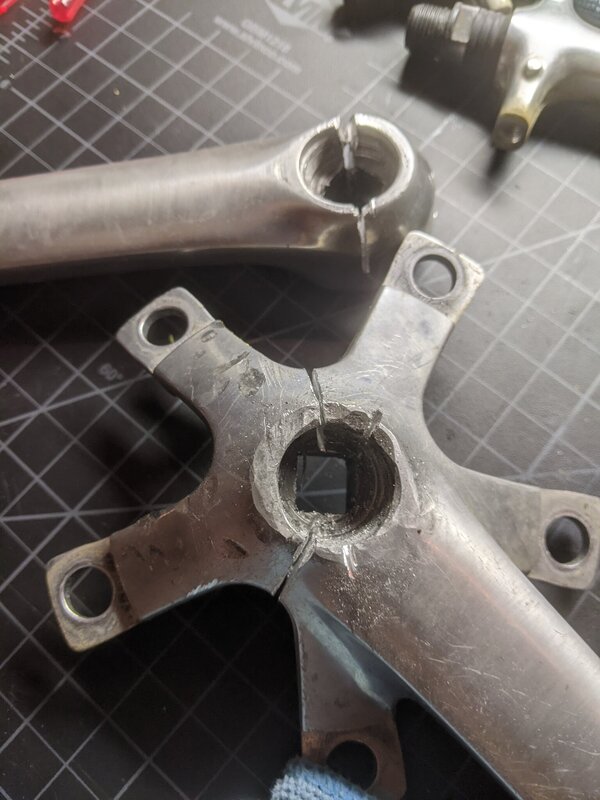
After hacking away at the drive side crank, I hammered it liberally until it was loose.

PXL_20220521_224609240.jpg

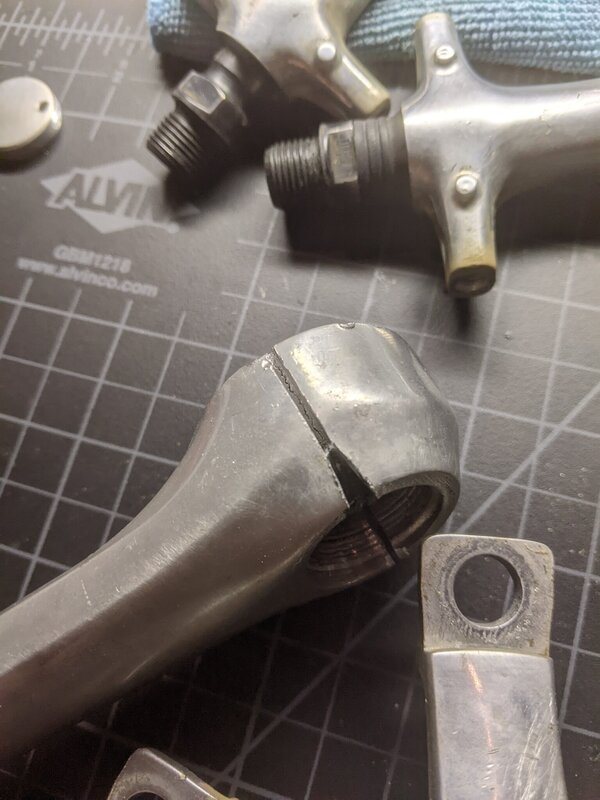
On the other side, I was able to line up the hacksaw with the corner of the taper, which made it a lot easier to get closer to the taper wall, and cause a crack to form with a cold chisel. This is my preferred method, now that I've learned from the drive side. The force of the hammer blows on the chisel even forces the crank down onto the taper, which spreads the crack even more.

PXL_20220521_224616009.jpg

I have my Trek 990 in the workstand this afternoon for some chainring spacers, but once that's wrapped up, then it's time to mount the BotE frame, clean it, and inspect any blemishes.
 
The bike finally came together in my head last night, and I've decided to narrow the build to the following parameters:
1. Keep the budget as low as possible, so use what I have on hand when possible
2. Keep the bike as close to the original owner's vision as possible

This means I'm going to toss on an old orange TaperLite, Ringle H2O bottle cage, and an anti chain suck thing that I've had lying around. I'm going to keep the tattered Turbo saddle, and I'm going to color match the grips and possibly the cable housing white. The groupset is going to be all silver, so that should pop nicely.

I'm also going back and forth on using the original seatpost and find an original stem, or keep the ControlStem and find a matching CT seatpost. If I end up selling the bike, I'd prefer to sell it with those original parts. I prefer ControlTech stuff though. If I go CT, I'll throw on a pair of black ControlStix.

Updated shipping list:
Original black stem with roller and an orange gecko sticker
27.2 ControlTech seat post in black
DX M650 crankset 175mm
 
Last edited:
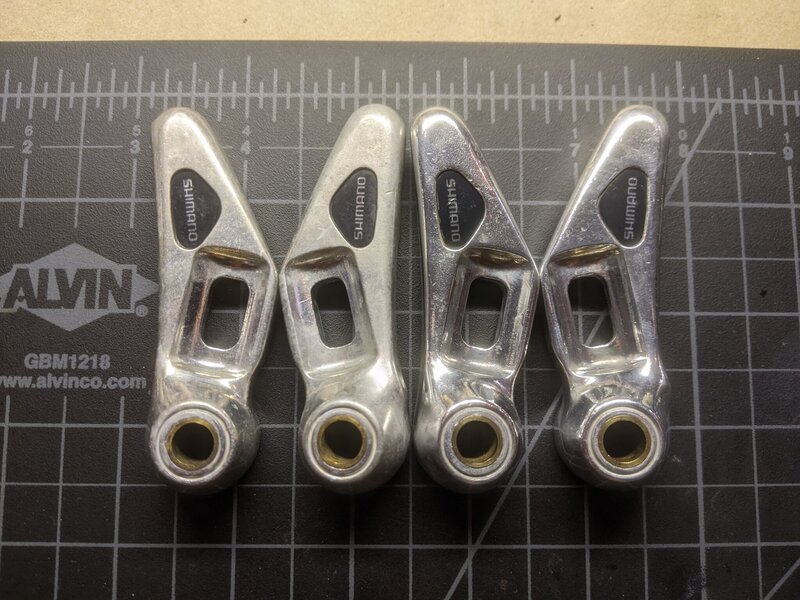
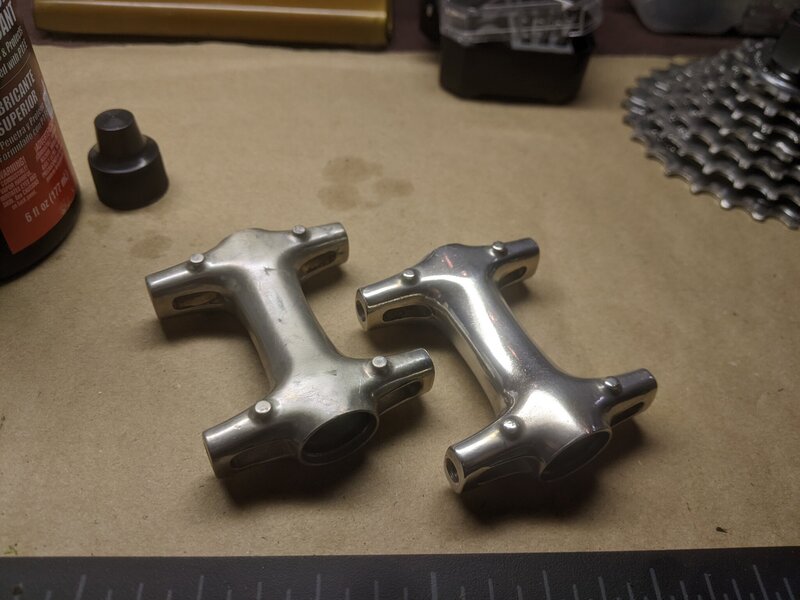
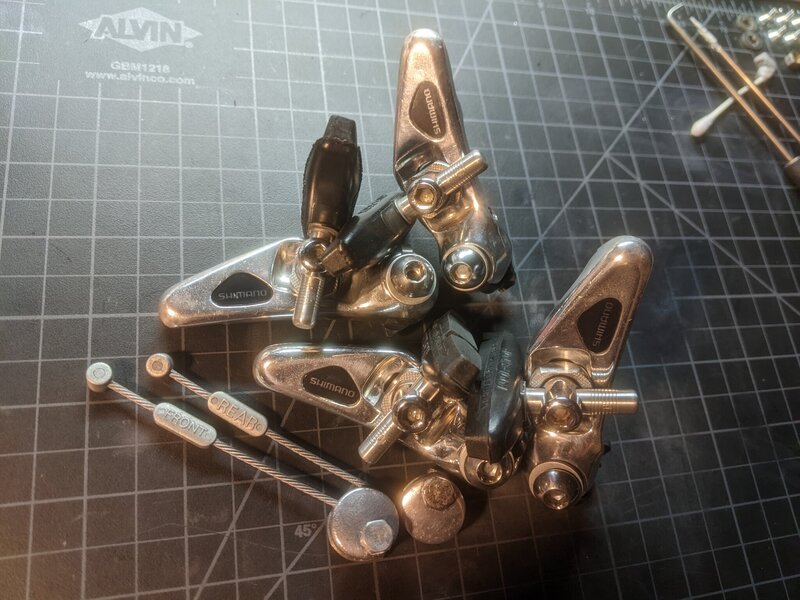
This weekend, I've been cleaning and polishing these brakes for the project, a set of silver BR-M650. I also shined up the pedal bodies while I prep the cages for refinish.

PXL_20220529_172918101.jpg
PXL_20220529_171033262.jpg

And finally, the finished brakes, ready to go on!

PXL_20220530_020435016.jpg
 

Latest posts

Back
Top