1960 Peugeot PX10... Gravster!

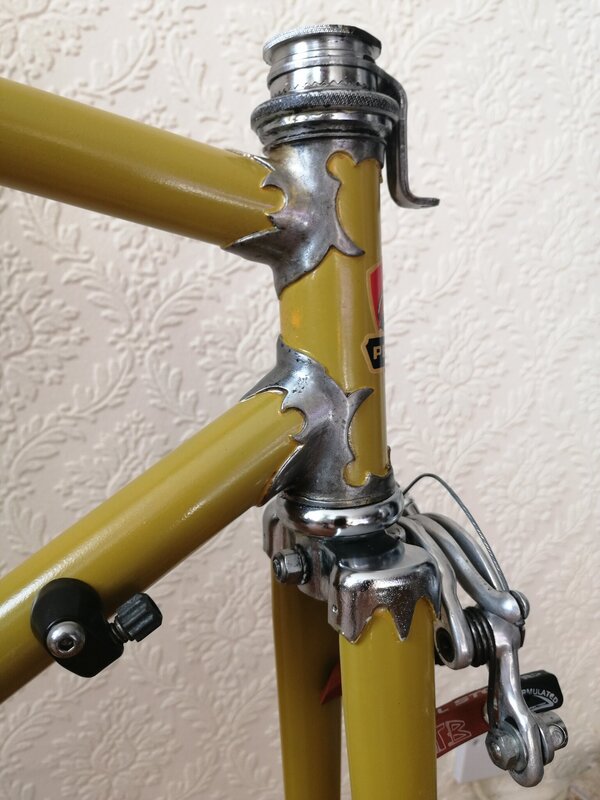
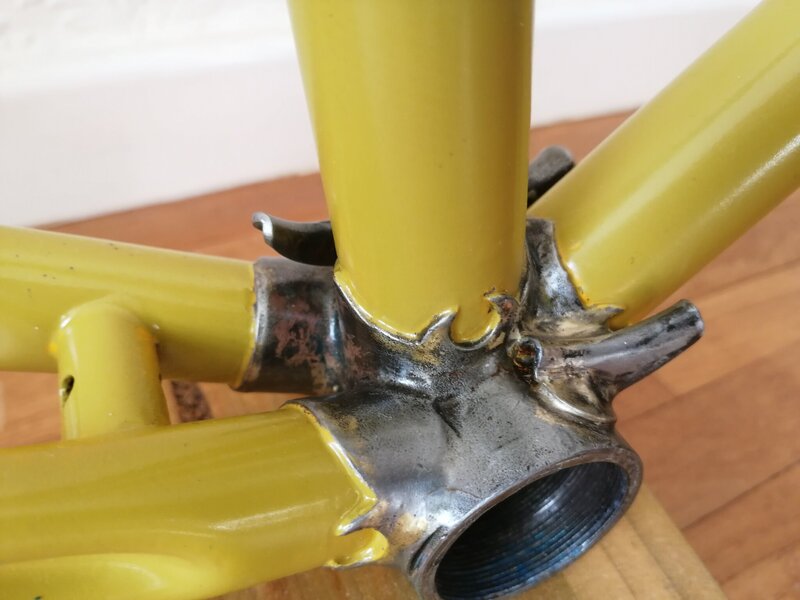
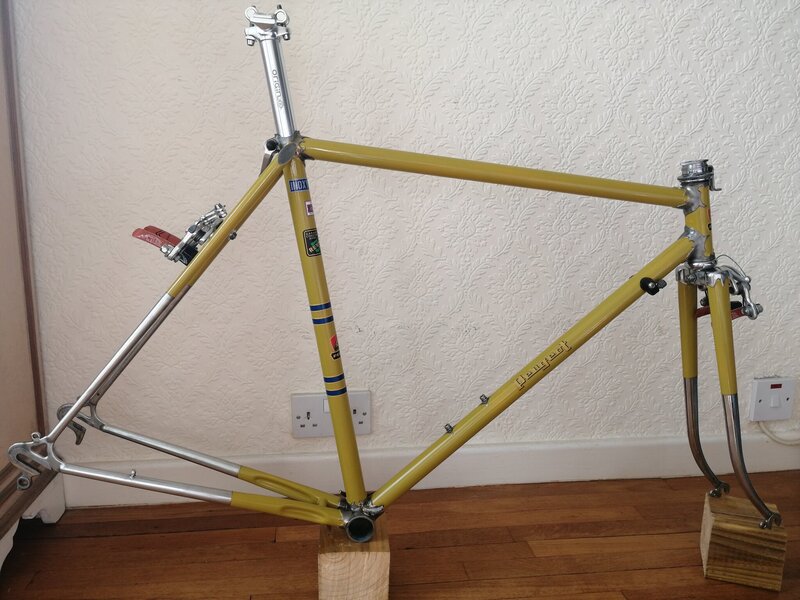
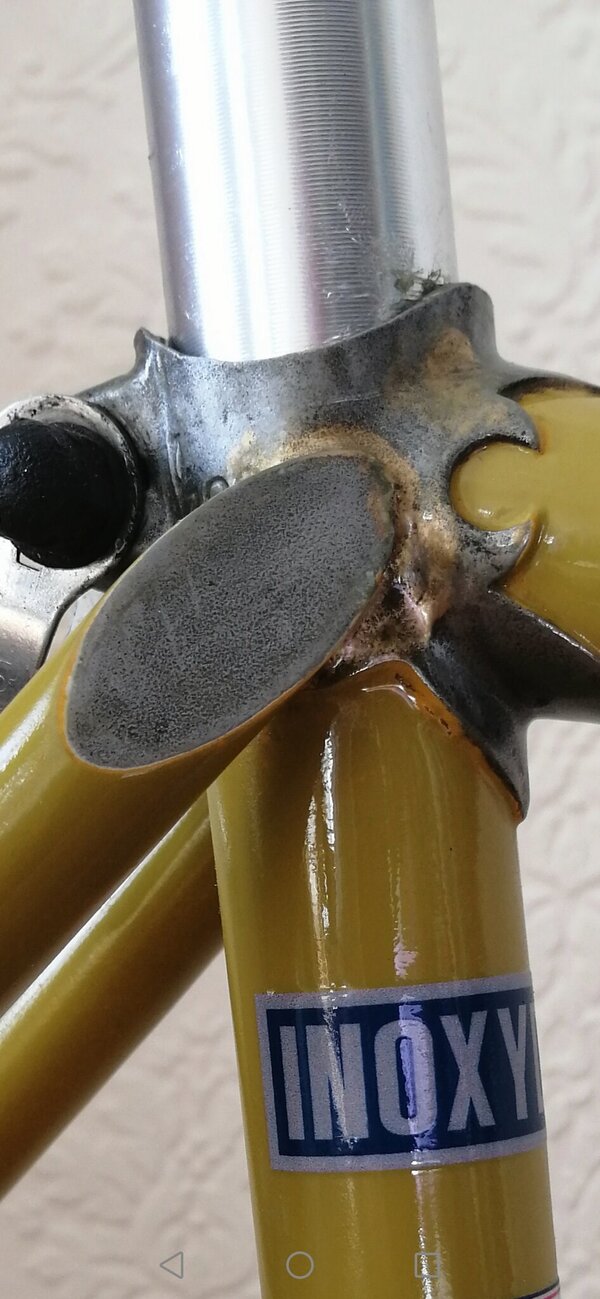
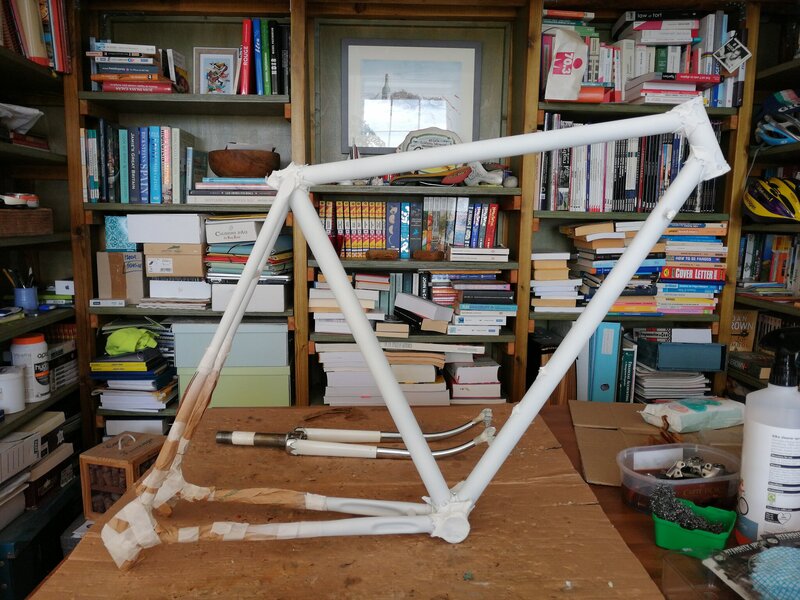
I eventually decided to stick to my original plans and spray the frame... But conceding to leave the head tube lugs, the seat cluster and the bottom bracket with their polished steel style. I therefore masked these areas which would later be covered with steel-specific clear lacquer to prevent them from rusting.

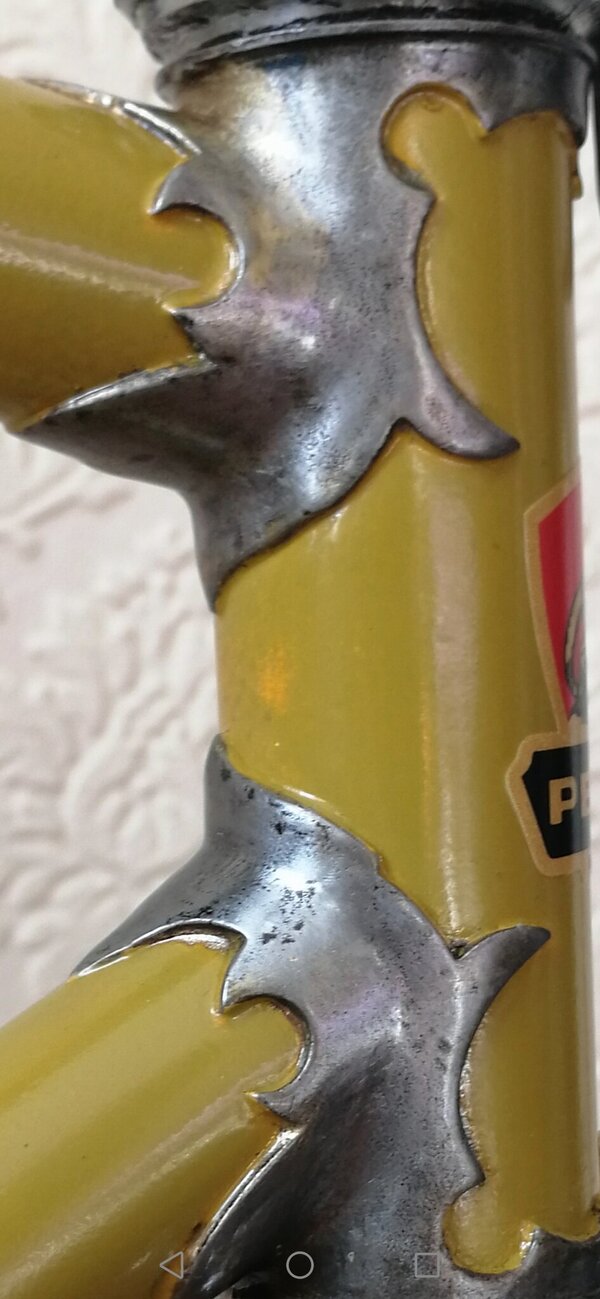
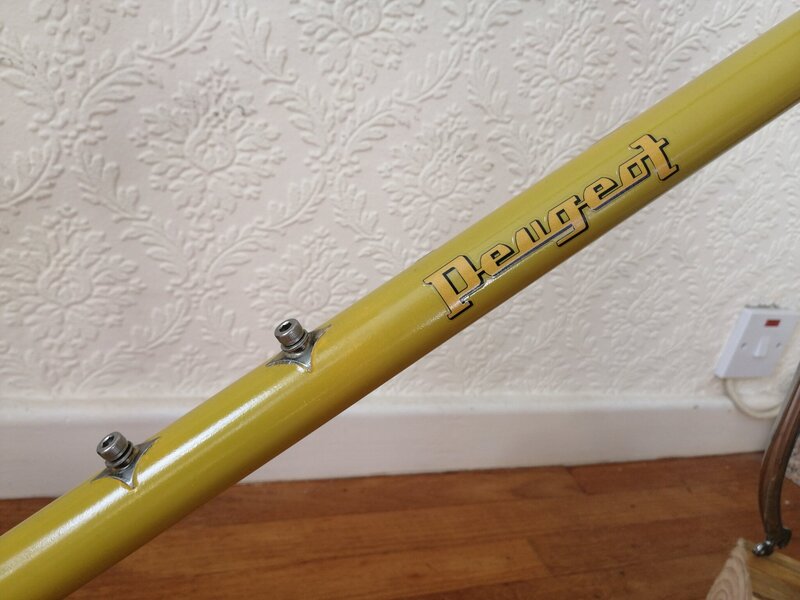
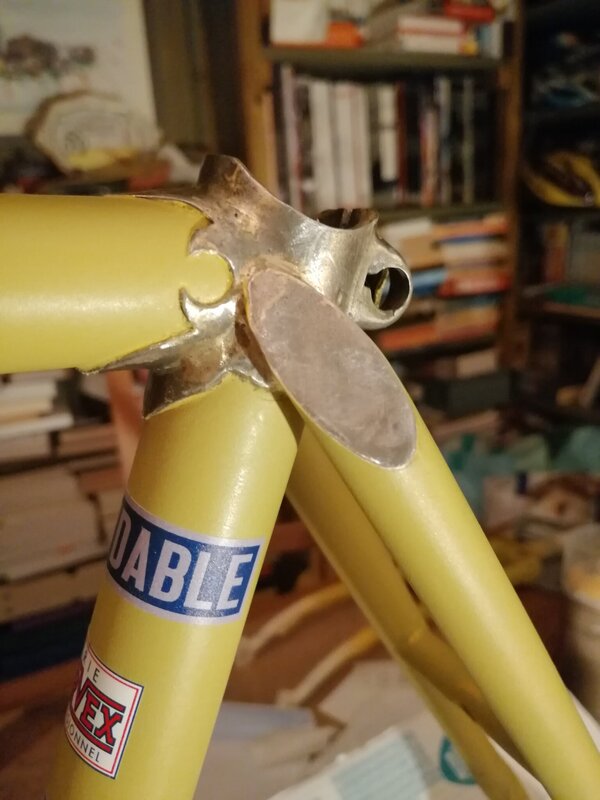
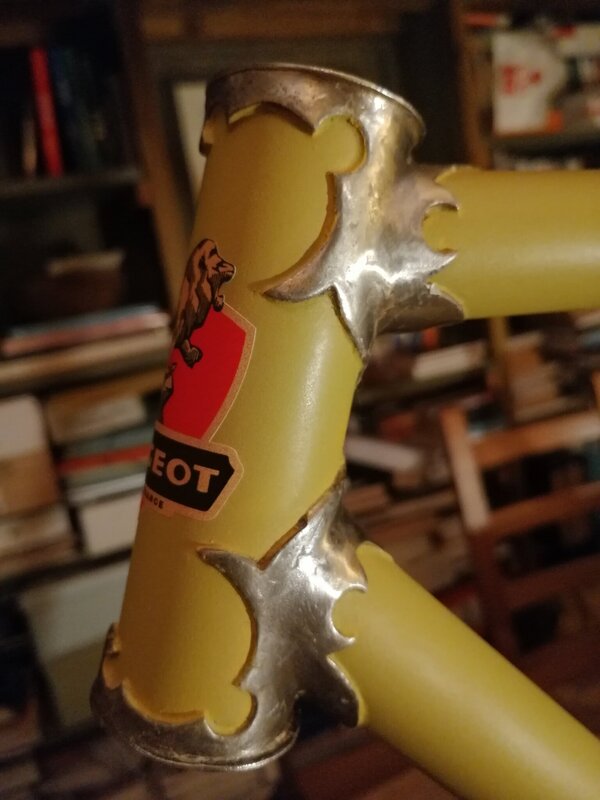
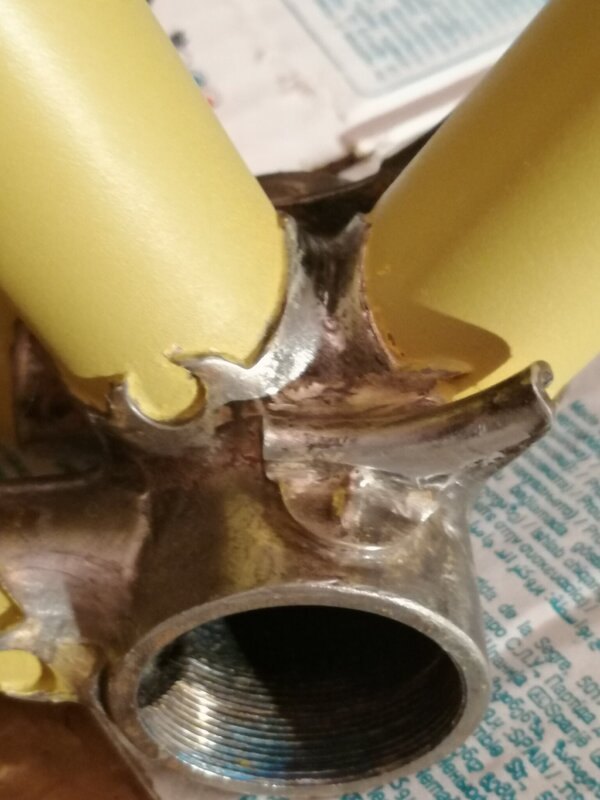
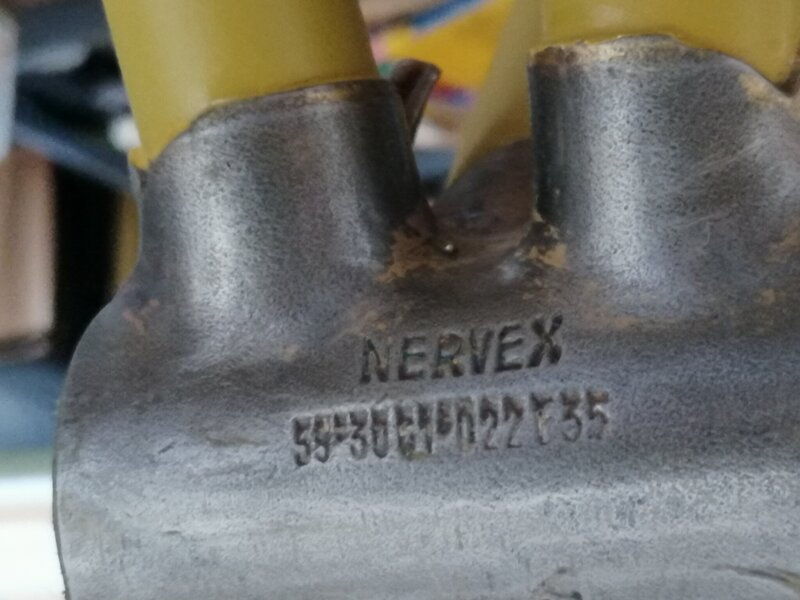
After all these Nervex Pro lugs are really spectacular and were a key feature of Peugeot top of the range machines. They deserve to be outlined.

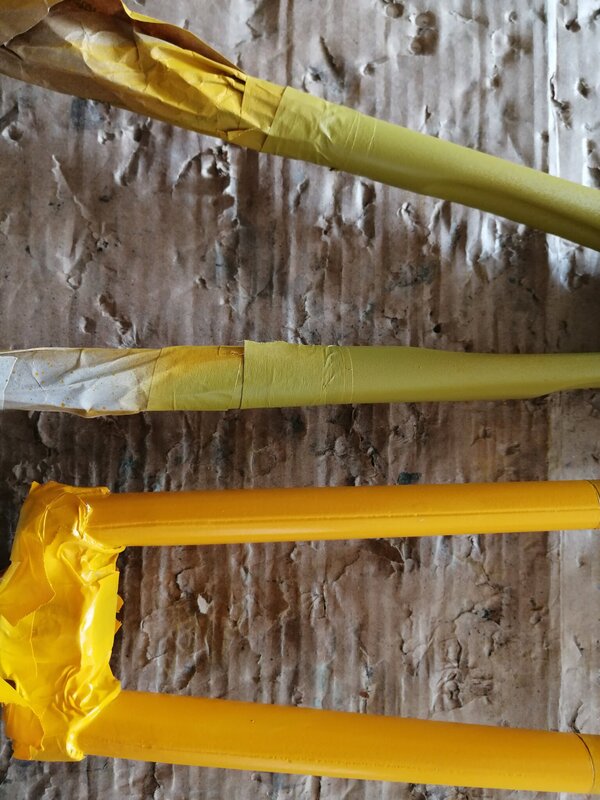
Equally I also masked the chromed rear stays, the fork crown and the lower fork blades in order to preserve their finish - which is still in excellent condition sixty years on...

Looking at the high quality of the chroming one might wonder what were the environmental concerns in those days... I prefer not to think about that aspect of things.

I then applied a layer of adhesive promoter, two layers of thin white primer, with proper sanding after each layer, and then a first layer of really nice orange paint...
 

Attachments

  • IMG_20220916_134534.jpg
    IMG_20220916_134534.jpg
    587.7 KB · Views: 18
  • IMG_20220915_121533.jpg
    IMG_20220915_121533.jpg
    558 KB · Views: 13
Last edited:
That first result was really pleasant to look at but I had two issues with it.

First it was absolutely not veering towards the green-ish notes that I could guess on the original livery of my Peugeot PHX50 touring bikes. And I really wanted that colour to be replicated and celebrated... Historical injustice need to be repaired 😉

The other reason why I was not comfortable with keeping this colour on this project was that I not only like it a lot but also would like to use it for another project which is very dear to me... A 1977 Peugeot PX10 which will be a tribute to my uncle with whom I started cycling in my early years... But that is for another topic.

So back to this Gravster paint... And trying to emulate as much as possible the PHX50 colour.

After many attempts - on spare tubes, I eventually found a paint which once applied over the orange layer would provide the tone rendition I was after...
 

Attachments

  • IMG_20220920_113348.jpg
    IMG_20220920_113348.jpg
    423.7 KB · Views: 10
Looking at the picture of the fork still in orange and the stays having received that additional layer of orange-green paint reveals a striking colour gap... And may rise the question - why not having started with that second yellow-green colour in the first place.

The reason is that I wanted to created a vintage wood stain effect where one base colour covered by an upper layer still manages to show through that upper layer by way of transparency - through lighter applications of paint in some areas or light sanding, or straight removal of areas of the upper layers through thorough sanding.

This colour effect is hard to show on a picture but it gives a truly vintage touch to the paintwork. On the below picture such wood stain effect can be seen on the back of the headtube.
 

Attachments

  • Screenshot_20230305_235318_com.android.gallery3d.jpg
    Screenshot_20230305_235318_com.android.gallery3d.jpg
    198.7 KB · Views: 9
Last edited:
I then removed the masking from the polished steel and chrome areas, applied a protective layer - three or four actually, of steel specific clear lacquer on the polished steel, and stuck the decals commissioned from a UK based decals provider.

Et voilà...
 
Last edited:
(unfortunately I didn't take pictures of the bare frame and just have pictures of the frames with some components on... More on the actual build later)
 

Attachments

  • IMG_20221023_124810.jpg
    IMG_20221023_124810.jpg
    307.1 KB · Views: 25
  • IMG_20221023_124920.jpg
    IMG_20221023_124920.jpg
    228.2 KB · Views: 23
  • IMG_20221023_124756.jpg
    IMG_20221023_124756.jpg
    277.8 KB · Views: 22
  • IMG_20221023_124247.jpg
    IMG_20221023_124247.jpg
    422.4 KB · Views: 25
One feature I personally appreciate in leaving the brazed lugs polished is not only the delicate craftsmanship of the chiseled lug ends but also the equally fine craft of the artisan who brazed the lug - and especially the tiny golden filet of brazing that appears on the edges of the lugs where the tubes plug into the lug.
 

Attachments

  • Screenshot_20230306_000152_com.android.gallery3d.jpg
    Screenshot_20230306_000152_com.android.gallery3d.jpg
    237.1 KB · Views: 9
Equally revealing the engraving on the lugs and the bottom bracket - usually referring to angles and diameters specs for those parts is a satisfactory appreciation of the work and techniques involved in the making of this frame...
 

Attachments

  • IMG_20220922_180819.jpg
    IMG_20220922_180819.jpg
    265.8 KB · Views: 7
Last edited:
That paintwork was carried out over a period of one month - using quality spray cans, and ended up with the application of three or four layers of clear coat
 
Back
Top