You are using an out of date browser. It may not display this or other websites correctly.
You should upgrade or use an alternative browser.
You should upgrade or use an alternative browser.
Mr.T's Gazelle
- Thread starter Mr.Toad
- Start date
- Feedback
- View
Mr.Toad
Senior Retro Guru
Mt.T's Gazelle
Thanks for the information and support!
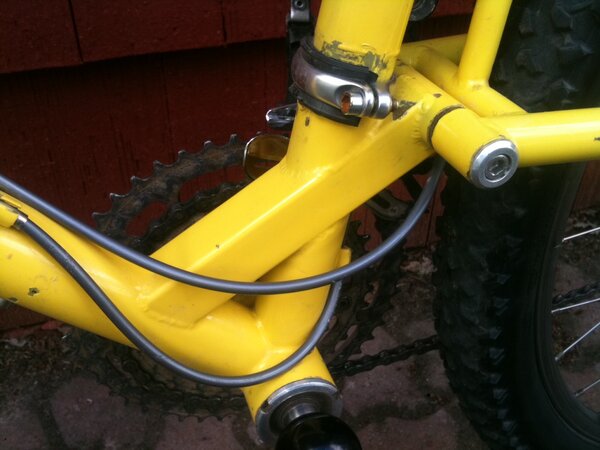
Felix, your bike is beautiful and shares many frame details with mine: rear brake cable runs to the right side of the seat tube, kink in the rear sub-frame tube, 1 1/4" hs I assume.
Now i'm thinking mine must be a Gazelle, repainted and decaled as a Defiant.
Other details that point to a repaint:
Location of the "Defiant" decal, normally much further forward, near the head tube.
"Boulder Bicycles Inc."
Yellow paint on the rear fender mount threads, added by original owner.
M900 parts and fork that were not available until 92.
This confirms my suspicions, mine must be a repainted Gazelle and not a Defiant. Next step is to pull the fork and look for traces of the original color.
Mr.Toad
Senior Retro Guru
Re:
Additional picture added showing the non-drive side, and bodge install job on the front derailleur.
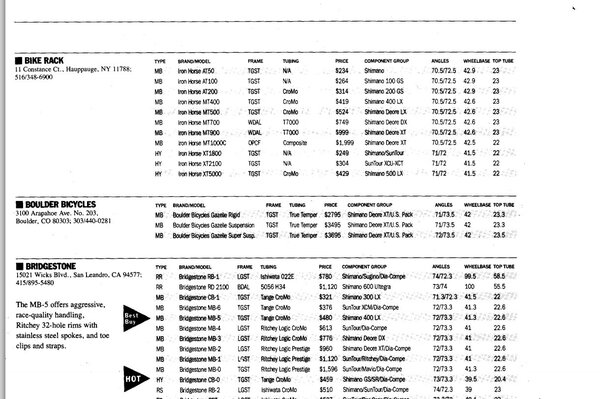
Also found a interesting price sheet on Sheldon Brown's excellent website. Rigid Gazelle, Gazelle Suspension, Gazelle Super Suspension?
Additional picture added showing the non-drive side, and bodge install job on the front derailleur.
Also found a interesting price sheet on Sheldon Brown's excellent website. Rigid Gazelle, Gazelle Suspension, Gazelle Super Suspension?
Attachments
Mr.Toad
Senior Retro Guru
Re:
Although I remember these bikes from advertisements back in the day this is the first i've seen in person. I'm guessing they are pretty rare.
The rear suspension is a "oil-damped shock absorber with internal steel spring located inside the top tube". I've read there is a Risse replacement shock available for these as well.
Sag is adjusted by disconnecting the subframe link and rotating the shock shaft clockwise to reduce the spring preload, counter to increase. Recommended sag is .25"-.75" for aggressive riding.
- Feedback
- View
Re:
Depending on the framenumber this is (was) a Gazelle. Decals "Boulder Bicycles Inc." point to 1992. What is that seat tube diameter modulation for? Your head tube is interesting as well. Is that enamel?
Depending on the framenumber this is (was) a Gazelle. Decals "Boulder Bicycles Inc." point to 1992. What is that seat tube diameter modulation for? Your head tube is interesting as well. Is that enamel?
- Feedback
- View
Re:
Emails to Boulder Bicycles (2007):
Hello Andreas,
The bike looks great! The serial number makes it a first year bike which I guess makes it a 1991 model.
Sorry but I don't know where to find a Boulder Brace. We never made all that many (maybe 200?) as they did not sell all that well. The brace was designed to fit the Mag20 forks which came with a very fragile cast brace that broke easily (many were broken when they were removed for painting). The Boulder Brace was invented so that we could sell Boulder frames with a matching fork. No one wanted a suspension frame without a suspension fork and Rock Shox was just about all that was available at the time. We couldn't ship forks without sturdy braces so we developed our own. The Boulder Brace also fit the RS1 forks and a few were sold as retrofits. In the end the brace was copied by several other companies at lower prices than our model cost us to make. None were as strong as ours and most were cheaply made. Finally, Rock Shox started making a better stock brace and then went on to make the brace and legs as one piece.
Enjoy your bike and good luck finding a brace. Maybe on ebay?
Best regards,
Bill Boulder
Hello again.
1) use 5wt motorcycle fork oil or automatic transmission fluid. To get the proper level, remove the shock and spring and drain the oil, then clean out the shock body with a paper towel. Now hold the bike so that the shock body is pointing straight up and drop the spring in the hole. Rotate the spring with your finger until it seats on the two pins in the bottom (it will not rotate further). Now fill the shock with oil until the top of the spring is just barely above the top of the oil. Do not completely cover the spring with oil so that it is totally submerged.
Install the shock and set preload to the desired setting (10 turns counterclockwise s a good place to start). Ride the bike and see how it feels. If the shock makes a noticeable "clacking" sound (like a hammer on a metal surface) then you need a bit more oil. You can add oil by pointing the shock body up and carefull removing the shock unit - hold it over the hole so that all dripping oil goes back in the shock body. Add a few drops of oil and reassemble. If you spill any oil then start over with a clean, dry shock body and put a tiny bit more oil in than you did the first time. If the shock makes no noise but starts to leak around the seal or the threads where it screws into the body then you have too much oil. You can remove a few drops by carefully removing the shock and then letting some of the dripping oil soak into a rag or paper towel.
The difference between too much oil and not enough is only a few ccs and is best arrived at through trial and error. Your shock should not make any metallic noises (too little oil) and should not leak (too much oil - also will not get full travel). The squishing noise is normal and is caused by the oil travelling through the damping holes in the shock piston.
2) The chain link is an industrial #60 master link. This is not a motorcycle link but is very similar. The best kind is made of stainless steel. I think the original links were Japanese made by Tsubaki. In the coming months we will likely begin offering repair parts for these old bikes. Right now we are not in production and have no parts to offer. Stay tuned to our website for more details as they devleop.
BB
Similar threads
- Replies
- 0
- Views
- 148
- Replies
- 3
- Views
- 391
- Replies
- 1
- Views
- 494


