It is ... it isn't ... it is ... an Sbike!

kingoffootball

Retrobike Rider
Gold Trader
Feedback
View
DSC_1402.JPG

I'm not very good at not buying anymore bikes.

Firstly, massive thanks to Xavier (Raging_Bulls) for being a goldmine of knowledge about Sbikes. I spent all week pestering him for information about them before going to see this one today. I'd almost convinced myself against buying it, but I was really intrigued about how they ride and after a quick spin and chatting with the seller I was sold, both based on the feel of the bike and its apparently rarity - I do like something unusual.

I believe it's a 1993 - shimano date codes on the brakes are 1992 and on the cranks 1993, both of which are the Altus A10 it was originally fitted with.

Plenty more information to come.
 
The first thing I noticed when I found this listed on Ebay was that it was wearing 700c wheels - the photos weren't great, but at least it was clear enough that the wheels were that size and the clearance showed the frame was made for 700c wheels. I had a vague recollection I'd read something here about non-26" Sbikes, so began searching.

The first thing I read/relearnt was that the Sbike Daytona 700c had .... 26" wheels, mentioned here:
https://www.retrobike.co.uk/threads/nos-s-bike-with-campa-grouppo.286115/#post-2140255
Was that what I was remembering? My search skills let me down here, so I tapped into Xavier's extensive knowledge: Yes, previous 700c/28" wheeled Sbikes have been seen on the forum:
https://www.retrobike.co.uk/threads/sbike-build-806-808-is-this-a-28-frame.295658/but only aluminium framed ones.

Working on the basis that importing/exporting bikes from the UK is a nightmare at the moment, I took the risk of sharing the auction and Xavier confirmed it looked like a steel 700c wheel size Sbike, but with some notable differences from other steel (500 series) Sbike frames ...
 
Working on the basis that importing/exporting bikes from the UK is a nightmare at the moment, I took the risk of sharing the auction and Xavier confirmed it looked like a steel 700c wheel size Sbike, but with some notable differences from other steel (500 series) Sbike frames ...

So what were the things that fitted for an sBike and what seemed different?
+ The steel X-frame was clearly the same design, with longer stays and a slightly different position to give the required clearance for the bigger wheels.
+ The seat clamp was original and the Altus A10 (including 46T outer ring) was standard fitment on some of the 26" steel Sbikes.

- Sbikes usually have four holes in the support plates, but this frame had six.
- The bottom triangle was larger (the cable stop for the front mech is lower).
- The headtube was longer.
- The dropouts were different. Although the aluminium-framed Sbikes have three equal size holes in the dropouts, the steel dropouts have one large hole and two smaller:
steel-vs-alu-dropouts-jpg.555438

[pic belongs to Raging_Bulls]
whereas the dropouts on this steel frame had three equal holes like an aluminium frame.

- The seat tube on a steel Sbike usually tapers to a smaller size either below, at, or above where the support plates meet (depending on where is is a small, medium or large frame) but the seat tube on this frame didn't taper.
- Although 700c wheeled aluminium frames have previously shown up (as in the link in the first post) there doesn't appear to have been any steel frames for larger wheels that have been shared.

So, was this an Sbike or could it be anything else, very similar?
 
So, was this an Sbike or could it be anything else, very similar?

What is similiar to an Sbike? A Samsonite!

images


Yes, the same brand who makes the luggage also sold bikes, make in the same factory as the Sbikes. One has previously been posted in the Ebay watch section:

https://www.retrobike.co.uk/threads/samsonite-sbike.183129/
but with no pictures, unfortunately, but Xavier's description of the aluminium style dropouts on a steel bike matches what I have.

A quick Internet search revealed a few helpful images:

Samsonites.jpg

Not only did these show the similar style dropouts, but the lilac one also had an eyelet on the rear of the seat tube, like the two on this one. So it appeared this was a better identification and the bike was likely to be a Samsonite.
 
Having already made plans, I was committed to going to view the bike, even if I wasn't sure that a Samsonite seemed as appealing as an Sbike, despite being made in the same factory.

The seller was a really nice guy and I chatted to him for a long time about the bike. He had owned it for 26-27 years, so it would have only been a couple of years old when he bought it. It still had the original paint until a couple of years ago, when he had it powdercoated because it was getting tatty. He had planned to get reproduction decals, but not got around to it because they were a bit expensive. The decals it had being ........ SBike decals. So it became pretty clear that despite the resemblance to the Samsonites I had found, this was an SBike. I am hoping the seller can find some old photos of it for me, which /I will share if he does. One more piece of evidence came after we had agreed a deal, then he went off to get something from the garage:

Original stem.JPG

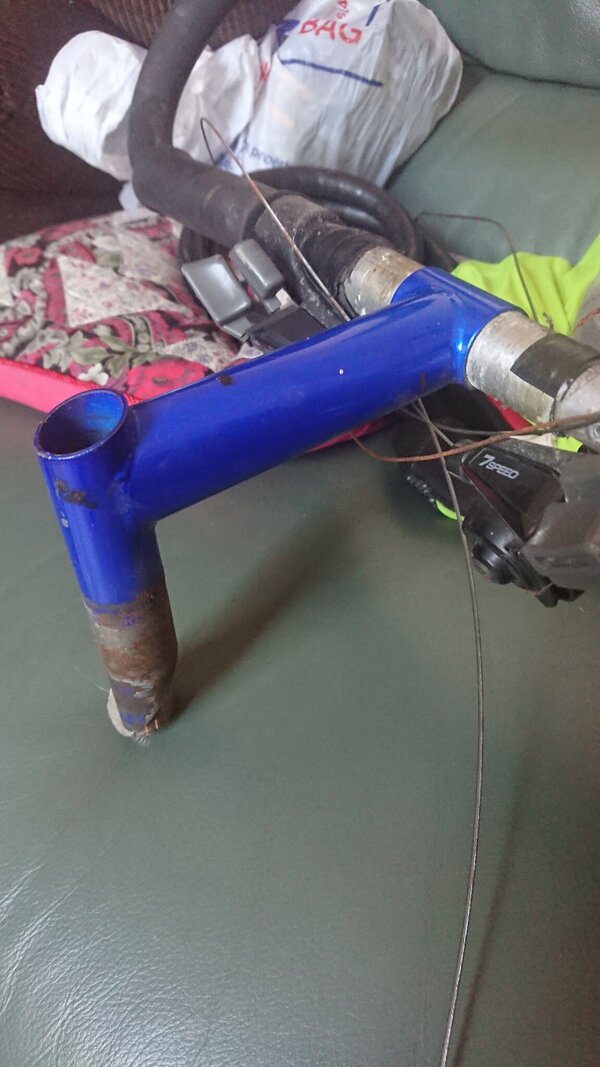
The original stem (with home-modified bullhorns) in a classic Sbike metallic blue. I was very grateful for this, as I didn't intend to keep the ahead adaptor and stem that it had fitted to it.

So, deal done, I brought it home and road it every day, despitenot having changed anything and the original seatpost being too short for me. I don't have a clear build direction yet, just a plan to get it more suited to me and remove the parts I definitely don't intend to keep.
 
Well, no old photographs yet, which is a disappointment, but gradually changing things to test out what is like to ride before a final build direction becomes apparent.

I began by riding it a few times as it is. I doubt I'll have another chance to see what it's like riding a bike with bars this expensive:
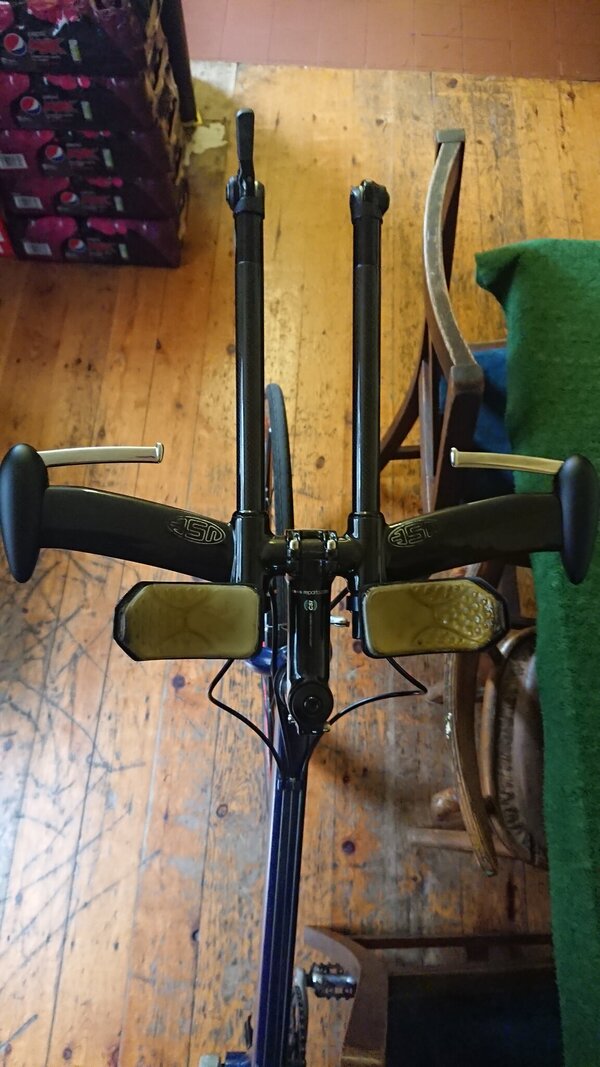
Old cockpit.JPG

Fortunately, I don't think I could adjust to the aero tuck even if I only ever planned to ride this on the road, so time to remove the aero "wings" and reinstate the original stem.

The first thing that struck me about the original stem is that I really like the clean (impractical 😅) design, with just a recessed bolt underneath and no faceplate or even a gap for tightening (if I've explained that badly hopefully photos further on will help. The impracticality didn't really bother me - riser bars are definitely not something I ever consider! I had thought bullhorn bars might be good, as I like an alternative hand position and the chance to stretch forward more, given the frame is on the small side for me. However, flat bars and bar ends are equally suitable, especially since I'm not going to be really pushing to use especially lightweight components. I haven't weighed the frame , but it's defnitely not particularly light - however, I do really like how the weight feels distributed.

The first hurdle with the stem, as you may be able to see in the previous photo, is that the previous owner did not think bar ends were the solution! Instead, a pair of lonnnng bullhorn bars have been chopped in the middle and then riveted to a piece of aluminium that sits in the stem. First step, knock out the rivets from one side:
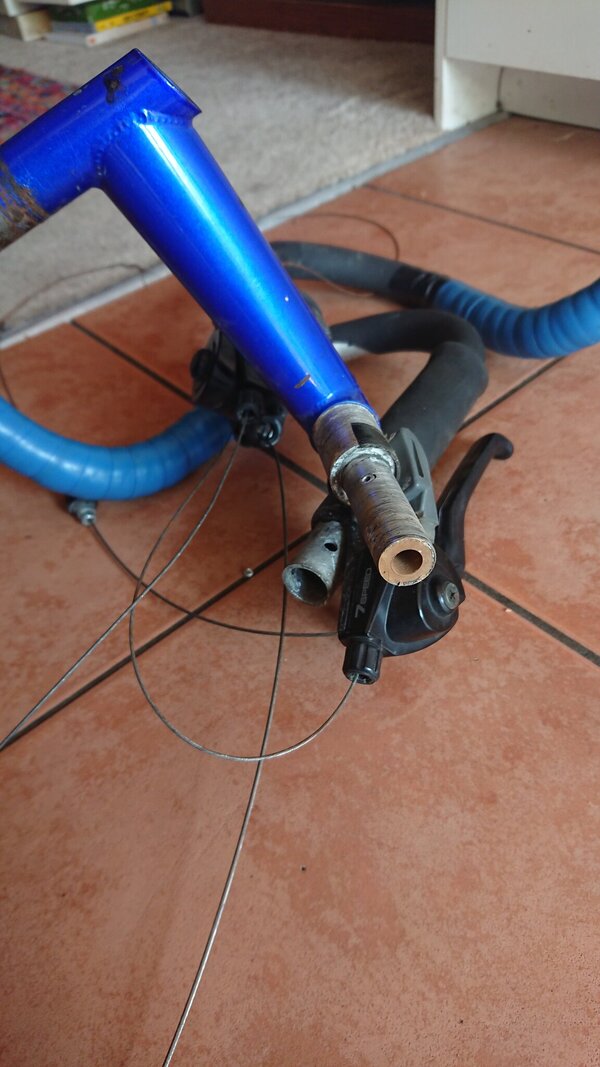
Stem + bars 1.JPG

That's a significant piece of aluminium there - they obviously weren't taking any chances with the strength of the middle bit. At this point, I began trying to either move or rotate the bars slightly and it became apparent that this might be a significant job. After treating the aluminium to a nice cuddle from some frozen peas, I tried again with a similar lack of success. Therefore, I took the rivets out and removed the other half of the bar, given it was clear that the extra leverage it gave me was insignificant in comparison with the task at hand. Now I had a lovely stem with a chunk of aluminium sitting in it:
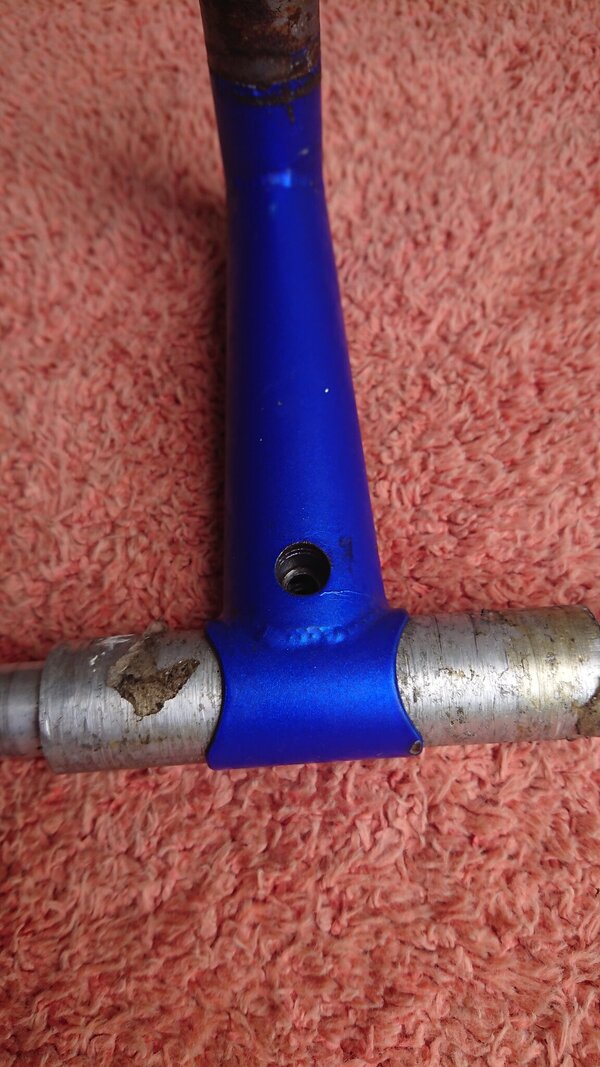
Stem stuck.JPG

Looking from one end, although as you can see in the previous photo the part where it was rivieted was thick but hollow, the
part clamped into the stem is solid!

First step was to soak in oil, added from both ends and especially through the bolt hole. After a few days, I then tried to tap it out with a hammer. No dice. Making sure the stem was carefully supported to reduce the risk of damaging it, I went for a few more hefty thwacks with the persuasion device, but with no success.

I've made this sound quite short in terms of effort, but I'd already spent quite a long time on it and was getting frustrated. I asked Xavier whether he know whether the internal clamping method of the stem had any alumnium, such as an aluminium wedge ..... my thoughts were turning to just how much sodium hydroxide would be required if I took that route ..... but not for the first time, despite this clearly being the original Sbike stem for this frame, it was different from the previously seen stem designs.

After the periodic application of more oil and profanities produce nothing but a smug lump of aluminium and frustrated hammer-wielder, the caustic option was looking more appealing. However, it struck me that now the bars were removed it should even fit in the rather compact freezer in my mum's house, so into the freezer it went.

After 40 minutes of warm up to ensure my hammer arm was ready to give everything, the stem was taken back out, again very carefully positioned, then treated to a couple of blows of the hammer. Still no movement. By this point, I was thinking that the stem was toast anyway if I couldn't get the aluminium lump out, so I gave it a couple of full power whacks and ..... finally there was some movement! I cannot describe my relief when I looked at the lower half to see a sliver of shiny aluminium above the previosly visible corroded surface! Once I had achieved this initial movement, I knew I could persuade it its time to leave was nigh and therefore used some more considered wallops until it was finally released.
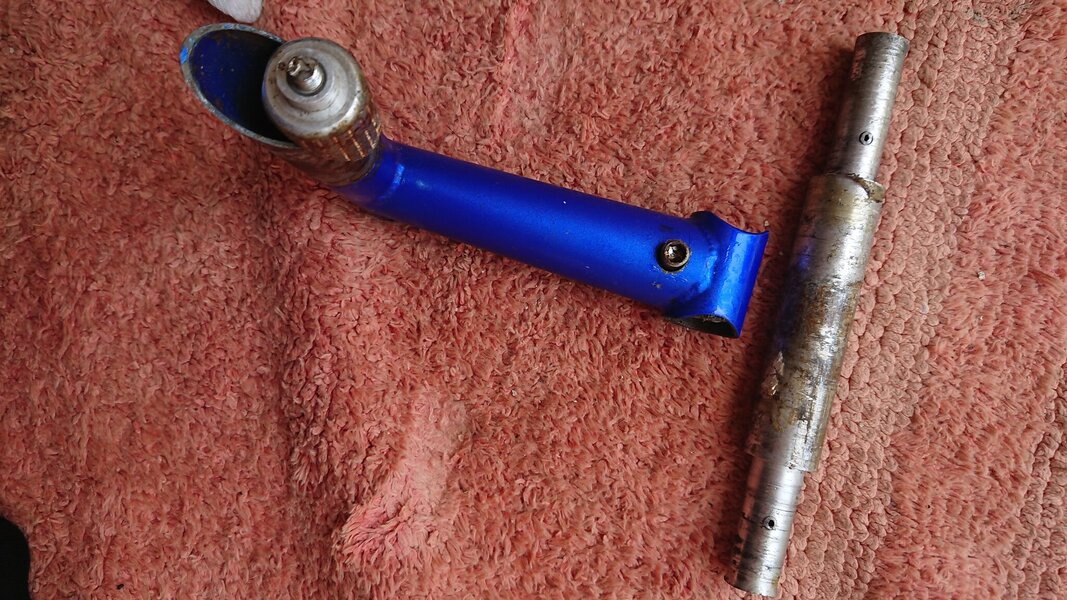
Stem success.JPG

Happiness :)

The answer to the aluminium wedge question was that there isn't one, the clamping mechanism looks like this:
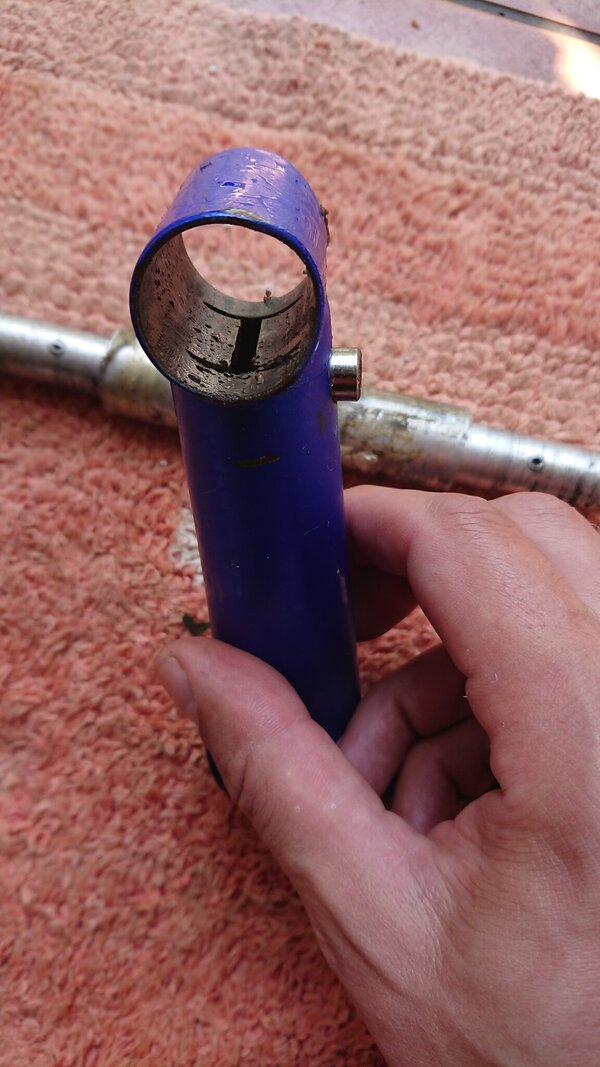
Stem clamp.JPG

I now gave the stem a bit of a clean up to remove the worst of the rust for the insertion section and check what information I could find:
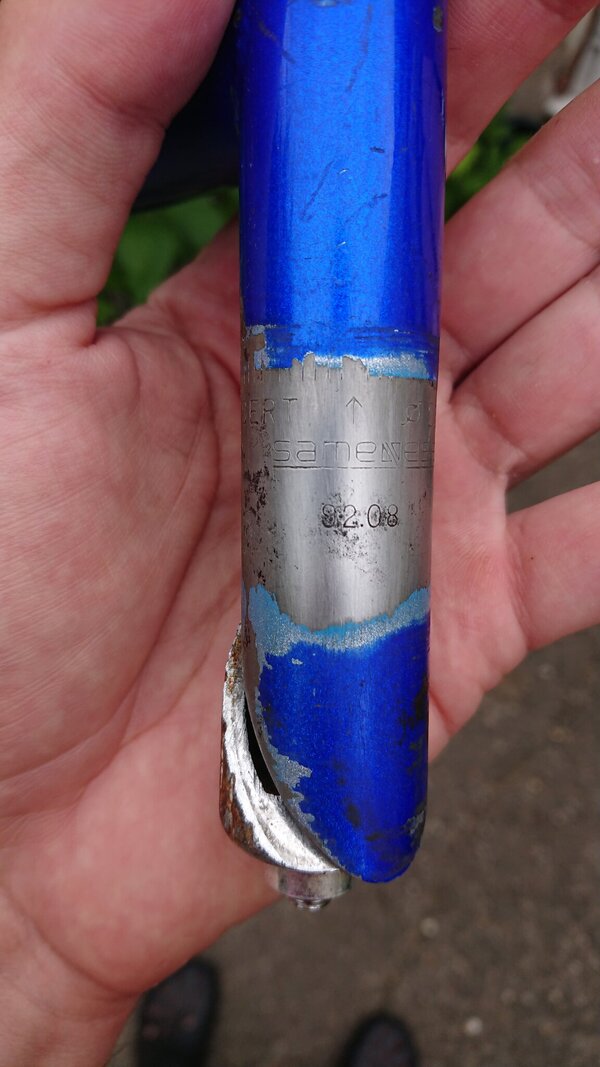
Stem date stamp.JPG

There was plenty of information stamped around it, such as a 'chromo' stamp, along with finding the maker is 'Sameness' (checks out as a company who made stems, bars and bar ends and later moved into exercise bikes) and a date stmp of 92.08, so assuming it was made August 1992 that fits in with the bike being a 1993 model.

Well, I didn't intend to write an entire post just about the stem, but there you have it. I'll still need to find or make something to use as a stem top cap, as the original one didn't come with it.
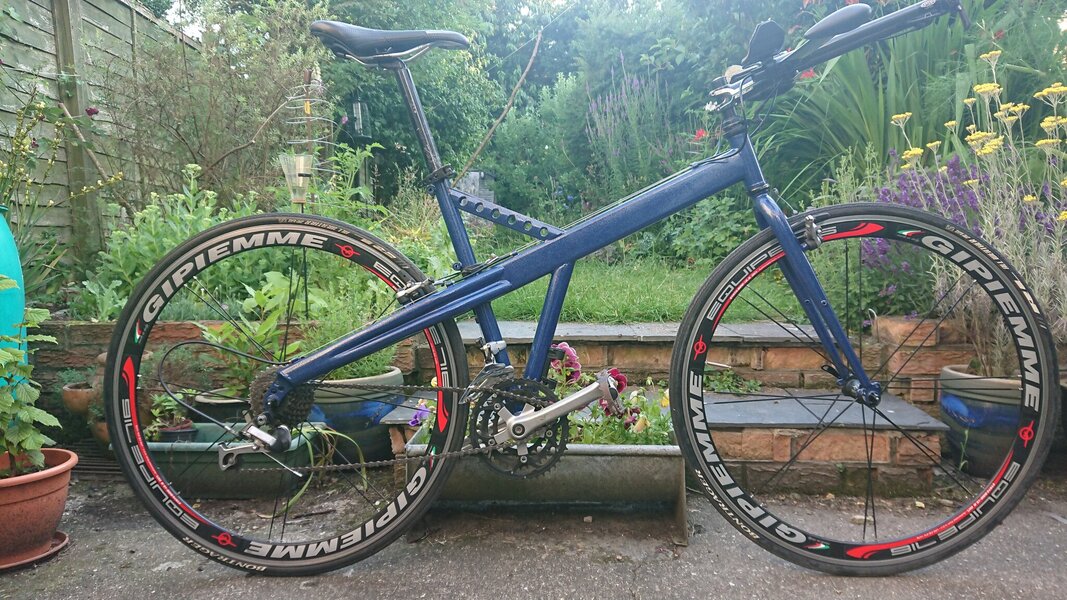
 
Good perseverance there. Interesting clamp design
 
Back
Top